Pages

Friday, 30 August 2013

Mushroom Chow Mein


Sometimes you need a meal that is quick to cook, makes a ton of food, and is cheap to make.

Who am I kidding?

Not sometimes.

Most of us need meals like this almost every week night!

Chow mein's a great way to stretch your food buck. It's wonderful refrigerator Velcro:  You can add whatever leftover meat you happen to have on hand, or you can make a perfectly satisfying meal without any meat at all.

Mushrooms chow mein is our favourite vegetarian version of the dish.  Mushrooms are rich in glutamates (big umami!) and have a satisfyingly meaty flavour and texture that will have even the most devoted meat eater in the house enjoying this meal.

To make mushroom chow mein, you'll need:


  • sunflower oil (or another neutral flavoured vegetable oil)
  • toasted sesame oil
  • 6 to 8 cups of sliced mushrooms (I used crimini)
  • 1/2 to 1 teaspoon poultry seasoning
  • granulated garlic, to taste
  • 1 pound fresh chow mein noodles
  • 2 eggs
  • 1-1/2 cups thinly sliced onion
  • 1-1/2 cups shredded cabbage
  • 1-1/2 cups mung bean sprouts
  • 1-1/2 cups grated carrot
  • 2 cups of vegetable stock
  • approximately 1/4 cup soy sauce
  • 1 heaping Tablespoon corn starch
  • salt and pepper to taste

Begin by putting a large pot of water for the noodles.

As soon as the water is on, begin cooking the mushrooms.  In a large pot, heat a mixture of about 2 Tablespoons of sunflower oil and 2 teaspoons of toasted sesame oil over medium-high heat.

When oil begins to ripple, add in the mushrooms.  Give them a good stir.  (They'll soak up the oil like a sponge and you want the flavour of the sesame oil distributed throughout.)

Sprinkle the poultry seasoning and a generous amount of granulated garlic over the mushrooms and give them another stir.  Continue cooking, stirring every few minutes. 

The mushrooms will give off a fair it of liquid.  Keep cooking and stirring until the liquid evaporates and the mushrooms begin to brown.

Once the mushrooms are browned, season them to taste with salt and pepper, transfer them to a heat proof bowl, and keep them warm in the oven.


When the water in the noodle pot comes to a boil, add a generous amount of salt (it should taste like the sea) and cook the chow mein noodles according to the package directions. 

(Chinese tradition favours using long noodles - a symbol of longevity - but I find the long noodles tend to clump together, making it hard to stir in the other ingredients without using an excess of oil. Before cooking the noodles, I run my knife through them, making three or four crosswise cuts and three or four lengthwise cuts, to shorten the noodles to a more manageable length.)

Drain the cooked noodles and rinse them with cold water.  Set them aside.


Beat the eggs and pour them into an oiled omelette pan or frying pan that has been pre-heated over medium heat.  Twirl the pan so that the eggs form a thin sheet over the bottom of the pan. 

When the eggs are set, slide them out of the pan onto a cutting board and use a thin knife or a pizza wheel to cut them into narrow strips.  Set them aside.


Add 2 more Tablespoons of sunflower oil and 2 teaspoons of toasted sesame oil to the pot in which you cooked the mushrooms, and heat it over high heat.

When the oil begins to ripple, add in the sliced onions and cook them until they begin to soften and become translucent.

Stir in the cabbage, carrots, and mung bean sprouts so that all the vegetables are well combined, and add in about a cup of stock.


Bring the stock to a boil, put a lid on the pot and steam the vegetables until they're tender-crisp.  Most of the stock will evaporate.

Stir in the noodles and egg.


Mix the remaining stock together with the soy sauce and cornstarch, stirring until the cornstarch is dissolved.

Stir the stock mixture through the noodles and cook over medium-high heat until the liquid boils and thickens and the noodles are heated through.

I serve mushroom chow mein family style, turning the noodle mixture out onto a large platter and then topping it with the cooked mushrooms. It yields four to six meal-sized servings.


Cook's notes:

Most of the time involved in making this dish is in the slicing of the vegetables.  If I'm planning to serve this as a weekday meal, I do the slicing the night before and then store it in covered dishes in the fridge until I'm ready to cook.

You can easily adapt this dish to accommodate whatever you have on hand.  Be bold and use whatever you think will taste good. Some of our favourite add-ins are:
  • shredded beef, chicken, or pork
  • cooked crab or shrimp
  • celery
  • bell pepper
  • scallions
  • snap peas sliced lengthwise into thin strips
  • toasted, slivered almonds
  • sesame seeds

Tuesday, 27 August 2013

Growing Sprouts at Home


I was growing some mung bean sprouts last week and thought this might be a good opportunity to share the process with you. 

It's worth learning how to grow sprouts. They're easy and inexpensive to grow and they're packed with nutrition and flavour.  They make a wonderful addition to your salad bowl and to sandwiches, especially during the winter months when greens can be expensive.

The process for growing all sprouts is basically the same, although soaking and germination times will vary depending upon what you are sprouting.  Realivzehealth.com shares a helpful infographic on sprouting times for common seeds.  You can find it here.

The first step in sprouting most seeds is soaking them.  I put two Tablespoons of mung beans in a mason jar, covered them with cool water, and then topped the jar with a square of tulle, held in place with a sealer jar ring. 

(If you don't have tulle, a couple of layers of cheesecloth will work too, but I prefer the finer texture of the tulle.  Tulle is more durable and is easily washed than cheesecloth.  I bought mine from the remnant bin at a local fabric store.  Sufficient fabric to cover more than a dozen jars cost me $2.16.)


I let the mung beans soak overnight, then drained them and rinsed them with fresh water, then drained them again.

I placed the jar on my counter, out of direct sunlight, and continued rinsing and draining them two or three times a day, for three days. 


Day One


Day Two


Day Three

Because the beans did get some light, they took on a little colour as they sprouted.  If you want colourless sprouts, place your jar in a dark cupboard where they still get good air circulation.

At the end of three days, some of the sprouts were beginning to form their first tiny leaves.  They were ready to use, but most still had their green husks clinging to them.

I transferred the sprouts to a large bowl and covered them with a quantity of cool water, stirring them around gently with my fingers to loosen the husks. 


The water loosened the husks from most of the sprouts.  Some floated to the top of the water and others sank the to the bottom.  It was a simple matter to use my fingertips to the free the last few husks that clung to the sprouts.

I was left with about 1-1/2 cups of cleaned sprouts.


I drained the water from the bowl through a sieve and composted the husks, then placed the cleaned sprouts in the sieve to ensure that I'd removed as much water as I could.

I used my sprouts right away, but if you're not going to be using your sprouts immediately you can store them in the refrigerator to halt the growing process.  They'll keep in a sealed container for three or four days.

Thursday, 22 August 2013

Blackberry Bliss Cupcakes

 
It's a bumper year for wild berries in our area.  We've been picking for a month now and there are still lots more on the vines. 
 
 
My fella loves to pick berries and takes a bucket out with him every day when he goes for his walk.  He always comes home with at least a quart or two.  Most of those berries get frozen on cookie sheets and then bagged for use during the winter months but some also get made into juice, jelly, blackberry curd, ice cream, and sorbet.  I try to come up with at least one or two new ways to use them each year.
 
These cupcakes are one of this year's recipes: A blackberry flavoured cupcake filled with blackberry curd and frosted with blackberry flavoured Swiss meringue buttercream.  They have a big berry taste through and through. 
 
To make Blackberry Bliss Cupcakes, you'll need:
 
  • 1-3/4 cups cake flour
  • 2 teaspoons baking powder
  • 1/4 teaspoon salt
  • 1/2 cup butter, softened
  • 1-1/3 cups sugar
  • 3/4 cup blackberry juice*
  • 4 egg whites
  • about a cup of blackberry curd
  • 1 recipe of Swiss meringue buttercream frosting flavoured with 1/3 cup blackberry jelly
 
Sift together the flour, baking powder, and salt.  Set aside.
 
 
Beat the butter until it's smooth, then add in the sugar and continue mixing until they're well combined.
 
 
Mix about 1/3 of the blackberry juice into the butter and sugar mixture.
 
Add half the flour mixture, stirring just until combined.
 
Stir in another third of the blackberry juice.
 
Add the second half of the flour mixture, stirring until it's incorporated, then mix in the last third of the blackberry juice to make a smooth batter.
 
 
Whip the egg whites until they form stiff peaks but are still moist.
 
 
Stir 1/3 of the egg whites into the cake batter to lighten it.
 
 
Add the remaining egg whites to the batter and fold them in just until no streaks of egg white remain.
 
 
Divide the batter between 12 cupcake liners.
 
 
Bake the cupcakes in a 350F oven for about 20 minutes, until they spring back when you press lightly on the top center. 
 
 
Allow the cupcakes to cool completely.
 
When the cupcakes are cooled use a small spoon to scoop a cone out of the middle of each cupcake (or use a knife to cut them, if you prefer).
 
Spoon in enough blackberry curd to fill the cavity in the cake about 3/4 full.
 
 
Cut the top quarter inch or so off the cone you scooped out of the cupcakes and place them on top of the curd to make a lid.
 
Frost the cupcakes with your blackberry flavoured Swiss meringue buttercream.
 
 
Store any uneaten cupcakes in the fridge, allowing them to return to room temperature before serving them.  They freeze well.
 
*Make your blackberry juice just as you would if preparing to make jelly.  Put a scant half inch of water in the bottom of a heavy pan and then fill the pan with washed berries.  Put a lid on the pan and cook the berries at low heat until they come to a boil.  Allow them to cool enough to handle, then strain them through a jelly cloth.  (I use a piece of old sheet material.)  Clarity is not a concern here so feel free to squeeze as much juice as you can from the berries.  Just take care to ensure that no seeds or pulp make their way into the juice.
 
**If blackberries are unavailable in your area, feel free to substitute an equal quantity of any other berry in their place. 
 
***Thank you to SweetArt Supplies for the lovely tulip cupcake liners.  Gwen has lots of wonderful baking, cake decorating and packaging supplies on her website.  Take a minute to check them out.  (This is not a paid endorsement.)  :^)

Tuesday, 20 August 2013

Re-Vision: Making or Re-Covering Potholders


Craft projects don't have to be elaborate or complicated to be worth doing.  Some things are worth making for exactly the opposite reasons:  because they are simple and useful. 
 
Like potholders. 
 
I've never bought one at a store.  At my house, potholders are made from old, worn towels and whatever scraps of cotton I have on hand (old clothing, fabric remnants, or thrift store finds). 
 
When the outside coverings on my potholders wear through, I don't throw them away. I re-cover them and continue using them until, finally, they get so thick they won't fit under the presser foot of my sewing machine.  Then I retire them to my craft room, where I use them while working with my soldering iron.
 
I noticed recently that some of my potholders were in need of recovering.  Since the process for re-covering a potholder is virtually the same as that for making one brand new, I thought I'd share it with you.  It's a simple enough project for novice seamsters and (for those of you with the holidays in mind) could make a useful, thoughtful gift.
 
Click on any of the photos in this post to be taken to a larger view.
 
These are the potholders I started with.  If you were making potholders from scratch, you'd cut a couple of pieces of old toweling - 7 or 8 inches square - to use instead. 


My friend Laurel gave me an old, homemade cushion cover in a cute vintage fabric.  I used part of it to make my pot holder covers this time, but any piece of pure cotton fabric will do.  I've used old shirts, old jeans, fabric remnants, thrift store pillowcases, etc. 

Don't use fabrics containing synthetic fibres for making or re-covering potholders.  They won't withstand the heat.
 
I took the cushion cover apart at the seams and was left with three pieces of fabric.


It looked like the smaller of the two rectangles would be sufficient to cover my potholders. I folded it in half and laid the potholders on the folded fabric just to be sure. 


I pressed the piece of fabric from the cushion cover, and folded it in half lengthwise, then laid the two potholders on the fabric, leaving some space between them.  I traced around the potholders with a quilting pen.

 
I removed the potholders from the fabric, corrected any wiggly lines in my tracing, and cut the hanging loops off the potholders, as close to the seam as possible. 


Being careful to leave a seam allowance, I cut the folded fabric between the traced outlines of the first and second potholders, and again above the traced outline for the second potholder. This left me with two squares for the covers, and a strip of fabric about two inches wide.  I used that narrow strip of fabric to make new hanging loops for the potholders.
 

First I folded the strip in half lengthwise and pressed along the fold.


Then I opened the folded fabric and folded each outside edge in to meet the crease left by the center fold.  I pressed along both new folds.

 
I folded the strip closed again, along the original fold line, to make a folded strip about 1/2 inch wide and 4 layers of fabric thick.

 
To secure the strip, I sewed along its entire length, close to the open edge.


I cut the single strip into two pieces for use as loops.  There are no rules about what size the hanging loops should be, but the strips seemed a little long to me.

 
To determine a better length, I laid one of the loops I'd cut off the potholders on top of one of the new strips, and then cut the new strip about an inch longer than the potholder loop. (I needed the extra length for sewing into the seam to secure the folded strip in place.)


I laid the untrimmed strip next to the trimmed one and cut it down to about the same length.


I folded both fabric strips in half and placed one inside the cut pieces of each new cover, at an angle from the top corner, with the raw edges of the strips extending above the seam line.


Once the loops were placed, I pinned all of the pieces in place. 

I sewed around the edges of each new cover, working just outside the traced line, and leaving most of one side unstitched (an opening into which I could insert the old potholder - or you could insert your pieces of towelling if making a new potholder). 

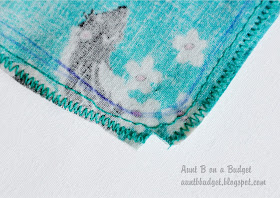
I zigzagged around each cover, just outside the seam line I'd sewn.  Then I trimmed the extra fabric away, taking care to leave the seam allowance untrimmed in the area I'd left unstitched for stuffing . 


I cut a small notch at each corner to help the seam lie flat once the cover was turned right side out.


Turned right side out, the cover looked like this:


I inserted a potholder into each of the new covers, tucked the seam allowances inside, and hand stitched each opening shut.


All that remained was to quilt the newly covered potholders so that the stuffing would not shift during use or laundering.


I stitched from corner to corner on each potholder, making an "X," then sewed a square about an inch and a half from the outside edge of the potholder.


And that's all there was to it:  My newly covered potholders were finished.  Kind of cute, don't you think?


Crafter's notes:
  • You don't need a fancy machine to do stuff like this.  Mine is very basic; sewing only forward, backward, and zigzag.  You do need to ensure, though, that you are using a sewing machine needle suitable for working with heavy fabrics.
  • If you're making the potholders from new, you may want to baste your layers of toweling together.  If they are sewn together, it will be easier to stuff them into the covers and arrange them so they lie flat.
  • I've also stuffed potholders with layers cut from worn flannelette sheets.  Just be sure to use lots of layers: at least six.
  • Old wool suiting or blankets make excellent potholder stuffing too.  Wash the wool fabric in very hot water and dry it on the hottest setting on your dryer.  It will shrink up and thicken, becoming it very durable.