Wednesday, 3 October 2012

Bread Making for Beginners


I've received several requests for a beginner’s bread tutorial.  I’m happy to oblige. 

This is the recipe from which I first learned to bake bread.  It’s simple, works for me every single time, and it’s easily amended if you want to add different flavours or textures.

To make basic white bread, you’ll need:


  • 2-1/4 cups lukewarm water
  • 2 Tablespoons sugar
  • 4-1/2 teaspoons (2 envelopes) active dry yeast
  • 1/2 cup vegetable oil
  • 6-1/2 cups white flour  (If you can get it, bread flour, which is higher in gluten than all purpose flour will yield better results.  It’s labeled in different ways but is usually described as either strong, hard, high gluten, or bread flour.)
  • 2 teaspoons salt

Begin by measuring your water into a large mixing bowl.  There’s lots of fuss made in bread recipes about temperature the water should be but, really, it’s very simple to gauge. It should be just slightly warmer than your body temperature.  If you’ve ever tested the temperature of a baby bottle, you already know exactly the right temperature for the water used in making bread.

Add the sugar to the water and stir it in until it’s dissolved.  You can use regular white sugar, brown sugar, molasses, maple syrup, or honey. 

Honey is more intensely sweet tasting than sugar so, if you’re using honey, your bread will be sweeter than if you use the other sweeteners listed here. 

Both molasses and honey are hydroscopic, meaning that they draw moisture from the air.  If you use either of these sweeteners in your bread it will stay fresh for a longer time under dry conditions.  By the same token, if the weather is humid, your bread will mold more quickly if you use honey or molasses in the dough.

Sprinkle the yeast over the top of the water.  This is surprisingly important.  Don’t just dump the packets or spoonfuls into the water.  If you do that, the yeast will clump up, causing it to dissolve less readily.


Let the yeast sit in the water for about 10 minutes, until it dissolves and foams up.  It’ll look like this:


When the yeast has dissolved, add in the oil.  

I most often use canola oil when baking bread because it’s made here in Canada.  Canola oil has a neutral flavour and it’s inexpensive, but you can use whatever oil you prefer.  You can also use butter that has been melted and cooled. 

Extra virgin olive oil will give the bread a slightly acidic flavour.  Butter will give it added richness.

Add in the flour. 

This recipe calls for white flour but, after you’ve baked your first successful loaves, you’ll probably want to experiment.  You can substitute whole wheat flour for up to half the white flour called for in this recipe.  You can also substitute rye flour, oatmeal, or multigrain cereal (Red River or Sunny Boy are good) for up to one third of the white flour.

Pour the salt in on top of the flour.  Salt kills yeast so, by cushioning it with the flour, you help to prevent it from inhibiting the rise of your dough.  

Never omit the salt.  Unsalted bread has an oddly metallic aftertaste.


Stir the mixture together with a wooden spoon until it forms a stiff dough and can’t be easily mixed any further. 


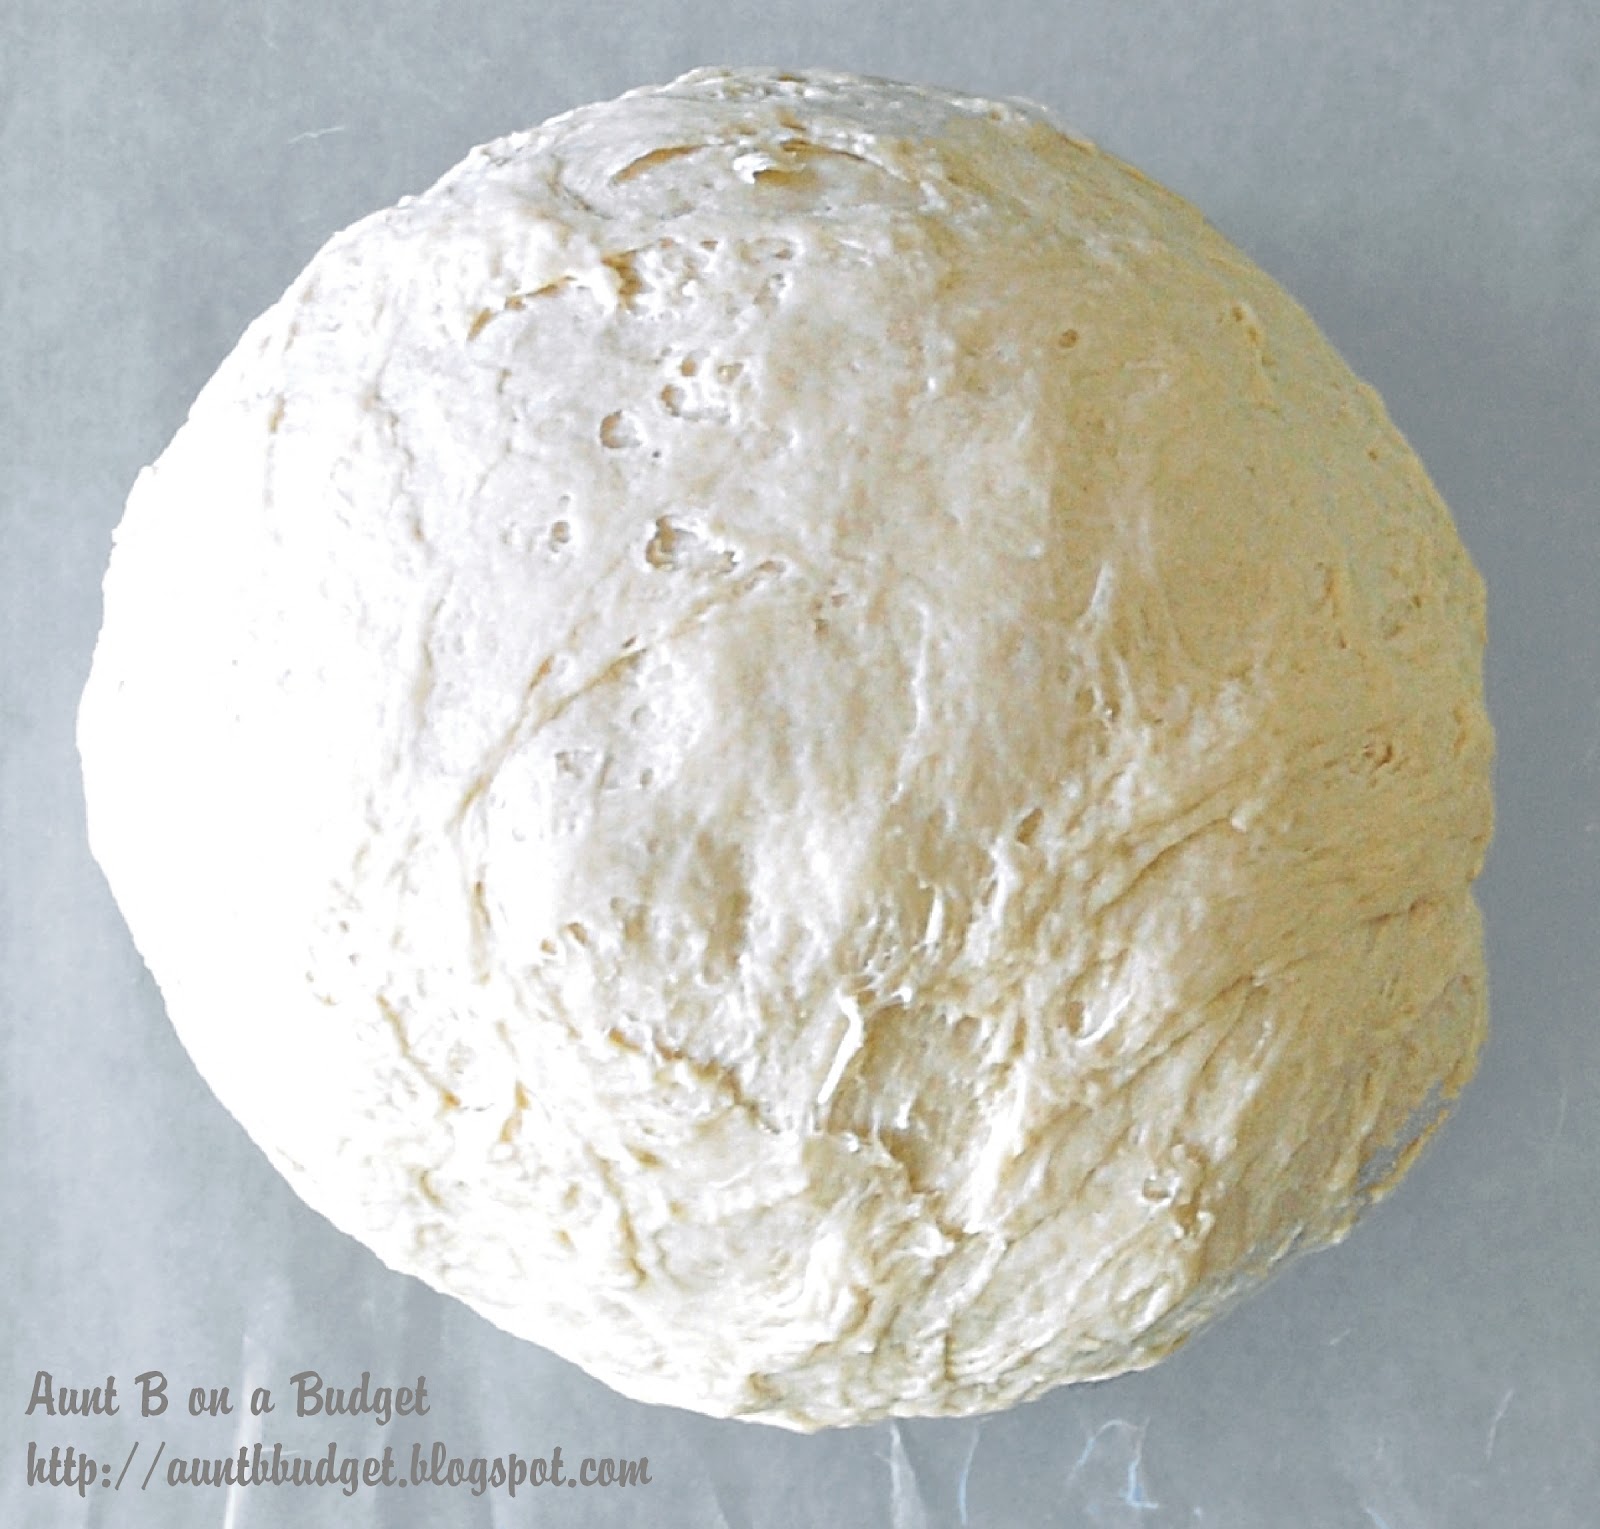
Knead the dough in the bowl until it holds together and picks up most of the dry bits of flour remaining in the bowl.


Turn the bread dough out onto the counter and continue kneading it, turning it a quarter turn and re-forming it into a ball every couple of minutes.  Continue kneading the dough for about 10 minutes.  It will become very elastic.  When you poke it lightly with your finger, it should spring back into shape.


(If you’re mixing your bread in a stand mixer, use the dough hook.  Add the ingredients in the order listed, and mix the dough for 5 to 10 minutes.  Test for consistency the same way you would if hand mixing.)

Once the dough has been kneaded, wash out the mixing bowl and then coat the inside of the bowl with a light film of oil. 

Put the dough into the bowl and turn it so that all sides of the dough have been coated with oil.


Cover the dough loosely with a piece of waxed paper or a moist tea towel and allow it to rest in a warm place for about an hour and a half. 


It should double in size.


Once the bread dough has risen, punch it to release some of the air.


Knead the dough a few times and then form it into loaves.  

This recipe makes a fairly sturdy dough so you can either form the dough into oblongs for loaf pans or form it into rounds and bake it on a cookie sheet.   

Oil or butter your loaf pans before you put the bread into them.  If you're using a cookie sheet, line the sheet with parchment paper.

Don’t worry if the loaves are not perfect:  The bread police will not come to get you, and I'm quite sure that the folks eating it will be so happy to get home baked bread that they won’t care what shape it is.


Let your bread rise a second time.  This will happen more quickly than the first rise.  My loaves doubled in size in about 45 minutes.


When the loaves have almost doubled in size, preheat your oven to 375F.  Most ovens heat to a higher temperature than you set them for, so be sure to wait a for few minutes after your oven preheats before beginning to bake your bread.

Place your loaves on the middle rack of your oven and set your timer for 20 minutes. 

When the timer goes off, rotate your bread in the oven, switching the sides of the oven the loaves are on and turning them front to back.  Reset the timer for 18 minutes.

In my oven, this bread is usually completely baked by the end of that second baking interval but ovens do vary.  To test your bread for done-ness, turn it out of the pan and tap on the bottom of the loaf.  It should sound hollow.  If not, put it back in the pans and return it to the oven to bake for a little longer.

Turn your baked bread out onto wire racks to cool. 

If you like a soft crust on your bread, brush the tops of the loaves with melted butter while they’re still very hot.  The butter will soak in, softening the crust and adding great flavour. 

If you prefer a crispy crust, just leave the bread as it is.


Once the bread has baked, allow it to cool completely before slicing it.  (If you can!  My husband always cuts into the bread while it’s still warm because he can’t resist the aroma.  It squishes in on itself when you slice it warm, so it’s best to let it reach room temperature before you cut into it.)


Your cooled bread should be stored in a bread box, an airtight wrapper, or – if you’re not going to use it right away – in the freezer.

See?  You did it!  And it really wasn’t difficult at all! 

Now, serve yourself a slice with some butter and jam, and enjoy.

Cook's notes:

  • You can add about a cup of additional ingredients to your bread dough.  Cheese, nuts, seeds, or dried fruit will all work very well in this recipe.  
  • If you're adding herbs or spices, measure them into the dough along with the salt.  Two teaspoons of dried herbs or cracked black pepper are a good place to begin with savoury seasonings.  Try about 1-1/2 teaspoons of cinnamon or other spices.
____________________________________________
This post has been linked to Gallery of Favorites hosted by Premeditated Leftovers and The 21st Century Housewife, the Pity Party hosted by 30 Handmade Days, to Foodie Friday hosted by Rattlebridge Farm, to Foodie Friends Friday hosted by Tracy at Busy Vegetarian Mom, Robyn's View, Marlys at This and That, Lois at  Walking on Sunshine, Lindsey at Family Food Finds, Cindy at Cindys Recipes and Writings, Michelle at  From Calculus to Cupcakes, Cynthia at Feeding Big, Jodie at Binomial Baker, R Dawn at Spatulas on Parade, Angie at A lil Country Sugar, Erika at Chef Picky Kid, Amber at Mamas Blissful Bites, to Strut Your Stuff Saturday hosted by Six Sisters' Stuff, to Nifty Thrifty Sunday hosted by Nifty Thrifty Things, to Weekend Potluck hosted by Sunflower Supper Club, to Think Pink Sunday hosted by Flamingo Toes, to Scrumptious Sunday hosted by Addicted to Recipes, to Craft-O-Maniac Monday hosted by Craft-O-Maniac, to Busy Monday hosted by A Pinch of Joy, to Manic Monday on Bobbi's Cozy Kitchen, to Mix it Up Monday hosted by Flour Me With Love, to Delicious Dish Tuesday hosted by Mama Chocolate, Full Time Mama, and Coping with Frugality, the Tuesday To Do party hosted by The Blackberry Vine, to Tip Me Tuesday hosted by Tip Junkie, to Whatcha' Whipped Up Wednesday hosted by DJ's Sugar Shack, to Cast Party Wednesday hosted by Lady Behind the Curtain, to Look What I Made hosted by Creations by Kara, to Wonderful Wednesday hosted by Printabelle, to Thursday's Treasures hosted by Recipes for My Boys, to Tastetastic Thursday hosted by A Little Nosh, to Full Plate Thursday hosted by Miz Helen's Country Cottage and to Tutorials, Tips and Tidbits hosted by StoneGable Blog.


Gallery of Favorites   Thirty Handmade Days

  Foodie Friends Friday

SixSistersStuff.com  


Addicted to Recipes Button, Page button  

apinchofjoy.com   Mixitup

Full Time Mama   Tuesday To Do Party


Cast Party Wednesday   Creations by Kara

  A LIttle Nosh

Miz Helen’s Country Cottage  

Monday, 17 September 2012

What We Ate, September 10 - 16


It’s been an odd week at our house:  Our heads and hearts are telling us it’s autumn, but the weather disagrees.  Although our mornings and evenings are cool, are mid-days have been quite warm.  So, although we’re craving fall flavours, we are spending less time in the kitchen than we might.

We did manage a couple of fall treats: I made gingerbread for the first time this season (That’s a flavour and aroma that just shouts autumn :) and I made a quick but tasty pork stew from a jar of cubed pork that didn’t seal when I took it out of the canner.  We enjoyed them both.

I lucked out at the grocery store this week and found, on manager’s special, a package of twelve large garlic and maple pork sausages for just $6.33.  We’ll get a total of six meals out of that package of sausages, providing the meat portion of those meals for just over $1.05 per meal.  I’m chuffed about that!

The most exciting food news of the week, though, was the arrival of a package in the mail.  Janet O’Melia, one of my Facebook friends, was concerned that I had never had grits so she kindly mailed me some, all the way from Georgia.  The package took such a long time to make its way across the continent that we’d both more or less decided that it was lost.  You can imagine my excitement when it did arrive.

I had grits for the very first time on Saturday morning, with cheese mixed in and a poached egg on top.  They were delicious! 

I’ll be writing a post about my first experience with grits very soon.  In the meantime, here’s what we ate this week:

Monday, September 10:
Breakfast – Leftover peach spice muffins, yogurt, pear butter
Supper – Vegetable curry, basmati rice, mango lassis

Tuesday, September 11:
Breakfast – Soft boiled eggs, whole wheat toast, applesauce
Supper – Pork stew, warm gingerbread with lemon sauce

Wednesday, September 12:
Breakfast – Oatmeal and applesauce
Supper – Healthy nachos made with oven baked tortilla chips, vegetarian black bean chili, tomatoes, green onions, black olives, and shredded Monterey Jack cheese.  I served it with guacamole, pico de gallo (fresh salsa), and yogurt (instead of sour cream) for dipping.  Fresh blackberries and vanilla frozen yogurt for dessert.

Thursday, September 13:
Breakfast – Yogurt, applesauce, prunes
Supper – Garlic and maple pork sausages, mashed carrot and rutabaga, boiled potatoes, with gingerbread and pear parfaits for dessert.

Friday, September 14:
Breakfast – Homemade granola, fresh peaches
Supper – Rotisserie chicken, carrot and celery sticks,zata’ar spiced beet dip, applesauce cookies

Saturday, September 15:
Breakfast – Cheese grits and poached eggs
Supper – Soup made with homemade stock, garlic and maple sausage, yellow lentils, and leftover mashed carrots and rutabaga, cornmeal muffins, applesauce cookies

Sunday, September 16:
Breakfast – Boiled eggs and croissants
Supper – Pinto beans and rice, copper penny (carrot) salad, canned peaches

Friday, 14 September 2012

We've Got The Beets


I love going to farm markets at this time of year!  Such abundance!  The last of the late summer fruits and vegetables are there, together with the staple foods we associate with autumn. 

One of my favourites among the fall foods are bunch beets.  At this time of the year, they’re at their best, grown right on the farm, and harvested the same day I buy them.  They’re beautiful to look at -   their deep red roots, stalks, and leaf veins a perfect counterpoint to the dark glossy green of their leaves – and every bit of them is not only edible, but tasty too.

When I buy bunch beets, I prepare them for the fridge as soon as I get home.  (Doing so helps to preserve the nutrients in the greens.) 

I start preparing bunch beets by cutting off the greens, leaving an inch or so of stem at the top of each beet root. I put the greens and their stems in a sink full of cool water to soak.  There can be quite a bit of dirt clinging to bunch beet leaves, so I soak and rinse them two or three times before draining them in a colander.  Once the greens have drained, I trim the stems of just below the leaves and package the leaves and stems separately for the fridge.  I put them in cotton drawstring bags and store them in my vegetable crisper.  (If you don’t have cotton drawstring bags, clean cotton tea towels will work just as well.)

Once the greens have been packaged and stored in the fridge, the roots get a bath of their own.  Again, I place them in a sink full of cool water and let them sit for a bit.  Once they’ve soaked for a few minutes, I give them a gentle scrub with a vegetable brush.  I blot them dry with a clean tea towel (don’t do this with your best towels – the beet juice will stain them), put them in a cotton drawstring bag, and store them in the fridge too. 

Beets bring a lot of nutrition to the table.  They are a source of folate, manganese, fiber, potassium, vitamin C, tryptophan, magnesium, iron, phosphorous, and copper, and all or that nutrition comes in 58 calories per cup!

Beets are a unique source of phytonutrients called betalains. Betanin and vulgaxanthin are the two best-studied betalains from beets, and both have been shown to provide antioxidant, anti-inflammatory, and detoxification support. [1]

In recent lab studies on human tumor cells, betanin pigments from beets have been shown to lessen tumor cell growth through a number of mechanisms, including inhibition of pro-inflammatory enzymes (specifically, cyclooxygenase enzymes).  The tumor cell types tested in these studies include tumor cells from colon, stomach, nerve, lung, breast, prostate and testicular tissue.  While lab studies by themselves are not proof of beets' anti-cancer benefits, the results of these studies are encouraging researchers to look more closely than ever at the value of betanins and other betalains in beets for both prevention and treatment of certain cancer types. [2]

Although you can see these betalain pigments in other foods (like the stems of chard or rhubarb), the concentration of betalains in the peel and flesh of beets gives you an unexpectedly great opportunity for these health benefits. [3]

There are many, many ways to cook with beets.  The leaves can be used in any recipe that calls for kale or chard, or even spinach.  The stems can be chopped and added to stir fry or used to add both flavour and colour to stocks.  The roots can be boiled, baked, or pickled, and incorporated into countless recipes.

Besides being an excellent source of nutrition, beets are a good choice for my household because locally grown beets are available here almost year-round.  (We do only get the lovely greens of bunch beets from mid-summer to mid-fall, but beetroots store well and are almost always available at our local farm markets.)  Buying locally makes good sense to us because locally grown produce is often more affordable, its purchase supports our local economy, and – because it does not have to be transported for great distances – its carbon footprint is much smaller.

Because they can be grown in a wide range of temperatures, beets take a part in many different cuisines.  They are an important ingredient in many European and Russian dishes and - perhaps brought with immigrants to the area - are now an important ingredient in many Middle Eastern dishes.   Beets are also used to add flavour, colour, and moisture to baked goods.  They pair very well with chocolate.

We don’t eat as many of beets here as are eaten in Europe, but that’s changing.  They are growing in popularity in North America.  A little on line research will yield you a wealth of recipes for this affordable, healthful ingredient.  

Even if you’ve had beets before and didn’t love them, do look up a recipe or two and give them a second try.  You’ll be surprised by how versatile this familiar, old fashioned ingredient can be.

Monday, 10 September 2012

What We Ate, August 27 - September 9


I haven’t been blogging much lately.  I got to feeling that I was spending so much time writing about what I do that it was taking away from the time I needed for actually doing the things I do, so I’ve been taking a break.  It’s been good too:  I’ve been working my way through my “to do” list, spending more date time with my husband, and finding  more time for crafts, sewing and recreational photography.  I’d been missing all those things.  I’m a happier human when I find time for them.

Less blogging means fewer “What We Ate” posts, so I now have two weeks’ worth of menus waiting to be shared.  That makes for a long post.  Hope you’ll bear with me.

We love this time of year at our house.  The pantry is nearly full and we’re enjoying the best of both late summer and early fall produce.  Lots of good food around! 

Despite the variety available to us, in reviewing our menu I see some recurring themes.  We’ve been eating a lot of cheddar cheese lately, because it’s been more affordable than usual, and a fair number of pork products, which also seem to go on sale at this time of year. 

Do you do that to? 

Find a bargain in the store and then find yourself eating it over and over again because it’s accessible to you? 

Good thing that cheese and pork are both versatile ingredients!  At least we can use them in several different ways so our menu doesn't end up feeling too repetitive.

Here’s what we ate:

Monday, August 27:
Breakfast – Granola and homemade yogurt
Supper – Cheddar and cauliflower soup, wheat and white biscuits, pepper jam, plum crisp

Tuesday, August 28:
Breakfast – Applesauce, homemade yogurt, whole wheat toast
Supper – Chicken, sausage, and applesauce pie (which was disappointing but I’ll keep working on it until I get it right), a salad of red leaf lettuce, shredded carrot, and tomatoes, with homemade ranch dressing, pears canned in brown sugar syrup with ginger

Wednesday, August 29:
Breakfast – Homemade granola bars, apples
Supper – Vegetarian black bean chili served over brown rice and topped with grated cheddar, homemade cinnamon, brown sugar, and peach ice cream for dessert

Thursday, August 30:
Breakfast – Boiled eggs and multigrain toast
Supper – Dinner out

Friday, August 31:
Breakfast – Oatmeal and stewed rhubarb
Supper – Pork steaks, baked potatoes, carrot, raisin andapples slaw, baked chocolate and caramel wontons

Saturday, September 1:
Breakfast – Apple and cheddar muffins, oranges
Supper – We had a big lunch so we skipped supper.  Just tea and fresh fruit for both of us.

Sunday, September 2:
Breakfast – Leftover muffins, apple sauce
Supper – Stir fry made with leftover pork steak, cabbage, carrots, and onions in a ginger garlic sauce, garnished with crumbled nori and served over soba noodles.  Peaches macerated in lemon juice and a little brown sugar for dessert.

Monday, September 3:
Breakfast – Oatmeal with raisins, apples, brown sugar, and cinnamon, homemade yogurt
Supper – Hummus, homemade flat bread (made with plain focaccia dough), sliced raw vegetables, feta tzatziki. Fresh plums for dessert

Tuesday, September 4:
Breakfast – Peach and plum crisp, homemade yogurt
Supper – Baked chicken legs, brown rice and cabbage salad, sliced tomatoes, chocolate pudding

Wednesday, September 5:
Breakfast – Scrambled eggs, whole wheat toast, banana
Supper – Chicken, vegetable, and barley soup, herb dumplings, apple slices and cheddar

Thursday, September 6:
Breakfast – Stewed rhubarb, homemade yogurt
Supper – Bean burritos made with home canned pinto beans, wheat and white tortillas, shredded cheddar, brown rice, fresh salsa, salad of spinach, baby beet greens, red onion, grated beets, julienned radish, and homemade ranch dressing, snickerdoodles for dessert

Friday, September 7:
Breakfast – Johnny cake and applesauce
Supper – I’d planned fried egg sandwiches and veggie hash for supper but came home to find that hubs had heated up the leftover soup from Wednesday and made cheese toast.  We had baked apples with an oatmeal and maple cookie crust for dessert.

Saturday, September 8:
Breakfast – Peach spice muffins and cream cheese
Supper – Ham, twice stuffed sweet potatoes from Love Bites With Lesa on Facebook, steamed spinach, broiled orange halves topped with homemade yogurt for dessert.

Sunday, September 9:
Breakfast – Oatmeal and pear butter
Supper – Eggs benny variation made with wheat and white biscuits, leftover ham, grilled tomatoes, baked eggs and cheddar sauce, steamed green beans.  We walked to Dairy Queen for ice cream cones for dessert.


Friday, 7 September 2012

Stock Making Basics


Waste bites.  

Literally.  

Food waste can take a huge chunk out of your budget!  

It's one of my pet peeves, and I work hard to keep kitchen waste at our house to a bare minimum.

Stock is an important tool in my waste reduction arsenal.  Even the smallest leftover can be used to make stock, along with all sorts of things that most people just fling into the bin without any thought at all.  

Making stock is an on-going project at my house.  There's almost always a stock pot simmering away on the back burner of the stove.  

I can't imagine what I'd do without a good supply of stock on hand.  It adds both nutrients and depth of flavour to an astonishing array of dishes.

The trick to making a really good, flavourful stock is to layer in many different flavours without watering them down.  I do this by starting my stock with a few ingredients, cooling it, straining it, refrigerating it, and then repeating the process the following day...and the day after that...and the day after that.  I’ll often cook a single batch of stock five or six times—with new ingredients added in each time—before I consider it finished.  

That sounds like a big investment of time, doesn't it?  

I guess it is in a way, but stock sits on the back of the stove, simmering away on low heat, requiring little attention from me.  It's not like I have to watch it every minute it's cooking.

I often begin my stock with water that I've used to cook some other ingredient.  Water that's been used for cooking vegetables, simmering sausages, cooking ham, or even heating hot dogs already has some flavour to bring to the party.  

I most often use a six-quart pan to make my stock.  I pack it quite full of vegetables, vegetable trimmings, and meat bones or chicken carcasses (if I have them), and add just enough liquid to barely cover the contents of the pan.  

I bring the stock to a boil and then reduce it to a simmer.  I let it simmer for as long as my schedule allows, then strain it, cool it, and refrigerate it, ready for new additions the following day.

Here are some things you can use to flavour your stock:

Wash your vegetables well before you peel them then save the peelings for the stock pot.  Be sure to trim away any parts that may hold soil, like the roots on your onions, and to discard anything that has any trace of mold, mildew, or decay.


If you have a recipe that calls for you to seed or peel your tomatoes, use the seeds and peels in your stock.  They have lots of flavour.


The outside leaves of cauliflower, and the stems and leaves of broccoli have wonderful flavour.  They also bring lots of nutrition to the party.


The trimmings from a head of lettuce—those leaves not pretty enough for the salad bowl—bring flavour and nutrients to a stock.


Use the stems!  Add the stems from beets, chard, and parsley to your stock pot.

Celery leaves are not discarded at our house.  We use them in salad or add them to our stock.


Pan drippings from cooking meat add a wonderful depth to any stock.  Drain the drippings, cool them, and then remove the fat that has risen to the top of the container before adding them to the pot.

The bones, skin, and trimmings from any poultry or meat that you're preparing can be added to your stock pot.  

Leftover cooked vegetables and meat can be added too.

When your stock has finished cooking for the day, cool it to room temperature as quickly as possible before putting it in the fridge.  

Many people cool their stock by setting the pot into an ice water bath, and replacing the cold water as needed until the stock has cooled to room temperatures, but some authorities are now advising against this practice.  The current recommendation is that you pour your stock into a wide, shallow container to cool, and that you set the container on top of an inverted pot.  The metal in the pot will help to disburse the heat more quickly.

I strain my stock out into a really big stainless steel bowl and then set the bowl on top of an inverted cooking pot.  It cools quite rapidly.


Once it's cooled, some people strain their stock a second time, either through cheesecloth or through a coffee filter, to obtain a clearer broth.  I don't mind that my stock is not perfectly clear, so I don't bother to filter it.

If you're planning to add more to ingredients to your stock the following day, or to use it up fairly quickly, this is the time store it in the refrigerator.

If you have a quantity of stock you wish to store away for future use, you can either freeze it or can it.  

I freeze my stock in 6-ounce portions, in silicone muffin cups.  The frozen stock pops easily out the muffin pan, like ice cubes, and can be stored in freezer bags until I need it.


I also can some of my stock, in pint jars.  Stock in a jar is handy to have on hand when I need some stock quickly but don't have any in the fridge.  


To can stock, I chill the stock and skim off any fat from its surface.  Then I heat the stock to boiling and pour it into sterilized jars leaving about an inch of headroom.  I process the jars at 11 pounds pressure for 30 minutes.

Please note that while I am an enthusiastic home canner, I'm not an authority on the subject.  If you're canning stock (or anything else), purchase a reputable canning guide book (Putting Food By and the Ball Complete Book of Home Preserving are both very good).  Review their instructions on safe canning practices and follow them to the letter.  Canning is no place for approximation or improvisation.  Food safety is a science and safe practice is, quite literally, a matter of life and death.

So...Is making stock a lot of work?  

Yes and no. 

It’s more work than buying it in the grocery store, but it’s certainly not an arduous process. 

Is it worth it?  

Absolutely!

Give it a try and save some bucks.  You can thank me later.  
____________________________________________

This post is linked to Hearth and Soul Blog Hop hosted by Premeditated Leftovers, The 21st Century Housewife, Penniless Parenting, Zesty South Indian Kitchen, Savoring Today, and Elsa Cooks, to Gallery of Favorites hosted by The 21st Century Housewife and Premeditated Leftovers, to The Pity Party hosted by Thirty Handmade Days,


Hearth & Soul Hop   Gallery of Favorites

Thirty Handmade Days