Friday 24 December 2021

Ice Cream Sandwiches For The Holidays


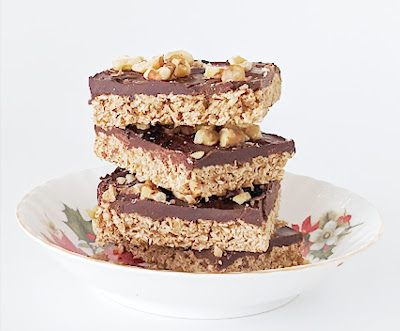
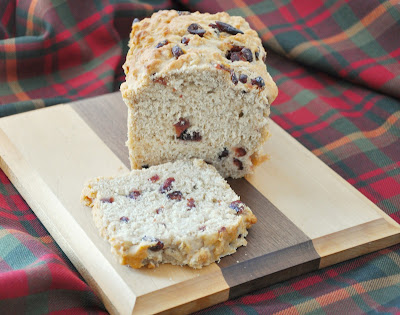
Ice cream?  At this time of year?  Heck, yes!  Every season is ice cream season at my house and from the very first time I saw
this recipe from April J. Harris, I knew I wanted to use them to make ice cream sandwiches.  They're so festive looking, and they taste great too.

I wanted to ensure that the ice cream sandwiches could mostly be prepared ahead of time and the cookies and ice cream were in rounds of similar diameter. The solution I came up with is simple, effective, and doesn't require the purchase of extra kitchen gear.

For every four ice cream sandwiches you plan to make, you'll need on 398 ml/14 ounce tin can. It's the size of tin most commercially canned cranberry sauce comes in, and many other canned fruits and vegetables too. Decide on how many servings you're going to need, then save your tins over time. Unless you have a cookie or biscuit cutter of the same diameter as the tins, you'll have to save an extra tin for cutting out your cookies.  You'll also need some kitchen parchment.

The ice cream should be the first thing you make because it can be kept in the freezer for several days before you plan to serve your ice cream sandwiches.  You'll be using the tin cans as ice cream molds so you should prepare them before beginning to make your ice cream.

Use a pencil to trace around the top of one of your tins onto a piece of parchment.  You'll need to make two circles for each tin you plan to use. Cut the circles out, cutting just inside the traced line so there's no graphite on the cut pieces.  

Cut a piece of parchment greater than the height of each tin. You'll use the full width of the parchment piece in each mold. Working one tin at a time, begin by rolling up this piece of parchment from one of its side edge,s into a tube smaller than the diameter of your tin.  Place the tube inside the tin, let go, and allow it to widen to conform to the sides of the tin.  

Place a parchment circle in the bottom of each tin.  I used the handle of a wooden spoon to gently push the circles into place at the bottom of the mold.

Now you're ready to make your frozen custard.  You'll need:

  • 5 large egg yolks
  • 2/3 cup sugar
  • 1 pinch salt
  • 1 cup whole milk
  • 2 cups heavy cream
  • 2-1/2 teaspoons vanilla extract

Whisk the egg yolks, sugar, and salt together until the mixture lightens to a pale yellow and becomes fluffy.

Stir the milk and cream together in the top of a double boiler and cook it over simmering water, stirring occassionally,  until little bubbles begin to appear on the surface.

Whisk one ladleful of the heated milk/cream mixture into the egg mixture until the two are thoroughly incorporated.  Add another ladelful of the milk/cream mixture and whisk it in. Continue ladling and whisking until all of the milk/cream mixture is combined with the egg mixture. Whisk in the vanilla extract.

Pour the custard through a seive into a pitcher, let it cool to room temperature, then put it in the firdge for a few hours or overnight.

Pour the chilled custard into your ice cream maker and process it according to the manufacturers instructions until it reaches the thickness of soft ice cream.

Spoon the ice cream into the prepared molds, filling them almost to the level of the top edge of the tin and then place a parchment circle on top, pressing it gently into place so that it helps level the top of the ice cream and there are no air bubbles between the ice cream and the parchment. One batch of ice cream should fill two tins with maybe a little bit left over.

Put the tins in the freezer and leave them there until you're ready to assemble your ice cream sandwiches.

Next, bake the cookies.  Here's a link to the recipe: https://apriljharris.com/cherry-christmas-cookies-an-old-fashioned-recipe/

Prepare the cookie dough following April's instructions right up to the point where she rolls the dough into cylinders prior to chilling them.  Instead of making cylinders, divide the dough in half and place one half onto a sheet of waxed paper.  Cover it with a second sheet of waxed paper and roll it out to about a 1/8 inch thickness. 

Use the waxed paper to transfer the rolled dough onto a baking sheet and then repeat the process with the other half of the dough. Put it in the freezer to chill.

When the dough is very cold bring out one rolled sheet and place it on your work surface.  Remove the top sheet of waxed paper.

Using your extra tin can, or a cookie or biscuit cutter the same diameter as the tins you're using for ice cream molds, cut out your cookies. You'll need two cookies for each ice cream sandwich plus a few extras in case of breakage. Gently remove the extra dough from between the cut cookies and use a paring knife to trim any edges where the cutter hasn't cut all the way through a cherry. 

Line a baking sheet with parchment.  Lift the cut out cookies, still on their sheet of waxed paper, over to the parchment lined baking sheet and quickly flip the waxed paper over so that the cookies are on the parchment.  Peel away the waxed paper and then move the cookies so they're evenly spaced on the parchment lined baking sheet.

Bake the cookies at 350F for about 10 minutes, just until they start to take on a tiny bit of colour along the bottom edge. Remove the baking pan from the oven to a wire rack and cool the cookies to room temperature.

Repeat this process with the other half of the cookie dough. 

Once at room temperature the cookies can be stored in an airtight container, or frozen, until you need them.

To assemble the ice cream sandwiches:

Working with one mold at a time, take the tin out of the freezer and dip the bottom of the can in a bowl of hot water for a few seconds to loosen the ice cream from the bottom of the tin.  Use the ends of the parchment sticking out from the top of the tin to pull the wrapped ice cream out of the tin.

Place the wrapped ice cream on a cutting board. Place 4 cookies bottom-side up on your work surface. Unwrap the ice cream and cut it into four rounds of approximately equal thickness and use a spatula to transfer one cut round of ice cream to each of the cookies you place on your work surface.  Top each sandwich with another cookie, facing right side up.

You can serve your ice cream sandwiches at this point or you can do this assembly a few hours before you serve your meal. If prepping ahead, arrange the sandwiches on a platter, cover them, and put the platter in the freezer until you're ready to serve dessert.


Thursday 23 December 2021

Sesame Crackers


I made crackers last night. I know there are a great many commercially made crackers but, still, they're a regular part of my baking routine. Homemade crackers are delicious, inexpensive, and really easy to make.  You can add whatever you want to the dough and come up with your own unique flavours.

This recipe is an adaptation of the white cracker recipe in Marion Cunningham's "Fanny Farmer Baking Book."  The recipe's a blank canvas and over the years I've added all sorts of different seeds, nuts, and seasoning to them.  I chose sesame seeds this time because they provide a nice, slightly nutty flavour that's neutral enough to go with the meats and cheeses or with jams or fruit.

To make Sesame Crackers you'll need:
  • 1/2 cup raw sesame seeds
  • 2 cups of flour
  • 1 Tablespoon sugar
  • 1/2 teaspoons salt
  • 2 Tablespoons butter
  • 2/3 cup milk (plus a very small amount extra if needed)
  • 2 teaspoons flaked or coarse salt
Begin by toasting the sesame seeds. Pour them into a dry frying pan and cook them over medium heat, stirring constantly until they darken a bit and take on a golden colour.  You'll be able to smell their toastiness too. Sesame seeds are easy to overcook while toasting so pay careful attention and remove the pan from the heat as soon as they warm and deepen in colour.

Stir the flour, sugar, and salt together.

Cut the butter into small pieces, add it to the flour mixture, then use your fingers to rub it into the flour until it breaks down into small, irregular crumbs.

Add in the sesame seeds and stir them through the flour.

Use one hand to stir the flour mixture with a fork while you use the other to pour in the milk.  Keep stirring until the dough comes together and pulls away from the sides of the bowl. If the dough's too dry to come together add more milk, a few drops at a time. Use as little extra milk as you can manage. You want the dough to hold together but to stay as dry as possible.

Leave the dough in the bowl, cover it with waxed paper, and let it rest for at least an hour.

Roll the rested dough out as thinly as possible, using a little flour both under the dough and on top of it to keep the dough from sticking to either your work surface or your rolling pin.  You should aim for a 1/8-inch thickness.

Wrap the dough loosely around the rolling pin and transfer it to a parchment lined baking sheet.
 
Once it's on the baking sheet, score the dough into 1-1/2 x 2-1/2 inch rectangles (roughly the size of a business card).  Use a fork to dock the dough, poking a few holes in each rectangle.  

Sprinkle the flaked or coarse salt over the top of the crackers and press it in so it adheres to the dough.

Bake the crackers at 425F for 6 to 8 minutes, then flip them over, put them back in the oven and bake them for about 5 minutes more.

Remove the crackers from the oven and, as soon as they're cool enough to handle, break them apart.  If some of them aren't yet crispy, put them back in the oven and let them continue to crisp.

When the crackers have cooled to room temperature, store them in an airtight container.

Wednesday 22 December 2021

Nutty Caramel Popcorn

Sometimes you want something that's sweet and crunchy at the same time. Sometimes you want a sweet with a hint of umami in the background. Sometimes you want a big bowl of snack-y stuff that you can nibble on while watching a movie. This recipe is all of that.

The caramel corn part of this recipe isn't mine.  It comes from Paula Deen via Gluesticks blog. I just changed the quanities a bit and added in lots of nuts.  

I used peanuts and cashews because that's what I had on hand and the combination proved surprisingly good.  You can, of course, add whichever nuts you prefer.  If you want your mixture to be more salty, you could even add a commercially made mixture of salted mixed nuts.

To make this recipe, you'll need

  • About 5 quarts of popped popcorn (about 1/2 cup unpopped kernels, popped)
  • 2 cups each raw, unsalted peanuts and cashews
  • 1 cup butter
  • 2 cups golden sugar (light coloured brown sugar)
  • 1/2 cup light corn syrup
  • 1 teaspoon salt
  • 1 teaspoon baking soda

Pop the popcorn kernels in an air popper and pour them into a large roasting pan. I use the bottom half of the roaster I cook my turkey in.

Add the nuts to the popcorn in the roasting pan.

Combine the butter, sugar, corn syrup, and salt in a medium saucepan.  Heat the mixture over medium-high heat. When it comes to a full boil, set a kitchen timer for 5 minutes and continue to boil the mixture, stirring constantly.

At 5 minutes, remove the mixture from the heat and stir in the baking soda.

Pour the caramel over the popped corn and nuts. Stir it gently to coat them evenly.

Bake the caramel corn at 200F for one hour, stirring every 15 minutes.

Turn the entire batch out onto a sheet of kitchen parchment and let it cool.

Snack away!

If you don't eat the whole lot at once, store the leftovers in an airtight container and use it up within a couple of days.


Tuesday 21 December 2021

Maple Cinnamon Butter

Even the most accomplished of cooks (and I wouldn't ever claim that title as my own) have times when nothing in the kitchen goes according to plan. Things that should, logically, work out, don't.  It's frustrating but sometimes, if fortune favours the persistent, good things can arise from failure. This recipe is a case in point.

I wanted to make maple walnut scones and decided to adapt my favourite cream scone recipe using those flavours. The scones looked just as a good scone should - browned on the top, nicely risen, a little crumbly - but the flavour was insipid.  My tasters concurred, and we drew the conclusion that there just wasn't enough maple sugar in the recipe to carry the necessary flavour punch. Adding more maple sugar to the next batch didn't fix it, nor did the addition of maple extract to a third batch.  

In a last ditch effort, I made a maple and cinnamon butter to spread on the scones, hoping that the combination of the two would bring the necessary pizzazz to the plate. Even with the butter, the scones were not a hit with my tasters, but they liked the butter a lot.  One of them took the remainder of that first batch home with her and served it to her family with French toast the following morning.  The only complaint from her family was that they wanted more.

I made a batch of plain biscuits to try the butter with and that was tasty so I spread some on toast the following morning. That was good too. 

I told my tasters that I couldn't post just the butter recipe because it wasn't pretty enough to photograph. (It's hard to make a bowl of dark brown spread look appealing in any light.) They replied "But it tastes good. Share it anyway" so - un-pretty though it is - I'm sharing my maple cinnamon butter with you. You can serve it with your Christmas breakfast. 🎄😊

Flavoured butters are very simple to make. For this one, you'll need:

  • 1/2 cup salted butter, at room temperature
  • 6 Tablespoons maple sugar (if yours is not in very fine granules, you should zhuzh it up in your blender until it's powdery.)
  • 1 teaspoon cinnamon
Put all the ingredients in a bowl and whip them together until well combined.  Spoon into a covered container and refrigerate overnight to let the flavours marry. Allow it to return to room temperature before serving it - unless you're molding it as described below.

If you want to get fancy with your presentation, you can spoon the butter into indiviual chocolate molds while it's still soft from mixing, and then set the molds in the fridge overnight. While it's still very cold, unmold the butter and arrange it on a pretty plate, or place one or two pieces on each bread plate at the table. 

Make more than you think you'll need.  If the people at your table enjoy this butter as much as my tasters did, you'll go through it quite quickly.  Leftovers can be stored in an airtight container in your fridge or freezer.


Monday 20 December 2021

Cheddar and Black Pepper Cheese Puffs


Aside from family gatherings, my mom and dad didn't do a lot of entertaining.  Every New Year's Eve, though, they and several other couples from our neighbourhood would go dancing at the Legion hall.  After last call, they'd adjourn to one house or another, taking it in turn in a casual sort of way.  On the years when they came to our house my mom would serve an assortment of food, always including cheese puffs. She'd make them in advance, re-crisp them in the oven, then serve them warm.

With the coming of the Food Network and a general broadening of our knowledge of foods from many cultures, people started calling cheese puffs gougères but, whatever the name, they're still the same tasty, easy-to-make pastry.  Since French gougères are made with Gruyère cheese and the French are very particular about accuracy in food names and I baked mine with cheddar, I'm choosing to call mine cheese puffs just as my mom did.

Gougères are made with pâte à choux (cream puff pastry); a dough entirely leavened by eggs.  The pastry is put into a hot oven 425F to ensure a rapid souffléing of the eggs, causing the dough to rise. After a few minutes the heat is lowered to prevent the puffs from becoming too brown. The process is vulnerable to excess moisture so dry cheeses are preferable in this batter. My cheese puffs work because the cheddar I use (Old Edinburgh) is aged, crumbly and - for a cheddar - quite dry. 

Don‎'t be intimidated by pâte à choux. Provided you follow the instructions carefully, it's easy to make.

You'll need:

  • 4 eggs
  • 1 cup flour
  • at least 1 Tablespoon of freshly ground black pepper; a coarse grind
  • 1/2 cup milk
  • 1/2 cup water
  • 1/2 cup butter, cut into Tablespoon sized pieces
  • 1/4 teaspoon salt
  • 1-1/4 cups finely grated cheddar
Put the eggs in a bowl and cover them with hot tap water.

Measure the flour into a small bowl and use a fork to stir in the pepper

Combine the milk, water, butter, and salt in a saucepan and bring them to a boil.

Reduce the heat to medium-low and add the flour all at once.  Stir until the flour absorbs the water and becomes a thick dough. Continue stirring the dough, breaking it apart with the back of a wooden spoon now and then, until it stops steaming. You want any excess water in the dough to evaporate. The dough cooking process will leave a skim coating of dough on the bottom and sides of the pan.

Remove the pan from the heat and let it rest for about 5 minutes.

Add the eggs one at a time, beating each one thoroughly into the dough before adding the next.

Stir in the cheddar cheese, mixing until it's evenly distributed throughout the dough.

Spoon or pipe the dough onto a parchment lined baking sheet.

Bake the puffs at 425F for 10 minutes, then reduce the heat to 350F and cook them until they're a light golden brown.

Take the baking sheet out of the oven and pierce each puff twice with the sharp tip of a paring knife.

Put the pierced puffs back in the oven and turn off the heat so any excess moisture inside the puffs can evaporate.


If you're making your cheese puffs ahead of time, you can re-crisp them by putting them in a 350F oven for a few minutes.

These cheese puffs can be made in any size from 2 to 4 inches in diameter.  

I serve the small ones warm, with a bowl of pepper jelly for those who wish it.  

Larger puffs can be opened, any moist dough in the middle removed, and then filled with meat or vegetables in a sauce, a little good mustard topped with shaved roast beef or ham and - for the beef - a dollop of horseradish, or an apple pie filling made with diced apples.

Saturday 18 December 2021

Susan's Baked Peach Slices


My friend Susan was an enthusiastic dinner party hostess and her preparation and table settings were well known and appreciated by those of us who where lucky enough to dine with her. I learned a lot from her. She passed away in 2013 but I still think of her fondly whenever I cook something she taught me to make.

Susan was some years older than me, and first started hosting dinner parties in the mid-60's. Food tastes weren't as cosmopolitan then and the range of ingredients available to most home cooks wasn't as diverse. Menu variety was achieved by trying to find new and engaging ways to prepare commonly available foods rather than by searching out rare or unusual seasonings and ingredients. I think it's safe to say that most home cooks were more familiar with basic cooking techniques than home cooks tend to be now, and that they took a different and generally more frugal approach to shopping for and preparing meals. 

Susan's baked peach slices are a classic example of that approach to adding variety. She took three commonly available ingredients and combined them in an unexpected way, arriving at something new and surprisingly different to serve her guests. 

I can't really call this a recipe because quantities were never written down and, really, it's so simple to make that if you've prepared it once you'll be able to replicate it ever thereafter. Even so, I've decided to share it with you. It's inexpensive to make, and it comes together very quickly. It's a perfect fall-back for those occasions when you find yourself with unexpected guests, or for times when you'd far rather be visiting than labouring over a stove.

To make Susan's Baked Peach Slices, you'll need:

  • Canned peach slices (or peach slices in jars), packed in either juice or light syrup.  Heavy syrup is too sweet.  (I try to allow about 1/2 of a 14 ounce tin or pint jar for each serving.)
  • Brown sugar
  • Curry powder

Drain the peaches and arrange them in a single layer on a parchment lined baking sheet.

Sprinkle them with brown sugar; not so heavily they're entirely covered but enough to add a little sweetness and help the seasoning to stick to the fruit.

Sprinkle curry powder over the brown sugar.  Use a light hand. You don't want the spice to overwhelm the flavour of the peaches.

Just before you sit down to your main course, put the prepared peaches into a 350F oven.  They should cook for 20 minutes or so. If you're not ready for them by then, simply turn off the heat and leave the peaches in the oven to keep warm.

When you're ready to serve dessert, scoop vanilla ice cream onto pretty plates or into shallow bowls and serve the warm baked peach slices beside it.

See?  I told you it was easy.  Don't discount this dish though. It really is amazingly good.


Thursday 16 December 2021

Tropical Trifle


You know that lemon
poundcake I shared yesterday, with the candied pineapple and crystallized ginger in it?  I used some of it to make a trifle, with layers of cake, pineapple, and vanilla pudding, topped off with whipped cream.  Because, in my world, trifle is always a good thing.

Here's how I made it:

MAKE THE PINEAPPLE FILLING

  • 2 x 398 ml tins crushed pineapple, canned in juice, not syrup
  • 1/2 cup sugar
  • 1 Tablespoon + 1 teaspoon cornstarch

Combine all three ingredients in a small saucepan, stirring until the cornstarch is dissolved in the pineapple juice. 

Cook over medium-low heat, stirring constantly until the mixture boils and thickens.

Remove from heat and cool to room temperature, then refrigerate at least 1 hour.

MAKE THE VANILLA PUDDING
  • 1/2 cup sugar
  • 6 Tablespoons cornstarch
  • 1/4 teaspoon salt
  • 4 cups milk
  • 2 well beaten eggs
  • 1 teaspoon vanilla

Combine the sugar, cornstarch and salt in the top of a double boiler.  Gradually add the milk, stirring until the cornstarch is dissolved.

Cook over - not in - boiling water, stirring constantly until the mixture boils and thickens.

Put the eggs in a heat proof bowl and slowly add in the cooked pudding, stirring constantly so the eggs don't scramble. 

Once the eggs and pudding are combined, use the back of a wooden spoon to work the pudding through a seive just in case there are any cooked bits of egg that need straining out.

Allow the pudding to cool to room temperature, then put it in the fridge for at least an hour.

ASSEMBLE THE TRIFLE

The trifle in the photo is actually enough to serve two people. Although it makes a good picture, I'd never present such a large portion at the end of a meal.  I'd use this recipe to make 8 individual trifles served in wine glasses, or one large trifle in a pretty bowl, to be served family style at the table.

When both the pineapple filling and the pudding are chilled, cut 6 x 1-inch thick slices of poundcake and then cut the sliced poundcake into cubes.

If assembling this in a large trifle bowl, use half the cubed poundcake to make a layer in the bottom of the bowl. If assembling this as individual servings, divide half of the poundcake cubes equally between the 8 glasses.

For a large trifle, put half the pudding over the cubed poundcake, followed by half the pineapple filling.

For individual trifles, divide all of the pudding equally between the 8 glasses (about 1/2 cup per glass), then do the same with all of the pineapple filling.

For a large trifle, repeat the poundcake, pudding, pineapple layers once again.

For individual trifles, if there's room in the glasses to accomodate it, divide the remaining poundcake evenly between the 8 servings, placing it on top of the pineapple filling. If you can't fit the second layer of poundcake in there, don't worry about it. Just put it in the freezer and use it later for something else.

Put the trifle(s) in the fridge to set up for an hour or more.

Just before serving, whip 2 cups of heavy cream (33% milk fat) until it forms soft peaks.  Add in 1 Tablespoon of sugar and 1-1/2 teaspoons of vanilla extract.  Continue whipping the cream until the sugar and vanilla are thoroughly mixed in and the cream is firm enough to hold its shape without collapsing when spooned onto the trifle(s).

Top the trifle(s) with the whipped cream and serve immediately.

Wednesday 15 December 2021

Lemon Poundcake With Candied Pineapple And Crystallized Ginger


In mid-November, British Columbia was hit by a series of rainstorms that Environment Canada described as "atmospheric rivers." They brought so much rain that catastrophic flooding and mudslides ensued, driving thousands of people from their homes and damaging highways and railways so severely that southwestern BC (where I live) was cut off from the rest of Canada.  Most people have returned to their homes but the damage to infrastructure is going to take months to repair. 

One highway connecting the affected areas to the rest of the country has now been re-opened, but only to essential travel.  It's a treacherous drive, still prone to flooding, with entire lanes of highway missing; sloughed off into canyons, washed away by rivers, or buried under tons of mud and stone and the journey is now complicated by snowfall and the potential for avalanches. The drivers who make the trip are heroes in this story. 

Because of the limited traffic, essentials are being given transport priority and, as much as we all love our Christmas treats, seasonal baking ingredients don't rank high on the list.  Some things, including candied and glace fruits and certain spices, have disappeared entirely from grocery store shelves.  

I had the good fortune to have done my big holiday shop just before the storms but, still, there were some things I forgot to buy and now I'm now having to do without them.  If it isn't in my pantry, it won't be on my table this Christmas.

Two things I do have on hand (because I like them a lot and try to keep them in my pantry year 'round) are candied pineapple and crystallized ginger. While not a typical holiday combination, both are included in many seasonal recipes so I decided to make something that paired them. This poundcake is what I came up with.

This cake is cerainly not the prettiest girl at the dance but she's probably the one you'd take home to Mom. Substantial in texture, bright with the flavours of lemon, pineapple, and ginger, and blessed with a comparatively long shelf life, this recipe's a winner. It freezes beautifully too.

To make this cake you'll need:

  • 1-1/2 cups each finely diced candied pineapple and crystallized ginger
  • 4 eggs
  • 3 cups all purpose flour
  • 1/2 teaspoon each baking powder and baking soda
  • 1 teaspoon salt
  • 1 cup butter, softened 
  • 2 cups sugar
  • 1 Tablespoon each grated lemon zest and lemon extract
  • 1 cup buttermilk

Butter and flour two 8-/12 x 4-1/2 x 2-1/2 inch loaf pans or one 10-inch bundt pan.

Cut the candied pineapple and crystallized ginger into a fine dice; 1/4 inch or smaller.

Put the eggs in a bowl and pour hot tap water over them. Let them stand for several minutes to warm gently.

Sift the flour, baking powder, baking soda, and salt into a large bowl, then stir them well with a fork to ensure they're evenly mixed. 

Add in the candied pineapple and crystallized ginger and stir again so the fruit is coated with the flour mixture.

Put the butter in a large mixing bowl and beat it until it's smooth and creamy.

Slowly add in the sugar, beating constantly until smooth and well blended.  

Add the eggs all at once and beat until the mixture is light and fluffy. 

Add about half the flour mixture to the bowl and beat until well blended.

Stir the lemon zest and lemon extract into the buttermilk, then beat half the buttermilk into the batter.

Add in the remaining flour and buttermilk mixtures and beat until the batter is well blended.  

Pour the batter into the prpared pans and bake at 325F until a skewer or toothpick inserted in the middle of  cake comes out clean.  This can take between 1 and 1-1/2 hours.

The cake will brown quite a bit around the edges.  If it's becoming too browned for your taste, turn the oven off towards the end of the cooking time and let the cake finish cooking in the residual heat.

Put the cake pans on a wire rack and allow them to cool for 5 minutes before turning the cakes out.  Allow the cakes to cool completely before slicing them.

As you can see from my photo, I like to serve this cake with marmalade. It's a lovely accompaniment to afternoon tea.  It's also good toasted and then topped with a scoop of vanilla ice cream, or lemon or orange sorbet. If you want to get fancy about it, you can drizzle the ice cream or sorbet with a little Grand Marnier or Triple Sec.

Enjoy. 😊


Tuesday 14 December 2021

Toffee Crunch Squares


Look at these squares. You see that somewhat plain looking bottom layer? Don't be fooled. THAT, my friends, is a whole lot of delightful, toffee crunchiness just waiting to surprise you.

My husband loved English toffee. I suspect English toffee is called other things in other place but, basically, it's a delectable sweet made with a layer of hard toffee, covered by a layer of chocolate, with finely chopped almonds pressed into the chocolate before it sets. I used to buy it at Purdy's (a BC chocolatier) and give it to him at Christmas-time every year.  

Unfortunately there came a year when it wasn't within my means to buy my guy his treat from Purdy's. I searched for recipes I could make at home instead and eventually settled on this one, from a Quaker Oats advertisement in the 1993 Family Circle Christmas magazine. The oats in the bottom layer of these squares are not a traditional ingredient in English toffee but we both liked a good oatmeal cookie and the flavour combination was appealing. It was comparatively inexpensive to make too.

The squares were so well received that I've made them almost every Christmas since. The only adaptations I've made to the recipe are the way in which I prepare the pan before baking, and the use of walnut pieces, rather more coarsely chopped than the almonds on an English toffee. You, of course, can use nuts or not, as you prefer, and chop them more finely or not, as suits your taste.

Before I give you the recipe, I want to talk to you about preparing the baking pan:  

The crunch in this recipe comes from sugar, melted in the oven and then allowed to harden and cool.  It can be difficult to get the cooled squares out of the pan.  I get my best results by first buttering a 10 x 15 inch jelly roll pan and then lining the bottom of the pan with parchment. I prepare the parchment before buttering the pan, tracing around the bottom of the pan with a pencil and then cutting just inside the traced line so no pencil is on the paper that goes into the pan. Once the parchment has been cut, I butter the bottom and sides of the pan liberally and then set the cut parchment on top of the butter.

To make Toffee Crunch Squares, you'll need:

  • 4-1/2 cups oatmeal (either quick cooking or old fashioned but never instant)
  • 1/2 teaspoon salt
  • 1 cup firmly packed brown sugar
  • 3/4 cup butter, melted
  • 1/2 cup corn syrup
  • 1 Tablespoon vanilla extract
  • 2 cups semi sweet chocolate chips
  • 2/3 cup chopped nuts (optional)

Stir together the oatmeal, salt, and brown sugar until the sugar is evenly distributed throughout.

Add in the butter, corn syrup, and vanilla extract. Stir until all of the dry ingredients are moistened and the mass sort of sticks together.  It'll still be a bit crumbly.

Transfer the oatmeal mixture to the baking pan and press it out to fill the pan in an even layer.

Bake in a pre-heated 400F oven for 18 minutes, until brown and bubbly.

Sprinkle the chocolate chips over the baked oatmeal mixture as soon as it comes out of the oven. Let them sit for 10 minutes and then use a knife or an offset spatula to spread the melted chocolate so it completely covers the baked oatmeal mixture. 

If you're using them, sprinkle on the chopped nuts while the chocolate is still soft.

Let the pan cool completely, then cut your squares. A knife with a thin but not flexible blade will work best for this.  

I don't recommend that you freeze these bars. They lose some of their crunchiness if frozen and then thawed.


Monday 13 December 2021

Salted Caramel Brownie Bars


These bars happened because of a random purchase at the Bulk Barn.  They had salted caramel chips there and because I'd never cooked with them, I bought some.  

I spent some days trying to decide what I might make with those salted caramel chips. Recent flooding has caused serious damage to the roads that connect southwestern BC with the rest of Canada. Essential goods are given shipping priority and some and luxury goods can be hard to come by. I wanted my recipe to be attainable for others affected by these shortages so I decided to work with ingredients I already had on hand. These bars are what I came up with. 

Because of the dulce de leche layer in these bars, they aren't a quick bake. I usually make dulce de leche from commercially made sweetened condensed milk but right now it's really expensive so this time I made my own sweetened condensed milk from scratch. If you choose to buy sweetened condensed milk already made, or if you buy pre-made dulce de leche and add your own salt to taste, the process will be much less time consuming.  

Since I did make my own dulce de leche from scratch and you might want to know how I did that, here are the steps:

Begin with Baker Bettie's recipe for Sweetened Condensed Milk. Increase the recipe quantities by one half (so your batch is 1-1/2 times larger than what the original recipe calls for) and cook it according the the recipe directions.

Once the sweetened condensed milk is made, transfer it - in a heatproof container - to your slow cooker.  Pour boiling water into the cooker, around the container, taking care not to get water in the milk.  Turn your slow cooker on low and continue cooking the milk, stirring occassionally and topping up the hot water around the milk container as needed, until it reaches the stage of caramelization you prefer. The more brown the caramel, the deeper the flavour, but take care not to over-do it. Taste as you go along. There's a point where the caramel flavour crosses the line from deep to bitter and once that happens there's no going back.

When the caramel has reached the stage you want it to be, remove the container from the slow cooker and put it in a cold water bath, stirring and changing the cold water often so it cools as rapidly as possible.  When it's reached room temperature, add your salt.

I won't give you a specific measurement for the salt in the dulce de leche layer because I've found that people's preferences about the saltiness of their food vary wildly.  Add a little salt, give the caramel dulce de leche a thorough stir so you know the salt is distributed throughout, taste, and adjust.  Continue adding salt, mixing, and tasting until it's where you want it to be.

At this point, I covered the caramel container and put it in the fridge. I finished making the bars the following day.

To make the brownie layer, you'll need:

  • 1-1/3 cups all purpose flour
  • 1 teaspoon baking powder
  • 1 cup salted butter
  • 1 cup Dutch process cocoa
  • 2 cups sugar
  • 4 eggs
  • 1 teaspoon vanilla extract
  • 1 to 1-1/2 cups salted caramel baking chips

Stir together the flour and the baking powder.

Melt the butter in a large saucepan. 

Remove the pan from the heat and stir in the cocoa until it's completely combined with the butter.

Stir in the sugar.

Add the eggs, one at a time, mixing well after each addition.

Mix in the vanilla extract.

Add the flour mixture to the chocolate mixture, mixing just until no flour is visible.  

Stir in the salted caramel baking chips.

Pour the batter into a buttered or oiled 13 x 9 x 2 inch baking pan and bake in a 350F oven for 30 to 35 minutes. 

Cool to room temperature, then transfer the pan to your freezer and let the brownies get really cold.

To assemble the bars:

Take the salted dulce de leche out of the fridge and heat it in the microwave on 30 second intervals, stirring between each interval until it's warm and has thinned to a more spreadable consistency.

Take the brownie pan out of the freezer and, using an offset spatula, spread the dulce de leche over the brownie layer in an even thickness.  Put the pan back in the freezer.

When the dulce de leche layer is well cooled and set (I left it in the freezer overnight), make the ganache layer.

Finely chop 12 ounces of semi sweet chocolate and put it in a bowl.

Heat 1-1/2 cups of heavy cream to a simmer.

Pour the cream over the chocolate and stir until the chocolate is melted and is completely incorporated into the cream.

Pour the ganache over the dulce de leche layer in the pan and use an offset spatula to spread it evenly.

Put the pan in the fridge until the ganache has thickened and the entire bar is well chilled.

Use a hot knife (run the blade under the hot water tap) to cut the bars while they're still very cold.  Let them warm to room temperature before serving them.

These are really tasty but also very sweet, so a little goes a long way.  The bar in the photo is about 1-1/2 x 2-1/2 inches.  If I was serving this as part of a dessert tray I'd cut it in smaller pieces; about half this portion.

Sprinkle a bit of flaked salt over the top of the ganache just before plating the bars.  I used locally harvested salt from Vancouver Island Sea Salt.

I returned my Salted Caramel Brownie Bars to the freezer after slicing them. A cup of coffee is really all they need in the way of accompaniment, which makes them an excellent treat to have on hand when entertaining on short notice

Because the ganache layer stays quite soft, if you're giving them as part of a food gift, I don't recommend packing the bars in layers in cookie tins. If you're going to include them as part of a food gift, cut the bars in smaller pieces as mentioned above, put each individual piece in a petit four cup (like a paper muffin cup but smaller), and pack them in a single layer in a shallow container with an airtight lid. Leave the sprinkle of salt off the top of the ganache. If you want to, you can pack some salt in a separate container, with instructions to sprinkle it on just before serving.


Friday 10 December 2021

Cranberry Ginger Beer Bread


Yesterday I posted a beer bread recipe with flavours that go beautifully with a spaghetti and salad supper.  Today's recipe is a variation on that recipe, but with a very different flavour profile. 

This quick bread is a little sweeter, but savoury enough to accompany a meal centered on chicken or pork. Served warm with butter and honey, it would make an afternoon or evening cup of tea into a very special treat.

Instead of beer, I use a pool Jamaican style ginger beer for this recipe. It's less sweet than ginger ale, with a strong fresh ginger flavour; a fast, easy way to bring bright flavour to a simple bake.

To make this bread, you'll need:

  • 2-1/2 cups all purpose flour
  • 1 Tablespoon baking powder
  • 1/2 teaspoon salt
  • 1/4 cup of dark brown sugar, firmly packed
  • 1/2 teaspoon cinnamon
  • 1 cup of dried cranberries 
  • 1 12-ounce bottle of Jamaican style ginger beer
  • 1 teaspoon grated fresh ginger
  • 1/4 cup melted butter

Put the flour, baking powder, salt, and cinnamon in a bowl and use a whisk or a fork to stir them together. (A whisk or fork won't compact the flour. A spoon would.)

Add in the dried cranberries and stir them in so they're coated with the dry mixture. (This helps keep them suspended within the batter.)

Add the Jamaican style ginger beer, then the fresh ginger and the melted butter. Stir until the ingredients are well combined but don't over-mix the batter. Lumpy is okay.

Spoon the batter into a buttered or oiled  9 x 5-inch loaf pan. It'll take about 45 minutes to bake at 375F. 

If you portion the batter into smaller containers you can shorten the baking time. Half pint/125 ml Mason jars work perfectly. The smaller loaves cook in about half the time it takes to bake a 9 x 5-inch loaf, and they're easy to present in a bread basket; no slicing required. 

This quick bread is always best served hot from the oven. If you have leftovers and want to reheat them, you can slice them and toast the slices, or you can wrap the leftovers in foil and reheat them in a 350F oven for 15 to 20 minutes.

Thursday 9 December 2021

"Oh, Look! We Have Unexpected Company!" Quick Bread


My husband was really bad about inviting people to dinner and then forgetting to tell me about it until our guests pulled into the driveway. Seriously. Thirty four years of marriage never broke him of the habit. After so many years of magically conjuring dinner for four, or six, or eight out of ingredients planned for just the two of us, I'm really good at it. 

One of the things I learned very quickly about stretching meals is that carbs are your friends. Having a few good quick breads in your repertoire can be a great help when unexpected company arrives at dinnertime.  

Served before dinner, hot from the oven, with butter or with olive oil and balsamic vinegar, a quick bread can buy you some extra time to prepare the rest of the meal. It can help take the edge off appetites too, which means main course protein servings can be smaller and the meal can be more heavily weighted towards vegetables that are quick to prepare. 

Your guests don't have to know any of that. You can keep mum and let them be impressed with what a special treat they're enjoying. They'll love it.

You don't have to re-invent the wheel either. Learn to make a basic quick bread like this beer bread. Beer bread's been around forever because it's easy to make and it tastes really good. 

Almost all beer breads call for self rising flour: a pre-mixed blend that also includes baking powder and salt. It's not an ingredient commonly called for in recipes from this region so I don't go through it quickly enough to use up a bag before it's past its "best by" date. When I bake a recipe that calls for self rising flour I make this substitution:

For every cup of self rising flour called for in a recipe, I use 1 cup of all purpose flour, 1-1/2 teaspoons of baking soda, and 1/2 teaspoon of salt. 

I've already done the math for you in this recipe, then adjusted so it's less salty and there's no aftertaste from the baking powder.

You're welcome. 😊

To make this bread, you'll need:

  • 2-1/2 cups all purpose flour
  • 1 Tablespoon baking powder
  • 3/4 teaspoon salt
  • 1 Tablespoon sugar
  • 1/2 teaspoon each of onion powder, granulated garlic, ground dry rosemary, oregano, and basil
  • 1 12-ounce bottle of beer (I use a lager)
  • 1/4 cup olive oil

Put all the dry ingredients in a bowl and use a whisk or a fork to stir them together. (A whisk or fork won't compact the flour. A spoon would.)

Add the beer and then the olive oil. Stir until combined but don't over-mix the batter. Lumpy is okay.

Spoon the batter into a buttered or oiled  9 x 5-inch loaf pan. It'll take about 45 minutes to bake at 375F. 

If you portion the batter into smaller containers you can shorten the baking time. Half pint/125 ml Mason jars work perfectly. The smaller loaves cook in about half the time it takes to bake a 9 x 5-inch loaf, and they're easy to present in a bread basket; no slicing required. 

Beer bread is always best served hot from the oven. If you have leftovers and want to reheat them, you can slice them and toast the slices or you can wrap the leftovers in foil and reheat them in a 350F oven for 15 to 20 minutes.

Now, go forth and fear unexpected company no more. You've got this!


Wednesday 8 December 2021

Rosemary Raisin Bread


In 1977, I bought the Sunset Cook Book of Breads.  It was one of the first cookbooks I ever purchased - a paperback - and I have it still, so well loved that it's mostly held together with sticky tape. This recipe comes from that book but I've adapted it to suit my tastes and baking style over the years. It's a surprising combination but the flavours work together really well.

I enjoy this bread toasted, with crabapple jelly, or as a sandwich bread, with ham, a mild cheese, and some sweet mustard. 

I should mention that I eat every dish I make for my blog. Nothing goes to waste. The wedge of bread I cut out of the loaf for the photo was made into a bread pudding, with pears.  😊

To make Rosemary Raisin Bread you'll need: 
  • 1 to 1-1/2 cups of raisins (I only had 3/4 cup of raisins when I baked the loaf you see in the photo. It was not enough.)
  • 3/4 cup raisin soaking water
  • 2 Tablespoons honey
  • 2-1/4 teaspoons active dry yeast
  • 2 eggs at room temperature
  • 1/4 cup neutrally flavoured cooking oil (I used sunflower oil)
  • 3 to 3-1/2 cups bread flour (sometimes called hard flour)
  • 1 Tablespoon fresh rosemary, chopped very fine
  • 1 teaspoon salt 
  • 1 Tablespoon cold water
Put the raisins in a heat proof bowl or measuring cup and pour boiling water over them.  Let them soak until the water has cooled to 110F.

Drain the water off the raisins, reserving it and setting the raisins aside. Pour 3/4 cup of the raisin soaking water into your mixing bowl. Add the honey, stirring to dissolve it into the water.  

If the honey won't dissolve completely, put the water/honey mixture in the microwave for a few seconds and then stir it again. If you put the water and honey in the microwave, remember to allow it to cool down again, to just above body temperature.

Sprinkle the yeast over the water and honey mixture.  Let it sit for about 10 minutes, until the yeast has dissolved and started to foam a bit. 

Crack 1 egg plus the white of the second egg into a small bowl and beat them with a fork. (Reserve the yolk from the second egg for later.) Pour the beaten egg into the water/yeast mixture, then add the oil, and the drained raisins.

Add in 3 cups of flour, the rosemary, and the salt in the order given here. (Salt impedes the rising action of  yeast. Putting it in last helps insulate the yeast from the salt.)

If you have a stand mixer, use a dough hook to mix the bread, adding more flour if the dough is sticky.  You'll need to mix it for at least 10 minutes, until the dough becomes elastic and pulls away from the sides of the bowl.

If you're kneading the dough by hand, spread the remaining half cup of flour on your board and knead the bread until it's elastic. This can take up to 20 minutes.

Wash out the mixing bowl and coat the inside of it with some olive oil. Put the dough in the bowl and turn it until it's coated all over with the oil.

Cover the bread dough with waxed paper and let it rise until doubled in size, about 1 to 1-1/2 hours.

Punch the dough down and knead it a few times to release the air.  Shape it into a sphere and place it on a parchment lined baking sheet.  

Let the dough rise until puffy; about 30 to 45 minutes.

Beat the reserved egg yolk together with 1 Tablespoon of cold water, then brush it over the loaf.

Use a floured, knife with a narrow blade to cut an X in the top of the loaf.

Bake the bread at 375F for about 30 minutes, turning it at the halfway point of the baking time. 

Start checking it for done-ness at 25 minutes. You'll know it's done when you tap on the top crust and it sounds hollow.  If it doesn't sound hollow, return the bread to the oven and turn off the heat.  Let the loaf finish baking in the residual heat.

Cool the bread on a wire rack for at least 30 minutes before slicing it.

Tuesday 7 December 2021

Three Tasty Sandwiches


Since I shared my olive bread recipe with you yesterday, I want to share three olive bread sandwiches today:  Egg salad, melty asiago, artichoke and tomato, and Greek seasoned braised lamb.

I apologize for the messy sandwiches in the photo but these days my hands are so shaky it's good luck that I managed to assemble them at all! I do hope you'll take my word for it when I tell you they're much more tasty than they look.

You'll notice when you read the ingredients lists for these sandwiches that I don't mention butter.  The bread is moist enough that I felt I could do without it.  If you're assembling any of these to take as a packed lunch, though, I'd recommend you butter the bread to help prevent the juice from the tomatoes soaking into it and making your sandwich soggy.

EGG SALAD

For each sandwich, you'll need:

  • 2 slices of olive bread
  • 1 boiled egg
  • 1-1/2 Tablespoons of finely diced celery
  • 1-1/2 Tablespoons of finely diced dill pickle
  • 1 teaspoon of mayonnaise (here's how I make mine), or more if you prefer
  • salt and pepper to taste
  • Thinly sliced red onion
  • Thinly sliced tomato
  • Lettuce
Peel the boiled egg, put it in a bowl, and use a fork to break it into small pieces.

Add the celery, dill pickle and mayonnaise and mix them combined but not so much that the pieces of egg are broken down. Add salt and pepper if you want it.

Cut two slices of olive bread.  If you want to - and I often do - you can toast them.

Spread the egg salad on one slice of bread.  Top it with the sliced red onion, tomato, and lettuce.

Put the other piece of bread on top and cut the sandwich. 


MELTY ASIAGO, ARTICHOKE, AND TOMATO

This sandwich is an interesting way to use up left over dip (if there is such a thing. 😉)

For each sandwich you'll need:
  • 4 x 1/3 to 1/2-inch-thick slices of tomato
  • freshly ground pepper
  • 2 slices of olive bread
  • Asiago and artichoke dip (Mine was purchased at Superstore but there are lots of recipes for it on Pinterest if you prefer to make your own.)
  • thinly sliced tomato
Place the tomato slices on an oiled baking pan and sprinkle them with pepper. Put them under the broiler until they're cooked through and have begun to take on a little colour around the edges.

Toast your bread.

Spread a generous amount of asiago and artichoke dip on each slice. 

Place the cooked tomato slices on top of the artichoke dip on one slice. 

Put the other slice on top, with the artichoke dip on the inside of the sandwich.

Put the sandwich in a 350F oven until the dip is heated through and bubbly.

Cut the sandwich and serve it while it's still hot.


GREEK SEASONED BRAISED LAMB

I need to preface this one with some comments about the lamb: 

I like lamb a lot but it's an expensive ingredient. Unless there's a pretty amazing sale price, the only cut I can afford is lamb shoulder. It's a part of the lamb that sees a lot of exercise so the meat is tougher but it's also very tasty. 

Because they tend to be purchased less often than leg of lamb or rib chops, it can be difficult to find lamb shoulder chops. Check the Halal section of the freezer aisle. That's where I usually find mine.

I buy my lamb shoulder chops in packages of four, for about $20/package, so the cost of one of these sandwiches, counting all the other ingredients runs to about $6.00.  That's not inexpensive but, when you consider the price of a fast food sandwich or burger, it's not too bad.  

For each sandwich you'll need: 
Begin by placing your lamb chop in a heat proof dish. Pour water around the chop, to about half its height and sprinkle a generous amount of Greek seasoning mix over the chop. Cover the dish and bake the chop at 300F until the meat is very tender and pulling away from the bone. Typically, this takes about an hour and a half in my oven. 

Remove the chop from the cooking dish and let it cool to room temperature.  If you're not going to use it right away, store it in a covered dish in the fridge.

Don't throw the cooking liquid away!  It'll make a flavourful foundation for a soup, stew, or sauce.

When you're ready to make your sandwich, trim the meat away from the bone in your shoulder chop and trim away most of the fat. Cut the meat into very thin slices. 

If you want a hot sandwich, put the sliced meat in a bowl with a little of the cooking liquid  and reheat it in your microwave. Drain the liquid before assembling your sandwich.

If you want a toasted sandwich, toast your bread now.

Spread a thin layer of mustard on each slice of bread.

On one slice, stack the sliced lamb and season it with salt and pepper to taste. 

Top the meat with the onion, tomato, and lettuce, then put the top slice of bread in place.