Friday 11 February 2022

Simple Does It: A Clever Tip For Packing Lunches

When I first moved into a building for seniors I wondered how I would like it.  I'm one of the youngsters here. Many of my neighbours are twenty or even thirty years my senior. I've come to love it though. My neighbours are a sociable bunch and, because most of us are living on fixed incomes, happy to share any tips and tricks that help make the most of what we have. There's a lot to be said for knowledge gained through life experience. 

I don't buy individual fruit cups but my across-the-hall neighbour does. She also regularly attends Elder College classes and volunteers at the museum and one of the local seniors' drop in centers. She's a busy woman! And because she takes packed lunches with her to these activities she shared a handy tip with me. She passed on some empty fruit cup containers too.

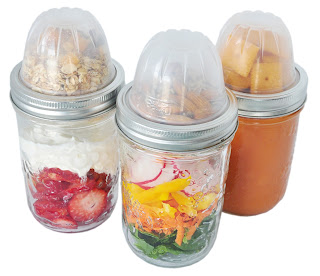
Did you know that those little plastic containers' rims are the perfect size to fit under a wide mouth Mason jar ring? I didn't either, but they are.  😊  My neighbour uses them to keep things that will be eaten together but don't store well in the same container - like salad and croutons, yogurt and granola, soup and crackers - conveniently packaged together in the soft sided cooler she uses as a lunch bag. 

It works like this: 

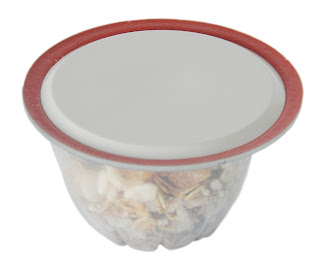
Fill your repurposed fruit cup with whatever ingredients you want to keep in there and then cover the top of the fruit cup with a Mason jar lid, seal-side-up.


Holding the sealer lid in place atop the cup, invert it and place the cup and lid sealer-side-down onto the top of your jar. Secure it in place with the Mason jar ring. 

Easy peasy, right? I wouldn't recommend it for kids' lunches but for adults taking lunch to work or school it's brilliant. 

I'll pass your thanks on to my neighbour, shall I? You're welcome.  😊

Friday 4 February 2022

Krispies And Candies Cookies


A lot of the best stuff I make comes from me surveying my fridge and pantry, then going with what I have on hand. These cookies are like that.

I had a jar of mini M&M's that had seemed like a good idea while I was at Bulk Barn but not such a good idea when I got home. They sat there on my shelf looking all bright and cheerful and useless until I decided I had to use them up. And cookies are good, right? Pretty much any kind of cookie is a happy thing.

So...What did I have to put in the cookies along with the M&M's?  I could've gone with nuts of some sort, but I had none and I didn't want to buy anything more. I did have Rice Krispies because I always have Rice Krispies. So, that's what I went with.  

The finished cookies were surprisingly good. The coating on the M&M's and the crispy cereal gave them a pleasant crunch that made my mouth really happy.

If you'd like to make these cookies, you'll need:

  • 2-1/4 cups all purpose flour
  • 1 teaspoon baking soda
  • 1 teaspoon salt
  • 1 cup butter
  • 3/4 c each white sugar and brown sugar, lightly packed
  • 2 beaten eggs
  • 1 teaspoon vanilla extract
  • 2 cups mini M&M's
  • 4 cups Rice Krispies
Use a fork or a whisk to stir together the flour, baking soda, and salt.

In another, large, bowl, cream together the butter and sugars. 

Add in the beaten eggs and vanilla and mix them until they were well combined with the creamed butter and sugars. Beat them together until they're light and fluffy.  The batter may look slightly curdled - broken - at this point. 

Mix the flour/baking soda/salt mixture into the wet ingredients until all of the ingredients are mixed into a stiff dough.

Add in the M&M's and Rice Krispies. Use a wooden spoon to mix them into the dough as gently as possible. Some of the Rice Krispies will get broken in the process but enough will stay intact to give the cookies good texture.

Form the dough into 1-1/2 to 2 inch balls and place them 2 inches apart on parchment lined cookie sheets.

Bake the cookies at 350F for about 12 minutes, until they begin to take on colour around the outside edges. 

Cool the cookies on a baking sheet for about 5 minutes and then transfer them to a rack covered with a sheet of brown paper to cool to room temperature. (The brown paper will absorb any extra moisture or butter from the bottom of the cookies, helping to ensure a crisp finish.)

Once the cookies are coooled to room temperature, store them in air tight containers and use them up within a few days.  If you need to keep them for longer than that, put them in the freezer.