Monday, 7 July 2014

Fifteen Things To Gather Now For Giving Later

I gather wild food from all around our area, all year 'round.  It's a rare thing for me to go for a walk without a bag or a basket in hand for gathering as I go. At this time of year, food is especially abundant but there are other things to forage for during the summer months too. You can gather all sorts of natural materials to use for gift giving later in the year.


While at the beach, look for
shells and shell fragments to make into jewelry and wind chimes,


pebbles to make into jewelry,


beach glass to make into jewelry, sun catchers, and wind chimes,


and seaweed to press for use on greeting cards.


While hiking, look for
berries to make into jams and jellies, 


chicory, so you can dry the roots and 
grind them together with your favourite beans 
for your own New-Orleans-style coffee blend,


fireweed flowers to dry and use for herbal teas and jelly,


Queen Anne's lace and other wildflowers and foliage to press and use on greeting cards,


pearly everlasting for using on wreaths and in dried flower arrangements,


fallen branches to use for basket handles, coasters, and buttons,


and cones for making wreaths, Christmas decorations, and fire starters. (Conifers drop their cones at this time of year, as do alder trees. They can be gathered well into fall but are at their cleanest and driest right now.)


While you're enjoying your garden or walking around the neighbourhood, you can gather 
(always with permission, of course)
lavender to mix with Earl Grey tea, to use in herbs de Provence, to make sachets, and to make scented water for spraying on linens and clothing while ironing,


hydrangea heads for dried flower arrangements,


flowers and foliage to press and use on greeting cards,


and seeds you can package in homemade envelopes.


Friday, 4 July 2014

Steak and Egg Frittata


Steak is a pretty big deal at our house.  We don't often see it on the table unless it's a special occasion or there's a good sale price, or both, but my fella's been craving it lately and I, wanting to oblige him, went looking for a way to provide it.  

One of our local grocers had bone-in rib steaks on sale this week so I went to take a look, but the steaks were quite thin and, if we're going to splurge on steak, we prefer a thick cut.  Since I had some other shopping to do at a nearby grocer who gives coupons in return for purchases at their gas bar, I explored my steak options there too.

With the Canada Day long weekend in sight, the chances of a mark-down did not look good.  The rib steaks at the second store were a better cut, but a higher price.  A little further down the meat aisle though, I found 3 small prime rib roasts - about 2 pounds each - all marked down by 30% because their "best by" date fell the following day.  If I applied the coupons I'd saved up, I could get one of those roasts for just over $6.00.  

I selected the roast that would be easiest to butcher, brought it home and cut it into two steaks, each about an inch thick and each weighing just over a pound. 

We grilled one steak and put the other in the freezer for another day.  The grilled steak provided steak dinner for the two of us, two steak sandwiches the following day, a main dish salad, and even after all that there was still about half a cup of thinly sliced steak left over.  I used it to make a frittata.

Here's the recipe:


  • 2 Tablespoons of pork fat (I rendered ours from the trimmings of a smoked pork picnic I'd recently cooked, but bacon fat would provide the same smokey goodness.  If you're not a pork fat fan, substitute in butter or whatever cooking oil you prefer.)
  • 1/2 cup chopped onion
  • 1/2 cup diced, cooked red skinned potatoes (I used half of a leftover boiled potato I had in the fridge)
  • seasoned salt to taste
  • 1/2 cup steamed green beans, cut in 1/2 inch pieces
  • 1/2 cup thinly sliced, cooked rib steak, cut into 1-inch pieces
  • pepper to taste
  • 3/4 cup each shredded mozzarella and edam cheese, tossed together.
I began by melting the fat in a frying pan over medium-high heat.  

When the fat was melted through and the pan hot, I added in the onion and potatoes.  

Because I reckoned it would go well with the smokiness from the pork fat, I seasoned the onions and potatoes with a little seasoned salt.

I cooked the onions and potatoes, stirring occasionally, until the onions were soft and the vegetables had taken on a little colour. 


then I added in the green beans and steak pieces and cooked them until they were heated through.


While the beans and steak were heating through, I cracked my eggs into a small bowl and beat them until they were well combined.

I reduced the burner heat to medium, and poured the eggs over the contents of the frying pan, then seasoned it all with freshly cracked black pepper.

When the bottom and sides of the frittata were cooked, but the center still liquid, 


I transferred the pan to a 350 oven and continued cooking my frittata until the eggs were set.


When the eggs were set, I sprinkled the cheese over top and put the pan under the broiler until the cheese was melted.


We each had one quarter of the frittata for supper, with tomatoes and roasted carrots on the side.  


I saved the other half of the frittata in the fridge, and used it to make sandwiches the next day.

And that's how you make a one-pound steak into five meals! Feeling pretty proud of myself just now.  :)

Wednesday, 2 July 2014

Main Dish Salad With Rib Steak and Okanagan Cherries


This salad began with a trip to the farm stand, where I found some incredibly beautiful lettuce, picked in the field right next door less than two hours before I purchased it.


The farm stand also had the first Okanagan cherries of the summer.  They were hideously expensive ($6.00/pound) but I really wanted some, so I treated myself to a handful.


I knew I'd be dining alone, and salads work very well for that.  With my farm stand treasure in mind, I planned a salad supper that would be robust and filling enough to serve as a main dish.  

This is a recipe for one person, but easily multiplied if you wish to make more servings.

Here's are the ingredients I used in my salad:

  • about 1-1/2 cups of lettuce that had been torn into bite-sized pieces
  • 1 slice from a medium red onion, quartered and then broken apart (about 1/4 cup)
  • Half of a leftover, boiled, red skin potato cut in 1/2 inch dice (about 1/2 cup)
  • 1/2 cup leftover steamed green beans
  • 6 sweet cherries, halved and pitted
  • 3 ounces of leftover rib steak sliced thin and then cut into bite-sized pieces


Here's the recipe for the dressing:

  • 2 teaspoons cherry infused vinegar.  (If you don't have infused vinegar, balsamic or red wine vinegar can be substituted)
  • a pinch of salt
  • 1/4 teaspoon dry mustard
  • 1/2 teaspoon honey
  • 2 tablespoons extra virgin olive oil.


I made my salad right in the bowl I'd be eating from.  If I were making more servings, I'd still do it this way.  It saves time and makes for less clean up.


Once the salad was assembled, I made the dressing. 

I began by whisking together the vinegar, salt, dry mustard, and honey until the salt and mustard were both dissolved.


I streamed in the olive oil, whisking as I added it, until it was emulsified into the vinegar mixture.


I drizzled the dressing over my salad.  


I used about half of the salad dressing. The rest went into the fridge for another day.

Just before I ate it, I seasoned the salad with freshly ground pepper.

I enjoyed my salad. The pepper, cherries, and beef were an excellent combination  I think next time, though, I'll omit the mustard from the salad dressing.

Monday, 30 June 2014

Growing African Violets From Leaf Cuttings


One of the things I love about plants is that, once you now how to propagate them, you can have an abundance of them for very little money.  

My fella teases me about it, but I almost never go anywhere without several small ziploc bags, a small pair of scissors, and a jack knife in my pocket.  I use them to gather seeds and take cuttings.  Over the years, this habit has provided me a lot of plants, including an assortment of very pretty African violets.

I've been given a few African violets as gifts over the years but I don't think I've ever purchased one myself.  If I come across a plant I admire, I ask permission to snip a leaf or two and then I bring them home and grow plants of my own.

As plants from cuttings go, I've doubt I've encountered any easier to grow than African violets.   My success rate with these cuttings is 80% or more.  If you'd like to give it a try, here's how to do it:

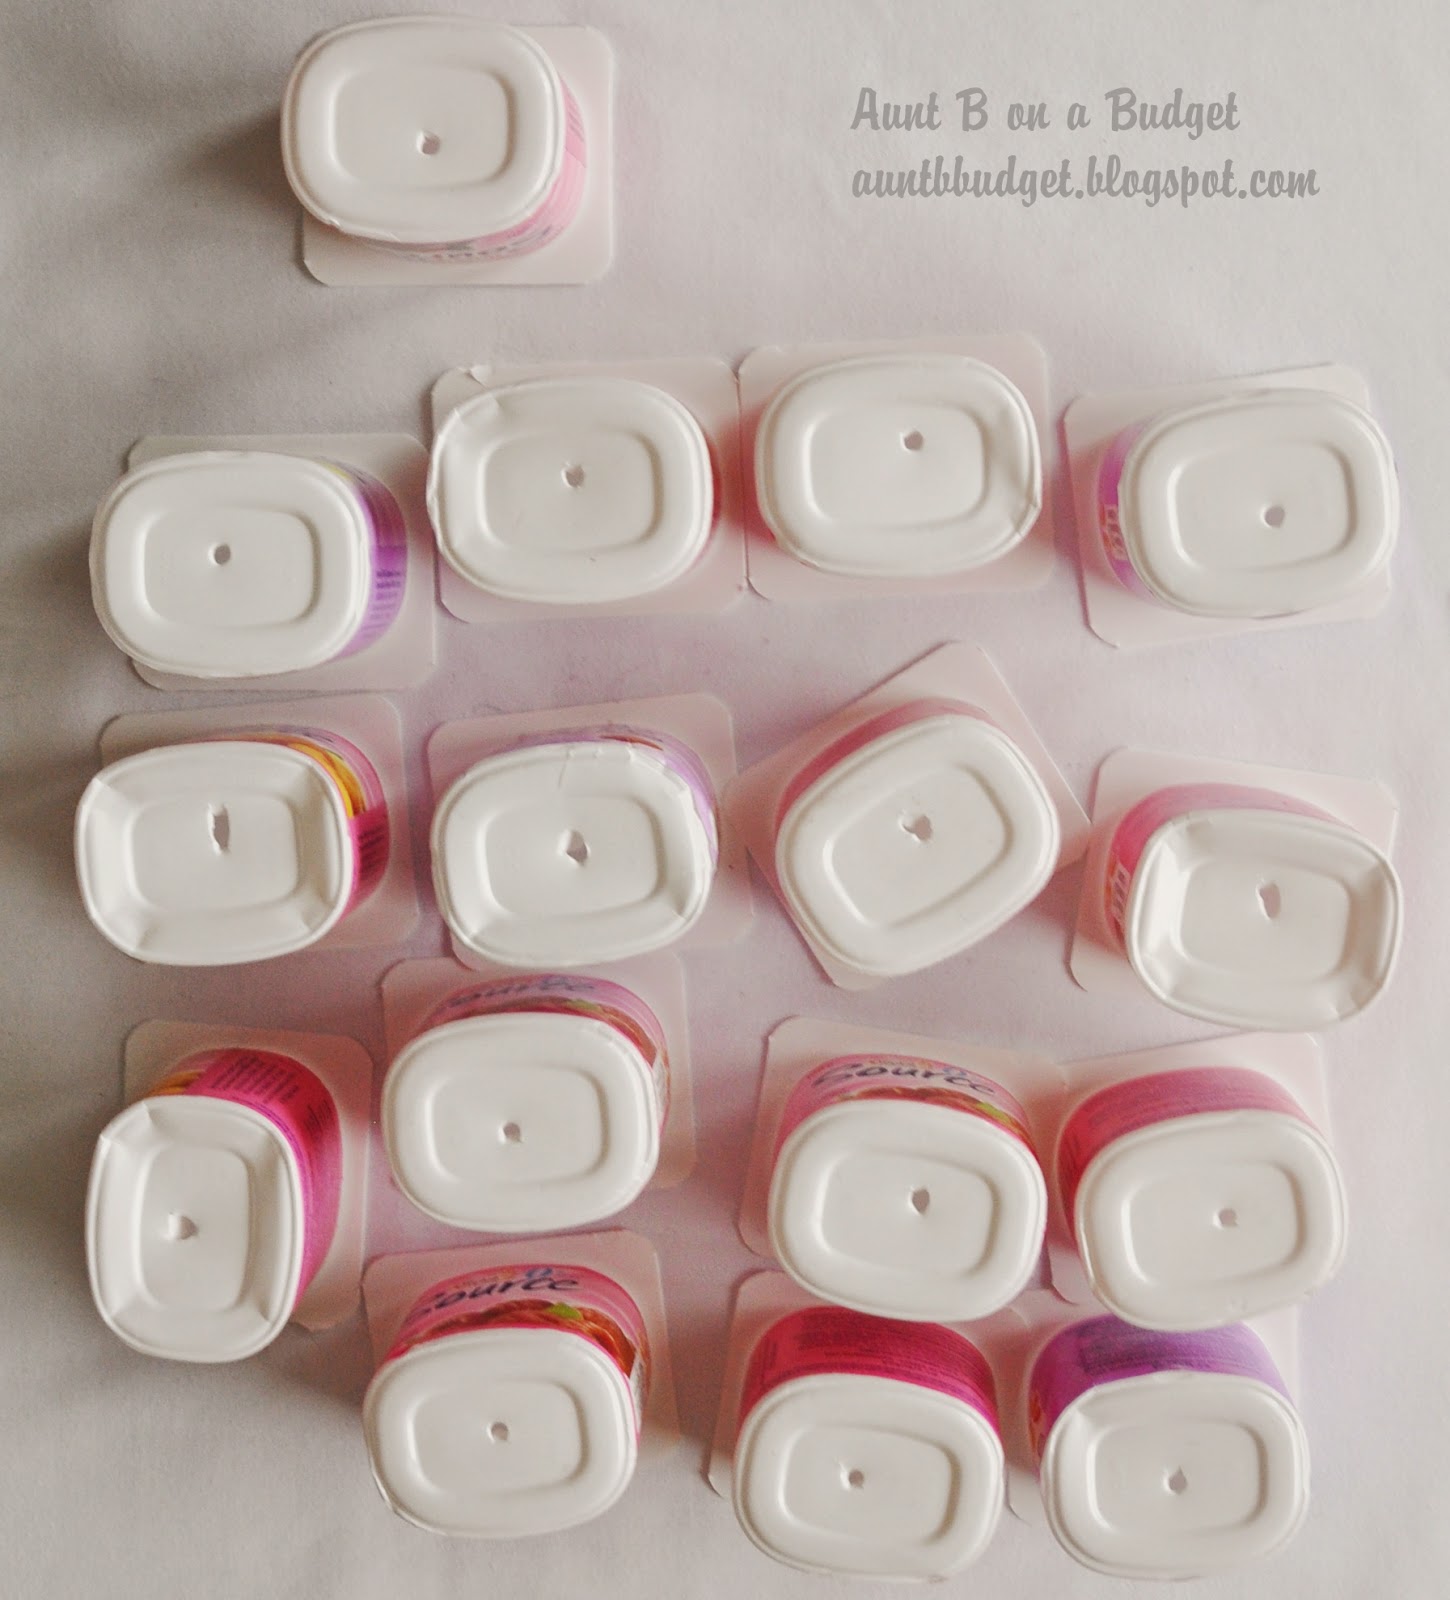
Prepare pots for your cuttings.  I use clean single serving yogurt cups with a hole poked in the bottom.


Fill the pots with African violet potting soil.  Several companies make specialized blends formulated for this plant's specific needs. They're available at most garden centres.  

The soil should be quite loose within the pots. Don't tamp it down.

Put the pots on a tray that is deep enough to hold at least half an inch of water.  I use an old baking sheet.


Trim some leaves from the outer edges of mature African violet plants.  Choose the leaves with the longest stems and cut them with sharp scissors as near the base of the stem as you can. Stick the stems of the leaves into the soil in your prepared pots.


Place the pots where they'll receive bright indirect light and water them as needed. 

Soon you'll see small leaves appear at the base of the leaf you planted.  


Sometimes just a single leaf will appear.  Sometimes, they sprout up in bunches.  It really depends upon the variety of African violet you're working with.  

Let your leaf cuttings continue to grow in the small pots you started them in until they've formed a plant with multiple leaves and an established root system.  Once they've done that, transplant them into larger pots.

Here are a few tips that will help you with starting African violets from leaf cuttings:

  • You can start your cuttings at any time of year but they'll root more quickly when the daylight hours are longer.
  • Light does make a difference.  I start my plants on a table by an east facing window, where they receive direct light in the early morning and bright, indirect light the rest of the day.  
  • Always water your African violets from the bottom, pouring water into a saucer or tray beneath the pot rather than onto the soil around the plant.  If the violets' leaves get water on them, they'll turn brown.
  • Don't over-water your plants even when they're just starting. Let the surface of the soil dry between waterings and when you do water, allow the soil to moisten all the way through before emptying any excess water from the saucer or tray beneath the pot.  Don't leave the pots standing in water after the soil is moistened.

And that's pretty much it, really.

I have a sort of African violet assembly line going on at my house.  Every time I pot up a plant I've started from a leaf cutting, I start another cutting in the empty pot.  It provides me a nearly continuous supply of small plants.

I pot my African violets in all sorts of containers that I find in thrift shops - tea cups, tea pots and sugar bowls without lids, small pitchers, bowls, pretty tins - whatever takes my fancy.  


My fella drills holes in the bottoms of the containers for me, using a diamond bit on a Dremel tool.  I set the containers in thrift store coasters or saucers,or in plastic containers I salvage from the recycling bin.

My whimsical thrift shop containers with their pretty plants make lovely small gifts.  They're frugal to give, you can choose a container with its intended recipient in mind, and if you wrap the gift in some clear cello tied up with a ribbon or even some jute twine, they make a pretty presentation.  


I'm not usually a Christmas in July person, but this gift is an exception to that rule.  Plants from cuttings do take some time to grow, so advance planning is required. If you start African violet leaf cuttings now, though, they should be ready for gift giving in December.


Thursday, 26 June 2014

Scrambled Eggs With Green Onions On Bacon Cheddar Biscuits


We're trying to trim back the food budget.

It's not easy. Food prices are rising crazily.  

When planning frugal meals, eggs are often the protein I choose to put on our plates.  The local, free range eggs I cook with cost $4.50/dozen; good value for the money. 

I'm cooking for just the two of us and we usually eat two eggs each, so a dozen eggs yields us three main dishes.  In my world, a main dish protein for two that costs just $1.50 is considered mighty budget friendly.

Bacon ends are another frugal ingredient. The raggedy, un-pretty bits left over when a deli or meat market is done slicing a side of bacon for sale, they are usually a better quality bacon than the vacuum packed stuff you find at the grocery store. If I chop up bacon ends, cook them, and then stir them through soups, casseroles, or baking, it takes only a small amount of meat to lend a nice, smokey flavour to the entire dish.

This meal, most often served for supper at our house, is built around both eggs and bacon ends.  It'll fill you up and it'll make you smile; Comfort food at its best.

To make scrambled eggs with green onions on bacon cheddar biscuits, you'll need:


  • 4 cups all purpose flour
  • 2 Tablespoons baking powder
  • 1/4 cup chilled butter, cut into pieces
  • 1-1/2 to 2 cups of shredded sharp cheddar
  • 1/2 pound good quality bacon ends, diced, cooked until crispy, and cooled
  • 1-1/2 cups milk
  • 4 eggs (Can you believe I forgot to include them in the photo?  Oops!)
  • 1 Tablespoon cold water
  • 1/2 cup sliced green onion (scallion)

Sift together the flour, and baking powder.

Add the butter pieces.  Use your fingers to work the butter into the flour, rubbing the butter pieces between your index finger and thumb to break it down into pieces about the size and shape of cornflakes.

Add in the shredded cheddar and bacon, and toss to distribute them throughout the flour mixture.


Make a well in the centre of the flour mixture.

Pour the milk into the well.  Use a wooden spoon to stir the milk into the dry ingredients, then work the dough in the bowl, with your hands, just until it holds together.


Turn the dough out onto your board and knead it just to incorporate any dry bits.  Work it as little as you possibly can: You want to keep those butter pieces intact within the dough.

Once the dough holds together, roll it or press it out to 1 inch thick.  You can use a biscuit cutter to portion the dough, or do as I do and simply cut it into squares.

I chose to make six very large biscuits this time but I'll often make twelve or even sixteen biscuits from this recipe.


Place the biscuits on a parchment lined baking sheet, then brush the top of each biscuit with a little milk.

Bake the biscuits on the middle rack of your oven, at 400F, for about 25 minutes, until the tops are browned and the middles set. 


The biscuits will rise, and if the butter remained intact within the dough, they'll have lots of flaky layers.


When the biscuits are within a couple of minutes of coming out of the oven, scramble your eggs.  

Have you noticed the amount of discussion on line lately about the best way to scramble eggs? Folks seem to have strong opinions on the subject! Here's how I make mine:

Crack the eggs into a bowl, add a little cold water (maybe 1 Tablespoon for every two eggs).  Whisk them until the whites and yolks are very well combined, the eggs have lightened a little in colour, and there are some foamy bubbles on the surface of the whisked eggs.


Heat a non-stick pan or a well seasoned cast iron pan over medium heat, then pour in the eggs.  

Sprinkle the green onions (scallions) over the eggs in the pan and stir the eggs gently until they begin to set.


We like our scrambled eggs quite soft.  They continue to cook after the pan has been removed from the heat (they did so even in the short time it took me to snap this photo) and I'd rather err on the side of under-cooking them than overcooking them.

Once the eggs are done, split the biscuits and spoon the scrambled eggs over them.  (I used a single biscuit for our supper, one half for each of us, and put the rest of the batch in the freezer.)  Serve this dish immediately, while it's still piping hot.