Friday, 3 June 2016

Refresh You Clothes and Reduce Your Ironing


Every fall, I pack my summer clothes into Rubbermaid bins and store them away in my storage locker, down in the basement of my apartment building. They stay there for almost 9 months before warm weather encourages me to bring them out again. 

The bins do a great job of keeping my clothes clean, dry, and moth free but, when I unpack them, my clothes come out smelling not bad exactly, but storage-y: kind of musty and not fresh.  Also, because I pack the totes tightly, everything ends up creased and wrinkled.  

On the scale of domestic challenges, I figure this barely registers at all but, still, getting those clothes ready to wear does make for a tedious chore. In past years I've re-laundered all my clothes after taking them out of storage, and then ironed them all before putting them away in my dressers and closet.  It was a lot of work. This year I wanted to simplify the process.  

I'd washed them before storing them in the bins, so my clothes were already clean. I decided to try a little experiment.  Instead of laundering them again, I hung a few of my T-shirts on hangers along the shower curtain rod in the bathroom and used a spray bottle to dampen them all over with water.  After that,I did nothing at all but leave them alone until they were dry.

The photo above shows the results.  It worked very well.  Not only did my T-shirts regain their freshness, but most of the wrinkles relaxed right out of the fabric.  They weren't perfectly smooth like they'd be if I ironed them but, hey, they're T-shirts.  The results were good enough that I'd wear them without pressing them first.

I repeated the hanging/spraying/drying process with the rest of the clothing from my bins and the results were good throughout.  I still chose to press some of the dressier items but, having removed so many of the wrinkles from the fabric before I ironed, the job went much more quickly than it would have with clothing straight from storage.

So there you have it:  Simple, work saving, and free. Housekeeping tasks don't get much better than that.

Tuesday, 31 May 2016

Busy Night Eggs


I'm sure that I've mentioned before how much I enjoy the "What's for Dinner" conversation at CanadianBudgetBinder on Facebook. It's always lively, in part because there's a new question to discuss each day.  

Recently, the "What's for Dinner" discussion was about our go-to dishes for busy nights.  Eggs immediately sprang to mind. They're wonderful things to have in the fridge:  Quick to cook, nutritious, and inexpensive. They're versatile too.  A little imagination is all it takes to cook up something really quite wonderful.

There are some egg dishes show up on my table with great regularity.  Busy Night Eggs are one of them. Busy Night Eggs are changeable things:  Based on what I have on hand and different almost every time. They all have one thing in common though: They're all made with Spike seasoning.* 

Spike's been around for a long time. I first learned about it in my maternal grandmother's kitchen.  It remains one of my very favourite ways to season eggs.  

Spike contains no chemical additives to keep it from clumping so you'll need to use a table knife to give it a good stir in the jar each time you use it. It's worth the effort.

Here's the version of Busy Night Eggs I'll be eating for supper tonight.  For each serving you'll need:

  • 1 Tbsp. of oil, or butter, or other fat (I'll be using pork fat I rendered myself, from a whole pork leg.)
  • 1/2 cup cubed cooked potato
  • 1 thinly sliced green onion (scallion), divided
  • 1 tomato, seeded and diced
  • Spike seasoning
  • 2 eggs, beaten
  • black pepper
  • Grated cheese (I used manchego but whatever you have on hand will do)
Melt the pork fat in a frying pan over medium high heat, then add in the potato and the white (root) part of the green onion.  Don't rush the cooking of these.  Let them sit until they take on a little colour, then stir and let them sit again, repeating the process until they're nicely browned.

Add in the tomato and a generous amount of Spike. Continue cooking and stirring until the tomato is heated through and softens up a bit.  It won't take long.

Add in the beaten eggs and move them around in the pan until they start to set up, forming soft curds.  Take the eggs off the heat while they're slightly undercooked.  They'll continue carry over cooking on the plate, and you don't want them to be dry.

Season the cooked eggs to taste with freshly cracked black pepper, then grate some cheese over top of the dish. Garnish with the chopped green tops of the scallions.  

Easy Peasy, right? Enjoy!  


*I am not being paid or provided with promotional considerations by the company that makes Spike.  I've included it in this recipe because I really like it a lot.  I think you will too.

Thursday, 21 April 2016

Tandoori Cod


Tandoori Cod combines a very Indian flavour - tandoori masala - with a very North American ingredient:  Pacific cod. Like most of my meals these days, it's easy to prepare and quick to cook. 

I use a store-bought, pre-made curry paste to season this dish. I want you to know that the company who makes it (Patak's) didn't sponsor my post, nor will I receive any payment or promotional goods in return for sharing it with you.  I just really like their product a lot.

Around here, Patak's tandoori paste can be found in the "ethnic foods" aisle of most grocery stores. If you can't find it where you live, you can still enjoy this wonderful flavour by making a dry spice mix yourself from Ruchi's Kitchen recipe for Tandoori Masala.

For each serving of Tandoori Cod you wish to make, you'll need

  • 1-1/2 Tablespoons Patak's Tandoori Paste or homemade dry tandoori masala and a little cooking oil
  • 1-1/2 Tablespoons plain Greek yogurt
  • 1 cod fillet, skin removed


Mix together the tandoori paste and yogurt, stirring until well combined.

If  you're using the dry spice mix linked above instead of tandoori paste, mix it into the Greek yogurt a little at a time, tasting as you go, until it reaches a level of flavour that suits your taste. (I would use about 2 teaspoons, or maybe a little more, for each 1-1/2 Tablespoons of yogurt.)

Place the cod fillet on a baking sheet that has been brushed with oil, then spoon the seasoned yogurt over the top of the fillet.

Bake the fish at 400F until it's almost opaque - in my oven that takes about 15 minutes - then put it under the broiler for just long enough to give the topping some colour, maybe 3 to 5 minutes more. Watch it like a hawk and take care not to overcook the fish.  It should be opaque and should break apart easily with a fork, but you don't want it to taste overcooked and dry..

I served this over a bed of mixed greens but a more traditional accompaniment would be basmati rice, a cooked vegetable dish of some sort and a chutney.  Any way you choose to serve it, it's delicious.

Related post:  Making Yogurt in a Thermos

Thursday, 14 April 2016

ReVision: Making the Most of Thrift Shop Fabric Finds

Home sewing used to be commonplace. Before we could simply pop down to the store and buy things it was the way we provided our families with clothing and household linens. Even after retail goods became accessible, it remained the frugal and practical choice for a very long time.  Home sewn clothing and linens were less expensive than those made commercially.

That is not the case any more.  Store bought clothing has become so inexpensive that it is now considered by many to be an almost disposable item, while fabrics, patterns, and sewing notions have steadily increased in price.  Fewer and fewer people are learning to sew. What was once an essential life skill has now become a luxury pastime.


I like to sew - a lot - but I'm on a very tight budget.  I'm also very mindful of the environmental and social costs of all of this "throw away" clothing so, for me, the best way to satisfy both my desire to continue sewing and my wish to reduce waste is to make my projects from fabric sourced at thrift shops.  

Here are a few of the fabric items I buy at thrift shops, together with some suggestions on how they can be used:

  • Sheets and pillowcases.  These are my favourites.  They come in all sorts of nifty prints and they provide a lot of fabric for very little money.  One full sheet will provide enough fabric to make a dress for an adult, or a lining for a jacket, a backing for a quilt, the fronts for three or four baby blankets, or numerous children's garments.  A single pillowcase will make an adult sized skirt, or an apron, or a small child's dress, or a shopping bag, or a couple of tea cozies.
  • Towels.  Frayed or faded towels are still useful.  They make excellent filling layers for pot holders, oven mitts, hot pads for the table, ironing board covers, and hot water bottle cozies. Towels in good condition can be used to make bath robes, bed pads, bibs, or hooded towels for babies.
  • Jeans.  Denim is super durable, easy to work with, and fashionable.  The upcycling possibilities are endless. There are far too many to list here but if you pop over to Pinterest and do a search, I'm sure you'll find projects enough to last a lifetime.
  • Pure wool items.  Look for coats, suits, blankets, and sweaters. I felt (shrink and thicken) almost all of the pure wool items I find.  Felted wool can be used to make new garments, handbags, slippers, tea cozies, mitts, children's toys, table pads, place mats, and rugs.
  • Linen.  It's getting harder to find pure linen these days because it's less commonly used for household items than it once was. If you find good quality linen intact, you've found a treasure.  If it's stained or has small holes in it, buy it anyway.  You can still use it.  I often use linens just as they were originally intended - sheets table linens, and runners - but I also make them into summer garments and christening gowns.  If they're damaged or stained beyond repair, I'll dye them or tea stain them and then salvage the usable pieces to make baby clothes, or cushions, or to use in piecework.
  • Hand embroidered and crocheted goods.  Knowing as I do how much labour goes into making them, it always makes me a little sad to see these items in a thrift shop. Saving them makes me feel like a superhero.  :)   I use even the stained and torn ones, incorporating the usable parts into baby dresses, baby blankets, cushions, and piecework.
  • Knitwear.  Thrift shops are full of commercially made sweaters that are in good condition but no longer fashionable.  Don't be afraid to buy them and cut them up.  They can be made into hats, scarves, mitts, arm warmers or leg warmers, and restyled into vests or incorporated into new sweaters or coats.  They can also be used to make tea cozies and mug cozies.


Once you've purchased your thrift store fabrics, you need to prepare them for use.  Because bed bugs are becoming increasingly common, I keep a box of black trash bags in my car trunk.  Before I carry my thrifted items home, I transfer them directly into a trash bag and knot it tightly shut.  From there, you have a variety of options:

  • You can leave them in the tightly knotted trash bag for 6 weeks or so to ensure that whatever might be on the fabric has suffocated.
  • You can wash them in hot water and dry them on your dryer's hottest setting.  This is the option I most frequently choose.  It ensures that the fabrics are clean and that my finished product can be safely laundered. Fabrics that don't survive the laundering process can be used to stuff pillows or toys, or they can be dropped off at many recycling depots.
  • You can pack them in individual plastic bags and put them in the freezer for 3 weeks.  This may seem very odd, but there are some things that do need this special care.  I recently bought a length of beautiful silk at the thrift store.  It would never have withstood the hot wash/hot dry treatment I give most of my fabrics.  Putting it in the freezer is a gentle way to kill any critters that might be lurking within its folds, and faster than the black plastic trash bag method.
  • It's important to note that if you use either the knotted trash bag method or the freezer bag method, your fabrics will still need to be washed and dried before you use them.  Hand washing and line drying are fine.

If you're like me and buy a lot of materials, you'll need to sort them once you've prepared them for use.  I store mine in plastic totes that are labeled by material type.  This keeps like materials grouped together, keeps them dust free, and makes them easy to find.

Now that I've learned to source and prepare thrift shop fabrics, I can sew to my heart's content.  The biggest challenge now is to find projects for all the material I have on hand.  ;)  Care to share suggestions for upcycling projects in the comments?  I'd love to hear from you.


Thursday, 7 April 2016

22 Recipes: Warm Desserts and Hot Drinks

My Facebook friend TC recently sent the following question:

It's autumn and cold in South Africa. Do you have any easy and budget friendly hot dessert recipes for the cold please?

In response to TC's question, I've gathered together some recipes of mine, and some belonging to other bloggers. I've tested them all, and found them all to be delicious.  (Tough job, but someone has to do it.  lol!)  I hope that TC, and you, will enjoy them too.


A Word from Aunt B:
Christmas Crisp


A Word From Aunt B:
Jack's Favourite Coffee Cake


A Word From Aunt B:
Gingerbread with Lemon Sauce


A Word From Aunt B:


A Word From Aunt B:
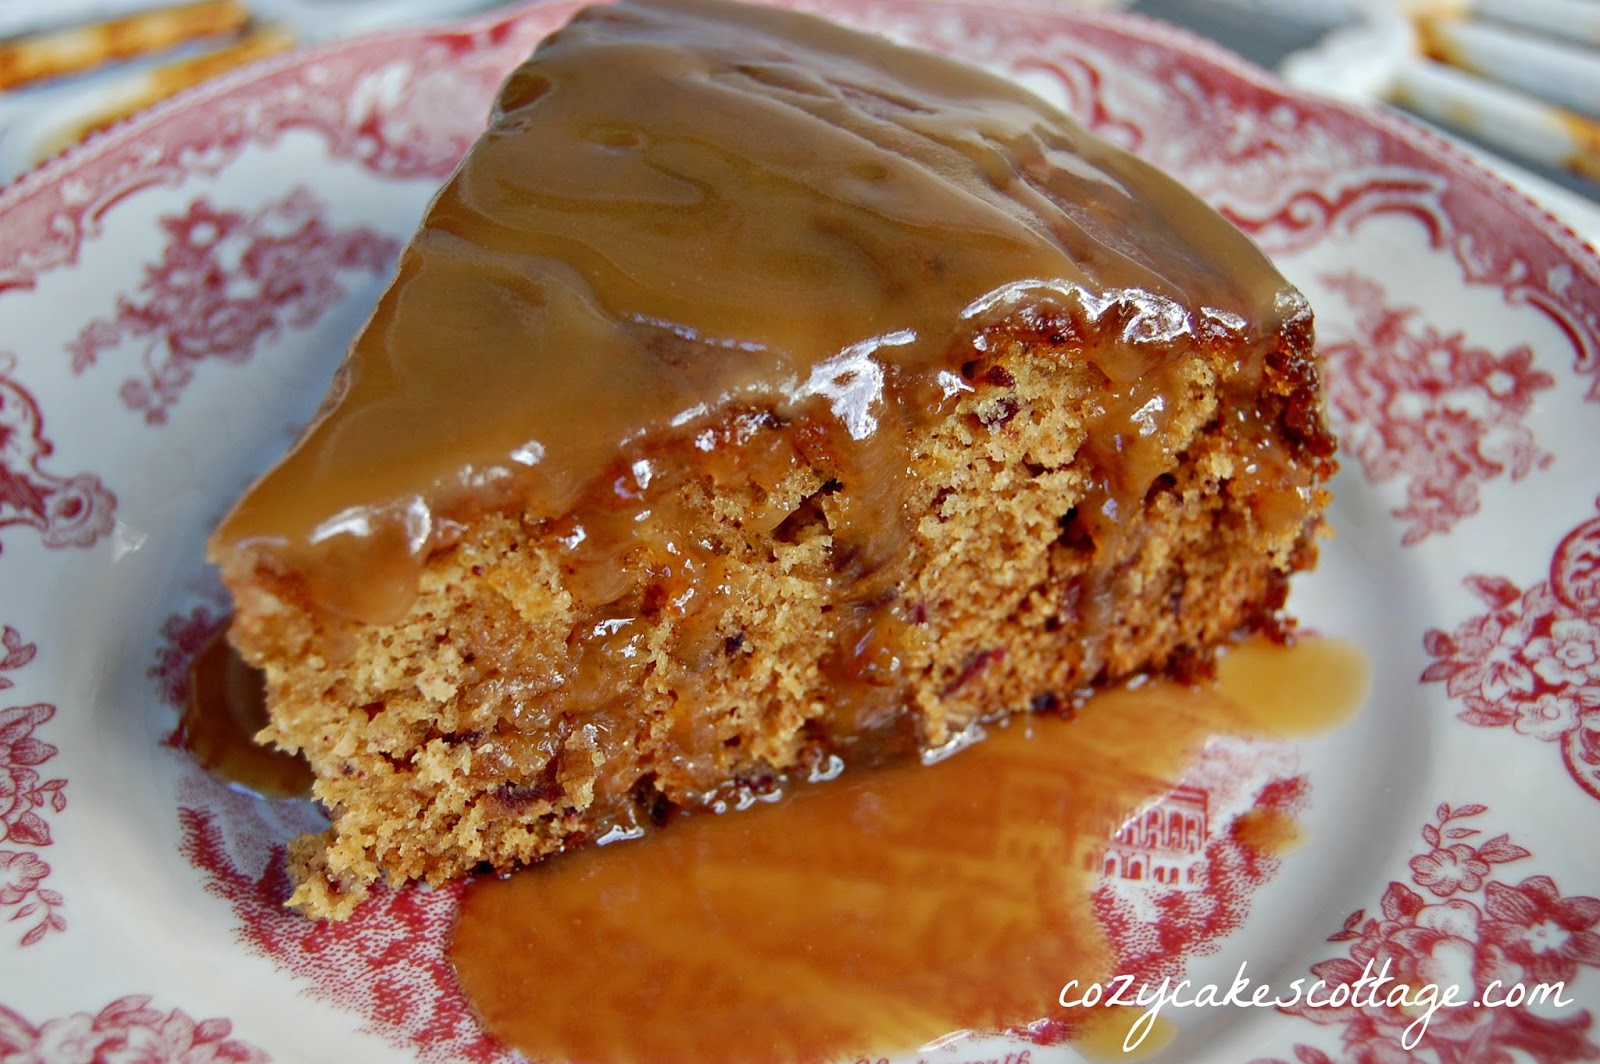
Date and Nut Pudding Cake


Aunt B on a Budget:


Aunt B on a Budget:


Cozycakes Cottage:


Cozycakes Cottage:


Pastry Chef On Line:


ChinDeep:


Tomatoes on the Vine:


Tomatoes on the Vine:


April J. Harris of the 21st Century Housewife:


April J. Harris of the 21st Century Housewife:


April J. Harris of the 21st Century Housewife:


Premeditated Leftovers:


Meal Planning Maven:


Meal Planning Maven:


ChinDeep:


ChinDeep:


Premeditated Leftovers:


Monday, 21 March 2016

Carbonara's Cousin


Do any of you follow Canadian Budget Binder on Facebook?  Mr. CBB hosts one of my favourite "What's for Dinner" threads. Each evening's post includes a fan question and lots of lively discussion.

A recent fan question in the CBB thread asked what our go-to pasta dish was.  Spaghetti alla Carbonara sprang immediately to my mind and, quite coincidentally, I'd planned to make a carbonara-style pasta for supper that very evening.

This is the recipe for that dish. I call it Carbonara's Cousin because, unlike a true Carbonara, it's made without meat and topped with cooked vegetables.  It's super quick to make, and inexpensive too. 

Like many of my meals, it came about as a means of making use of what I had on hand at the time; in this case some leftover cooked broccoli florets and a very ripe tomato I found that day on the discounted produce cart at the grocery store. Roasting the tomato and seasoning the dish simply but generously turned the meal into something quite wonderful.

I cook just for myself these days, often making only a single portion at a time. The quantities in this recipe are for a single serving but can be easily increased. Simply multiply the quantities given below by the number of people you wish to serve.

To make Carbonara's Cousin, you'll need:

  • A single-serving quantity of spaghetti or other dry pasta.  I used brown rice spaghetti and portioned it by using the amount of uncooked pasta that would fit in a circle about the size of a quarter.
  • 1/2 cup small, steamed broccoli florets
  • 1 medium sized tomato
  • 1 Tbsp. olive oil
  • Freshly ground pepper to taste
  • Salt
  • 1 extra large egg
  • 1/4 cup finely shredded parmesan cheese
  • More freshly cracked black pepper to taste (I like lots)


Begin by putting a large pot of water on to boil and setting your oven to 400F.

If your broccoli is not already cooked, you can steam it to tender crisp while the pasta water is heating. You should also cut your tomato into wedges, remove the seeds, then cut the wedges into a large-ish dice.  Put the tomato pieces on a parchment lined baking sheet, drizzle them with olive oil, then season them with salt and freshly cracked black pepper.

When the oven reaches 400F, put your tomatoes in to roast. They'll need at least 15 minutes.

When the water comes to a boil and the pasta cooking time coincides with finishing the tomatoes (check the package cooking instructions to calculate this), season the water liberally with salt and add the pasta to the pot.

In a bowl large enough to accommodate your cooked, drained pasta, beat together the egg, shredded parmesan, and a generous quantity of freshly grated black pepper.

Pop the broccoli into the microwave to reheat for a few seconds once the pasta and tomato are both cooked. 

Scoop out some of the pasta cooking water and set it aside then drain the pasta.  

Transfer the drained pasta to the bowl containing the egg mixture and toss it until the pasta is coated and the egg heated through.  If you need it to make the mixture creamier or to help cook the egg, you can add a little of the pasta water.  Use your own judgement about this.

Transfer the pasta in its eggy sauce to a serving dish and top it with the cooked broccoli and tomato. Serve immediately.


Wednesday, 3 December 2014

Pork and Ale Stew With Cornbread Dumplings


Have you noticed the price of meat lately?  Jeez Louise it's getting expensive!  It's sure brought about some changes in how we eat at our house.  

Less and less meat is making its way to our dinner table and, when it does, we're apt to stretch it out with lots of veggies to make it go further.  We also find ourselves eating more pork because it is much less expensive to buy than beef.  

When we do buy meat, we often buy large cuts and then break them down into smaller portions ourselves.  Whole boneless pork loins from Costco are good for this.  The price per pound is more reasonable than that of many other cuts of meat and, because they're very well trimmed, there's almost no waste.  There is, however, a section of the pork loin that is much darker meat than the rest, and has some gristle running through it.  I trim that portion into stew meat and use it in braising recipes.  It formed the basis for this stew.

You'll notice that I used beer in this recipe  Although we don't drink beer, I do enjoy cooking with it.  It's not as inexpensive as stock or water, but worth the investment because of the flavour it brings to the dish.  I keep the cost down as much as possible by buying beer from the single bottle rack, where bottles salvaged from broken cases are sold at a reduced price.

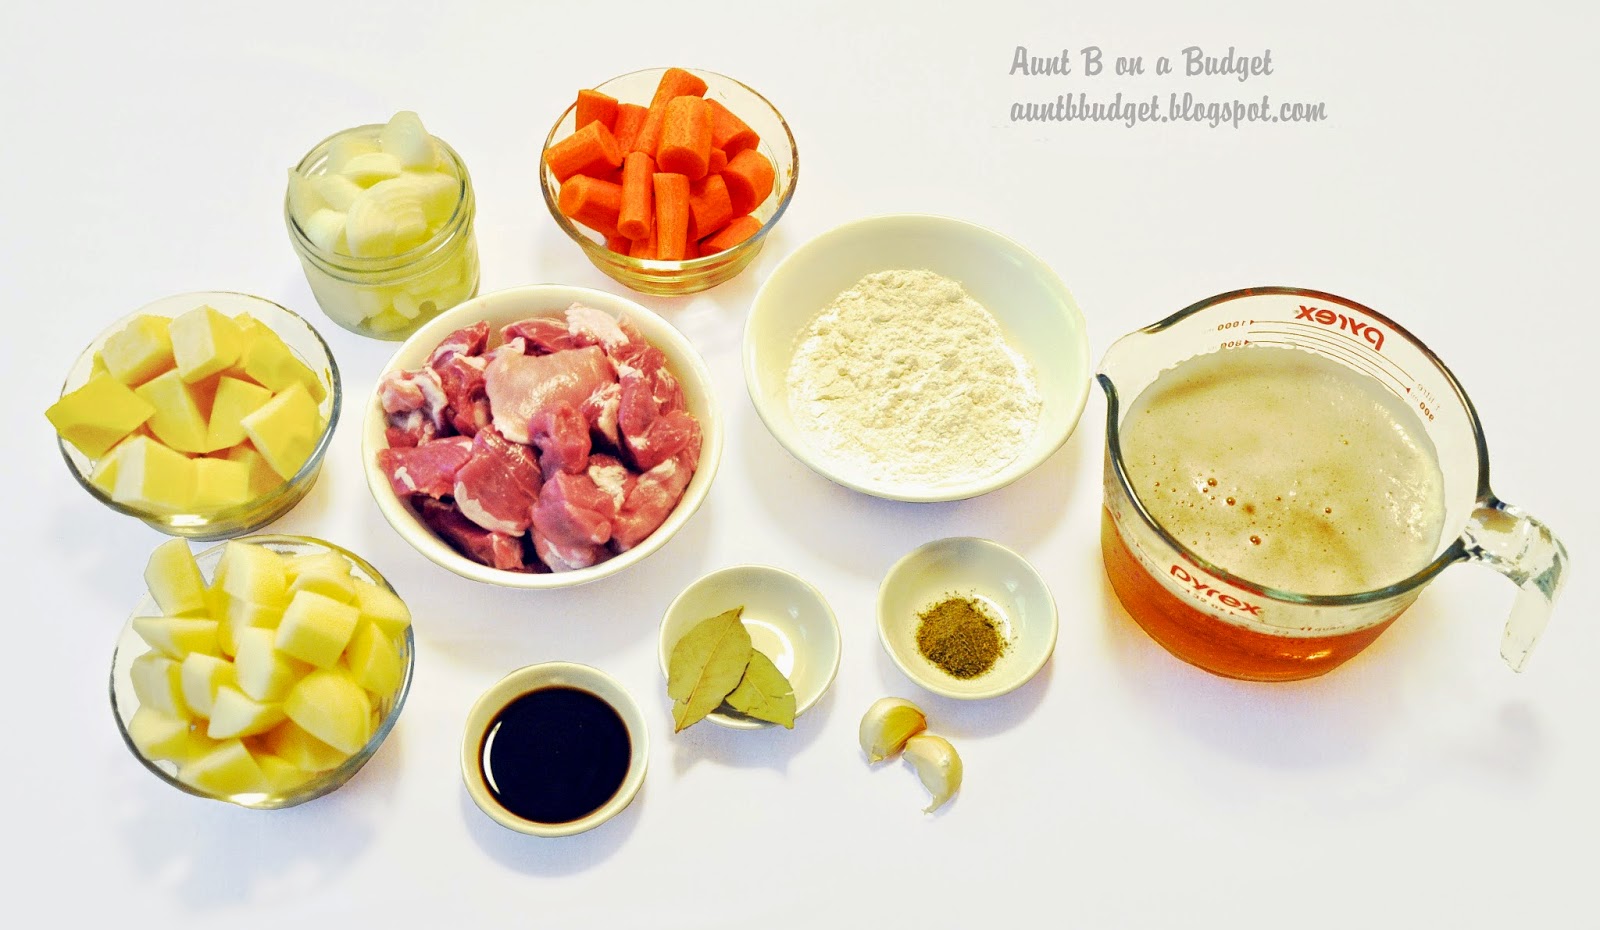
Here are the ingredients for the stew:


  • 1-1/2 pounds cubed pork loin
  • 1-1/2 cups all purpose flour
  • 1 teaspoon poultry seasoning
  • salt and pepper to taste (Be really generous.  Not all of it is going to end up on the meat and you want a good flavour base.)
  • 2 to 4 Tablespoons of bacon fat (or cooking oil if you prefer)
  • Boiling water
  • 3 cups of pale ale (I've used darker beers for this too but wouldn't go much darker than an amber because of the delicate flavour of the pork)
  • 2 cloves of garlic
  • 1-1/2 to 2 cups each of onions, carrots, rutabaga (yellow turnip), and potatoes, cut in a 1-inch dice* 
  • 1 Tablespoon Worcestershire sauce
  • 2 bay leaves
  • 1 to 2 Tablespoons cornstarch (optional)


To make the dumplings, you'll need:


  • 3/4 cup cornmeal
  • 1 398 ml/14 ounce tin of creamed corn
  • 1/4 cup sunflower oil
  • 1 egg
  • 1 cup all purpose flour
  • 3-1/2 teaspoons baking powder
  • 1 teaspoon of salt
  • 1/2 cup chopped green onions
  • 1 or 2 finely diced jalapeno peppers (optional)

Begin by dredging the pork in seasoned flour.  I do this by pouring the flour, poultry seasoning, salt and pepper into a large brown paper bag and giving it a good shake to mix it up. Once the flour is seasoned, I add in the pork pieces and give the bag another good shake.  I transfer the dredged pork onto a plate, shaking any excess flour back into the bag.

Once the pork is dredged, melt the bacon fat in a large Dutch oven and begin searing the meat.  Work in stages, browning a few pieces at a time, being careful not to overcrowd the pan.  


The seared pork should be golden brown and have a crisp coating that resembles the outside of a piece of fried chicken.


When the meat has all been browned, return it to the pan and pour the beer over it.  Stand back when you do this:  The beer will bubble up and spit a bit as it hits the hot pan.


Add in all of the remaining ingredients, together with just enough boiling water to bring the liquid level high enough to almost cover the meat.

Bring the pot to a boil, then turn the heat down to a low boil - just a little above a simmer. 


Cover the pot and leave the stew to cook for about an hour. You'll need to stir it now and again to ensure that everything cooks evenly.

When the stew has cooked for about an hour, it's time to make the dumplings.  

Begin by stirring together the creamed corn and cornmeal.  

Beat the egg and add it to the cornmeal mixture, along with the oil. Stir until well combined.

In a separate bowl, whisk together the flour, baking soda, and salt. 

Add in the chopped green onions, and the jalapeno if you're using it, and toss them through the flour mixture so that they're lightly coated.

Add the flour mixture to the cornmeal mixture and stir just until the dry ingredients have been moistened.  The batter will be lumpy.


Take a look at the stew and give it a taste.  Adjust the seasoning as needed.  

If the gravy is not as thick as you'd like, you can make a slurry of cornstarch and a little cold water and mix it in. The gravy will thicken as the stew returns to a low boil.


Once the seasoning and thickness of the stew are where you want them to be, spoon dollops of the cornbread batter onto the top of the stew.


Put the lid on the pot and walk away.  Leave it undisturbed for 25 minutes.  Don't lift the lid!  

The cooked dumplings will have increased in size and have a very tender texture.


When the dumplings are cooked, use a slotted spoon to remove them to a plate.  Portion out the stew, then place a dumpling or two on top of each serving.


There will probably be some dumpling batter left over.  I usually pour it into an oven safe casserole dish and bake it at 400F for 20 to 25 minutes, then save it to serve at breakfast the following day.  

This time, because our oven was broken, I cooked it in our microwave, on the high setting, for 5 minutes.  It wasn't as light as it would have been if baked in the oven, but it still made a fine accompaniment to our morning eggs.


Frugal Tips:  

Don't waste even a bit of flavour or nutrition from your vegetables. Scrub your carrots, rutabaga, and potatoes well before peeling them, then peel them directly into your stock pot.  

If you prefer not to put potato peels in your stock, they can be used to make a tasty, crispy snack or garnish.  Keep them in the fridge, covered in cold water, until you're ready to use them. Carefully pat them dry, then fry them in 360F oil until crispy and golden. Use a spider or slotted spoon to scoop the cooked peels from the oil, placing them a paper-towel-lined bowl.  Season them immediately, with salt and pepper, tossing them in the bowl to distribute the seasoning evenly. Add extra flavour with any of the following:  Chili powder, smoked paprika, curry powder, or garam masala.