Showing posts with label frugal living. Show all posts

Friday, 22 April 2022

Keep Lettuce Fresh Longer


In recent conversations, several of my friends have remarked on how much water gets sprayed on lettuce in grocery store produce displays. The lettuce gets so wet that it rots within a couple of days of bringing it home. I know how frustrating that can be so I want to share a simple trick I use to keep lettuce fresh. Stored this way, it lasts days longer.

When I bring lettuce home from the store, I pull it apart, breaking the leaves off from the core and tearing away any discoloured or damaged parts.  I put the leaves in a big bowl and fill the bowl with cold water.  I let the leaves soak for a few minutes, swish them around a bit, lift them out into a strainer, empty the bowl, and rinse it out. I repeat the process twice more so that the lettuce has had three rinses.

After the third rinse, I spread a clean tea towel out on my work surface and lay the leaves out on the towel with some space between them.  If I have more leaves than will fit on a single towel, I lay another towel on top and spread the rest of the leaves on it.  


When the leaves have been spread out on the towel(s), I top them with with another clean towel


then roll the whole bundle up like a jelly roll.


I (usually) put the roll in a homemade drawstring bag made from cotton and lined with ripstop nylon. When I took these photos, my drawstring bag was in use for foraged greens so I used a couple of plastic bags from the produce section. If you're using plastic bags, slip one over each end of the roll, overlapping in the middle but not tightly fastened.


The reason this trick works is that the towels absorb excess water from the leaves and then the leaves take the water back in as needed. 

There's a bonus too:  Once the lettuce is rinsed and wrapped my prep is done so salad making or sandwich assembly take less time.

I hope you give this a try.  It really does work.


*If you use plastic bags to store your lettuce, please wash them and reuse them, or use them to make plarn (plastic yarn for knitting or crocheting), or recycle them after the lettuce is used up. Don't throw them in the garbage.  Mother Nature and I both thank you for being mindful.

Thursday, 31 March 2022

Thankful Thursday: Celebrating An Unexpected Gift


I think Thankful Thursday may be my favourite social media convention. It's wonderful that in the midst of all the noise, and selling, and argument, and time wasting that floods our feeds every day, so many people have decided to pause and say "Hey! Let's share a moment or two of positivity. Let's pause to celebrate the good things in our lives." I love that Thankful Thursday reminds me to pause and appreciate my good fortune in being who I am, where I am, in the circumstances of the moment.

Today, I'm thinking about an unexpected gift that has come into my life because I'm an artist.

There's a reason the term "starving artist" has become such common currency in our culture. Most artists don't earn a living from their art. They take other jobs to put food on the table, and make art in their precious free time because their hearts tell them they must. And because they must make art, artists seek jobs that allow sufficient flexibility of schedule, sufficient free time, and a minimal emotional investment in order to leave them free to pursue their practice. Typically, jobs that provide the freedom to make art don't pay a lot and, thus, artists develop a parallel skill set to their art: They become very proficient at making the most out of what material things they have.

I'm in my 60's now and, looking back, I see that I had no idea about the range of practical skills I'd develop in order to free up time and space in which I could make art. Without realizing it at the time, I have throughout my life made a series of choices to get by on less money in order to have the freedom to make more art and, in order to do that, I've mastered a wide range of skills that help me stretch my budget.

I learned to grow my own food, and to preserve it for the seasons when food is less abundant. I learned to identify and forage for wild foods. Because basic ingredients are often less expensive than prepared foods, I learned to cook from scratch and mastered skills like bread baking and pasta making. I learned about nutrition so I could derive the most benefit from my food growing efforts and grocery shopping bucks.

I learned to sew clothing, to launder it in ways that cost less money and caused the least amount of wear and tear, and I learned how to mend my clothing when it was damaged. I learned to look at second hand clothing as a resource. I learned to see how clothing could be restyled and altered to fit, and how to make other necessary household items from fabric sourced from 2nd hand clothing and linens. I took the lesson of my grandma's church dress to heart, using and repurposing every piece of clothing and household linen until it was completely worn out. As a result, I wear my clothes for years, and often decades. That's taught me to disregard fashion and, instead, to cultivate my own personal style.

I learned to find joy in activities that cost little money. Walking has become a daily habit for me, both in the course of running errands and for pleasure. I learned to seek out and appreciate the extensive network of recreational trails available to me here on the island. I learned to take my foraging bag with me when I walk so that my outings not only feed my spirit but provide me with food and art materials as well. I learned to find joy in choosing day trips over more extensive vacations and in turning picnic meals into a celebration rather than a mere necessity. I learned to love my local public library and how use inter-library loans as a means to access university libraries when not a student. I learned how to host potluck suppers and group trips to beaches and parks.I embraced the pleasures of letter writing.

So, now, here I am: On the young end of old, chronically ill, living alone on a limited income, and equipped with the skills to turn those circumstances into a life in which I not only get by but actually find joy. Rather surprisingly, I've also learned that being good at being broke is a marketable skill.

How could I possibly not be thankful for the life skills being a "starving artist" has given me?

Which brings me full circle to my appreciation of Thankful Thursday. Today, I'm going to pause and appreciate how my need to do something essentially impractical has brought me such a wonderful set of practical skills.

What are you thankful for today?

Friday, 4 March 2022

Seven Budget-Friendly Ways To Stay Fit


When my brother and sister see that I've ventured to write a post about fitness they'll get a good laugh out of it. They're both very athletic and exceptionally fit. I, on the other hand, am the least athletic person I know. I'm clumsy, have a poor sense of balance, and my hand eye coordination is terrible. I'm short and brick shaped. I'm also terribly self conscious about all of that so I have a strong dislike of participating in group fitness activities. 

It's taken me years - decades in fact - to understand that there's a difference between athleticism and fitness, but I do get it now. If I don't keep my muscles strong and maintain some ease of movement, my quality of life will be diminished. I need to be able to lift and stretch and bend and pull and climb stairs and walk with sufficient ease to accomplish the day-to-day activities and chores that will allow me to live independently. That's my fitness goal. Your fitness goals may well be very different from mine but, whatever they may be, they'll be a lot more attainable if you can manage them without straining your budget.

If you're living on a limited income, many fitness activities can seem - and in fact are - unattainable. It's unlikely you'll be able to afford a Nautilus or Peloton or Nordic Track, or to engage in sports that require a lot of specialized equipment, or to pay ongoing fees like lift tickets or gym memberships, so let's focus on what you can do.  Here are seven activities that won't break your budget.

Calisthenics

Calisthenics is a system of repeated movements that use a person's own body weight as a means to improve co-ordination and flexibility and build strength. I'm pretty sure most of us remember them from school gym classes: Push-ups, jumping jacks, sit-ups and the like. They're top of my list because they require no specialized equipment or clothing other than garments loose enough or stretchy enough to allow for ease of movement. If you're doing calisthenics indoors, you don't even need shoes. 

(I do use a yoga mat when doing floor exercises but that's purely optional.)

There are lots of free calisthenics instruction videos on You Tube. If you choose to use them it's a good idea to watch them all the way through a couple of times before trying the exercises yourself. Paying attention to foot placement, body alignment, and breathing can help prevent injury and enable you get the most benefit from your efforts.

Free Access Workout Equipment in Parks

While this isn't available everywhere, many public parks have an area with fitness equipment that can be accessed and used for free. Check your parks authority website to see if this option is available near your home and, before you begin using the equipment, read the posted instructions.

Yoga

Although there's a huge industry built up around yoga clothes and yoga studios, you don't need to buy into it. You don't really need any specialized gear other than a yoga mat. As with calisthenics, your clothes should allow you freedom of movement. If you wear shoes while doing yoga, the soles should be of a kind that will keep your feet from slipping while you're exercising.

There are free yoga videos on YouTube but I opted instead to pay for online instruction. I purchased a couple of courses from Better 5 and found them very helpful.  If you choose to pay for on line instruction, take into account your level of fitness while shopping for something that works for you. It's best to choose a course that will allow unlimited access, without an expiry date. 

(I've mentioned Better 5 because their courses are designed with my age group in mind. The instruction is clear and the pace appropriate to my abilities. I don't receive any commisions or other remuneration from them.)

Stair Climbing

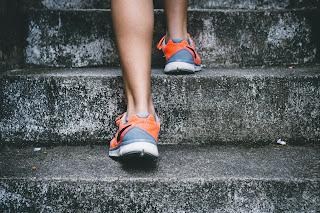
If you live in a multi-story apartment building like I do, stair climbing is always an available activity but even if you don't have access to indoor stairs at home you can find stairs in lots of other places. I seek out outdoor public stairways in hilly areas near where I live. They're often incorporated into paths between residential neighbourhoods, and into park or beach access trails. You can also do your stair climbing in multi-floor public buildings. The only equipment needed is comfortable clothing and suitable shoes.

Walking

Another affordable exercise, walking requires nothing more than comfortable, weather appropriate clothing and some footwear.

If you're making walking a regular part of your fitness routine, I do think you should get the best pair of shoes you can afford because arch supports and good soles can help prevent injury.  I totally get that the best you can afford may be second hand or the least expensive pair from Walmart but, whatever you can manage, it will help if you do your best to ensure a good fit. 

Other items I find helpful in keeping to my walking routine are waterproof shoes for rainy days or muddy trails, (It's a Wet Coast thing. Trails here are muddy for 8 months out of 12.), an umbrella for wet days, a warm hat and gloves for winter weather, a pedometer (basic mechanical pedometers are quite inexpensive), and - if I'm on rough footing - a walking stick. 

(I cut the branch I use for my walking stick from a fallen tree while out hiking one day. I brought it home, removed the bark, and sanded it smooth but it worked perfectly well before I did all that.

If you're going to be hiking alone or going out on a trail that's rough or not often traveled, be sure to let someone know your planned route and arrange a check in time to let them know you've returned safely. Take along a day pack with water, some protein bars (they can be made inexpensively at home) or GORP (Good old raisins and peanuts), a small first aid kit, two days' worth of any meds you require, and one of those lightweight silvery emergency blankets. If you can't afford a day pack and its contents it's best to stick to shorter walks on well trafficked, groomed trails near where you live. 

If you have a smart phone, you can download the free version of the AllTrails app. It's a great resource for finding out about trails near you. Trails are described, mapped, the distance given, altitude changes graphed, and busy times noted. AllTrails can help you make informed choices before trying new routes. 

(As with Better 5, I'm recommending AllTrails because it works well for me. It's not a paid endorsement.)

Community Sports Centers

Even if you pay the full price of admission, community fitness centers and pools are usually less expensive than private gyms and many offer free or subsidized access to people with low incomes. Where I live, that subsidy can include free admission to the pool and gym, and participation in a set number of drop in classes. 

If you're a person who prefers group activities this is an excellent option, well worth checking out.  There's an application process but it's usually pretty straightforward. 

If you receive subsidized access to community sport center facilities and programs, you'll still need to provide some gear. Depending on the activities you choose, you may need a swimsuit and towel, shorts or sweatpants, a t-shirt or sweatshirt, and athletic shoes. 

Cycling

I debated about adding cycling to my list because, if you allow it to be, cycling can be really expensive but with care it's possible to keep the costs in check. A bicycle can be counted as transportation too, especially if your budget doesn't extend to owning a car. 

Begin by learning how to ensure that the bike you buy is a good fit for your height, then shop for a used one. Local buy and sell sites and local sales groups on Facebook are often good sources for affordable used bicycles. 

You'll also need to buy a helmet and a bike lock, and you'll need to replace your helmet if ever it protects you during a fall. Even if there's no visible damage to your helmet, a fall that results in a helmet strike can impair its structure, preventing it from providing adequate protection in future. 

If you balance it against the cost of driving, maintaining, and parking a car, or even the cost of public transit, I think you'll find that an inexpensive used bicycle, together with its helmet and lock, soon pays for itself.


I'm sure there are lots of other activities that could be added to this list. If you have suggestions to share in the comments, I'd love to hear your ideas.

Friday, 12 November 2021

Winning at Dinner

I discovered years ago that sitting down and making a weekly or monthly meal plan doesn't work for me.  I end up buying too much food and then throwing a lot of it away because I don't use it up before it spoils. What does work for me is to make using leftovers into a game. I make a meal with extra portions of the main ingredients and then challenge myself to see how many new dishes I can make from the leftovers in the days that follow.  I call it Winning At Dinner.

I've been posting about Winning At Dinner in my personal feed for a while now and, every time I do that, someone comments that I should be teaching others how to do it. So...Here I am, sharing the idea. 

My thought is that I'll post my week's best series of meals on my Facebook page each Friday and challenge you to share yours in the comments. I'll share the post again each weekday and, when it's time to post the next Winning at Dinner, the person whose comment has garnered the most likes over the course of the week will be announced as winner. There won't be prizes but the bragging rights will be huge.  😉

Here's my Winning at Dinner series for the week:

Day 1: A sheet pan meal of bone-in chicken thighs, cubed acorn squash, and beets, all simply seasoned with salt and coarsely ground black pepper, served with brown rice as a side dish.

Day 2:  A stir fry of onion, carrots, and cabbage in a sauce made from homemade vegetable stock flavoured with a little garlic black bean paste. Once the veggies were tender-crisp I stirred in the meat from one of the chicken thighs, and some canned green beans.  I thickened the sauce with cornstarch, then I served the stir fry over some of the rice from the previous night, reheated in the microwave.

Day 3:  I needed a change from chicken so I had macaroni and tomatoes, with a celery salad.

Day 4: Poulterer's pie: I like a crust on the bottom of my meat pies so I made the pastry from my quiche recipe and used it to form two individual pies in extra large muffin cups. I par-baked the crusts then filled each pie with the meat from a chicken thigh, diced roasted squash and beets, sauteed onion, and the last of the canned green beans, in chicken gravy. (I used a packaged mix.) To encourage the top to brown nicely as the pies baked, I topped each pie with mashed potato brushed with a little melted butter. I had one pie for supper, with coleslaw on the side, and put the second pie in the freezer for another day.

Bonus: I made a soup from homemade vegetable stock, the leftover gravy from the pies, the leftover stirfry cut into smaller pieces, the rest of the leftover roasted squash and beets, finely diced, the meat from two chicken thighs, the last of the brown rice and some poultry seasoning. The soup was divided into three 2-cup portions.  I froze them so I'll have something for lunches or evenings when I don't want to cook.

Please share your best dinner or series of meals in the comments on my Facebook page and then share the heck out of this post so others can like your comment and participate with comments of their own. 

Let the challenge begin!

Thursday, 30 September 2021

Over-Salted Food? Here's What To Do About It


The other day, my friend Donna told me she was mad at herself.  She'd made a huge batch of tomato soup and, because she was really tired, she'd accidentally over-salted it.  We've all done this at one time or another, right?  It's so easy to do: A moment's inattention or a misread recipe and there you are.

The last time I over-salted a batch of soup I went on Pinterest in search of solutions. I found lots of ideas there, some of them quite outlandish. The one that made the most sense to me was adding potatoes, the idea being that the potatoes would absorb some of the extra salt as they cooked. I tried it. Maybe I didn't put in enough potatoes, but the potatoes alone didn't fix the problem. 

If I'm honest, I already knew what needed to be done with the soup, I just didn't want to do it. I could add more ingredients until I arrived at a balance I liked, or I could use that salty soup to season other dishes. I didn't want to be eating soup for days and days so I opted for the second choice.  

I strained out the veggies and refrigerated them then ladled the liquid into small jars and froze it.  

I used the veggies in a cottage pie and, infused into the pie's gravy, their extra salt seasoned the entire dish. It turned out really well.  

Over the following weeks, I used the frozen liquid from the soup to cook rice and to poach chicken.  I used the poaching liquid from the chicken, diluted with some unsalted veggie stock, to make a new soup.

Because I usually don't realize my mistake until after I take them out of the oven, finding a way to use over-salted baked goods can be challenging.

If I've added too much salt to bread or biscuits, I usually reduce them to crumbs in my food processor. I use the crumbs as breading or as a topping for casseroles or gratins.  

If I over-salt a batch of pastry and realize my mistake before I've put it in the oven I'll roll it out into a sheet, dock it, score it into squares, brush it with an egg wash, and bake it without a filling. Because I don't add sugar to my pastry dough, I can either use baked pastry sheet for crackers or, if proves too salty for that, I can process it into crumbs as mentioned above. Unfortunately, if I've made a pie with that pastry before realizing my mistake, the best I can do is save the filling. The crust is, sadly, destined for the compost bin.

If a sweet baked good is too salty I often look to either caramel or chocolate to help restore balance.  I'll portion out some cooked fruit and/or ice cream, top it with a caramel or chocolate sauce, and then crumble my oversalted muffins, cake, or cookies over the dish. 

Dealing with an excess of salt in pie filling or pudding is more problematic. Really, the only thing you can do with the pudding is set it aside, make another - unsalted - batch and mix the two together. 

Salty pie filling is much the same. Scoop it out of the pie crust into a bowl, cook a second batch of pie filling on the stove top with no salt at all, and then mix the two together.  You can use the adjusted filling to make new pies but if you do that, having been cooked twice, the filling will have less texture. I prefer to use the amended pie filling between layers in a cake, or as the fruit layer in a trifle, or to mix it into my breakfast oatmeal over the course of several days. You can also fold it into a muffin batter if you first cut the fruit into smaller pieces.

I hope some of these ideas are helpful to you. I'm always pleased to learn new ways of reducing food waste so if you have a remedy for over-salted food not mentioned here, please feel free to share it in the comments. I'll look forward to reading your suggestions.

What's In A Necktie? Advice on Upcycling


I love Pinterest. It allows me to satisfy my inner hoarder without actually accumulating objects.  lol!  It's also my go-to search engine for creative ideas.

I watch Pinterest for upcycling ideas but I'm afraid that when it comes to upcycling neckties the offerings are rather disappointing.  Almost every project uses the ties in their finished form and, other than joining them together, little alteration is made. Neckties are made up of several layers of fabric and a layer of interfacing, making an assemblage of unaltered ties quite heavy and rather inflexible. 

Neckties are constructed in a standard form, with two or more long narrow pieces of bias cut fabric joined to make a tapered strip between 5-1/2 feet and 6 feet long (168 cm and189 cm) with points at either end. Many ties are narrowest at their mid-point, flaring in both directions, wider at the end that will make the front of the tie and less wide at the other end. The outer fabric of the tie is folded, meeting at the center of the reverse side of the tie and tacked into place with a series of long stitches. 

Good quality ties are usually made from silk, but in some cases also from very fine woven tartan or textured woolen knits. Less expensive ties are often made of polyester. It's best to check the labels before making your purchase, leaving the polyester ties behind for someone else to use.

If you open up a tie along its center seam, you'll find a facing at each pointed end and a woven interfacing in the dimensions of the finished tie laid along the center of the fabric.  The outer fabric is 2-1/2 to 3 times wider than the finished tie. You can see how it has been folded over the interfacing. 


If you remove the facings and interfacing and then press the outer fabric, you end up with a good sized piece of useable, fine quality fabric. 


Because necktie fabric is cut on the bias, double fold bias tape is the easiest way to make use of it, and very practical, too. The lightweight silk used to make neckties is admirably suited for bias tape. The finished tape is very flexible and has enough stretch to form around curved seams without making notches or folds. 

I also piece salvaged necktie fabric into yardages and use them to make linings for jackets and purses.

If you choose to make linings from pieced necktie fabrics, you'll need to allow sufficient yardage to cut your pieces on the straight grain.  The fabric grain crosses the diagonal of necktie fabric pieces as indicated by the ruler in this picture. You'll need to stagger your tie fabric pieces diagonally when assembling them, to accommodate the shapes of the lining pieces you plan to cut.

I hope this post will help you consider neckties in a new way next time you're out thrifting. Silk yardages can be very expensive while neckties can be purchased for a dollar or two at thrift shops. Even though it takes the fabric from several ties to make a metre of lining fabric you will still have spent significantly less than you would buying new fabric, and you'll be giving something once discarded a new lease on life.

If you have any questions about making bias tape or assembling the salvaged fabric into larger pieced yardages, please share them in the comments.  I'll do my best to address them for you in future posts.