
I've received several requests for a beginner’s bread tutorial. I’m happy to oblige.
This is the recipe from which I first learned to bake bread. It’s simple, works for me every single time, and it’s easily amended if you want to add different flavours or textures.
To make basic white bread, you’ll need:


- 2-1/4 cups lukewarm water
- 2 Tablespoons sugar
- 4-1/2 teaspoons (2 envelopes) active dry yeast
- 1/2 cup vegetable oil
- 6-1/2 cups white flour (If you can get it, bread flour, which is higher in gluten than all purpose flour will yield better results. It’s labeled in different ways but is usually described as either strong, hard, high gluten, or bread flour.)
- 2 teaspoons salt
Begin by measuring your water into a large mixing bowl. There’s lots of fuss made in bread recipes about temperature the water should be but, really, it’s very simple to gauge. It should be just slightly warmer than your body temperature. If you’ve ever tested the temperature of a baby bottle, you already know exactly the right temperature for the water used in making bread.
Add the sugar to the water and stir it in until it’s dissolved. You can use regular white sugar, brown sugar, molasses, maple syrup, or honey.
Honey is more intensely sweet tasting than sugar so, if you’re using honey, your bread will be sweeter than if you use the other sweeteners listed here.
Both molasses and honey are hydroscopic, meaning that they draw moisture from the air. If you use either of these sweeteners in your bread it will stay fresh for a longer time under dry conditions. By the same token, if the weather is humid, your bread will mold more quickly if you use honey or molasses in the dough.
Sprinkle the yeast over the top of the water. This is surprisingly important. Don’t just dump the packets or spoonfuls into the water. If you do that, the yeast will clump up, causing it to dissolve less readily.

Let the yeast sit in the water for about 10 minutes, until it dissolves and foams up. It’ll look like this:

When the yeast has dissolved, add in the oil.
I most often use canola oil when baking bread because it’s made here in Canada. Canola oil has a neutral flavour and it’s inexpensive, but you can use whatever oil you prefer. You can also use butter that has been melted and cooled.
Extra virgin olive oil will give the bread a slightly acidic flavour. Butter will give it added richness.
Add in the flour.
This recipe calls for white flour but, after you’ve baked your first successful loaves, you’ll probably want to experiment. You can substitute whole wheat flour for up to half the white flour called for in this recipe. You can also substitute rye flour, oatmeal, or multigrain cereal (Red River or Sunny Boy are good) for up to one third of the white flour.
Pour the salt in on top of the flour. Salt kills yeast so, by cushioning it with the flour, you help to prevent it from inhibiting the rise of your dough.
Never omit the salt. Unsalted bread has an oddly metallic aftertaste.
Never omit the salt. Unsalted bread has an oddly metallic aftertaste.

Stir the mixture together with a wooden spoon until it forms a stiff dough and can’t be easily mixed any further.

Knead the dough in the bowl until it holds together and picks up most of the dry bits of flour remaining in the bowl.

Turn the bread dough out onto the counter and continue kneading it, turning it a quarter turn and re-forming it into a ball every couple of minutes. Continue kneading the dough for about 10 minutes. It will become very elastic. When you poke it lightly with your finger, it should spring back into shape.

Turn the bread dough out onto the counter and continue kneading it, turning it a quarter turn and re-forming it into a ball every couple of minutes. Continue kneading the dough for about 10 minutes. It will become very elastic. When you poke it lightly with your finger, it should spring back into shape.
(If you’re mixing your bread in a stand mixer, use the dough hook. Add the ingredients in the order listed, and mix the dough for 5 to 10 minutes. Test for consistency the same way you would if hand mixing.)
Once the dough has been kneaded, wash out the mixing bowl and then coat the inside of the bowl with a light film of oil.
Put the dough into the bowl and turn it so that all sides of the dough have been coated with oil.

Cover the dough loosely with a piece of waxed paper or a moist tea towel and allow it to rest in a warm place for about an hour and a half.

It should double in size.

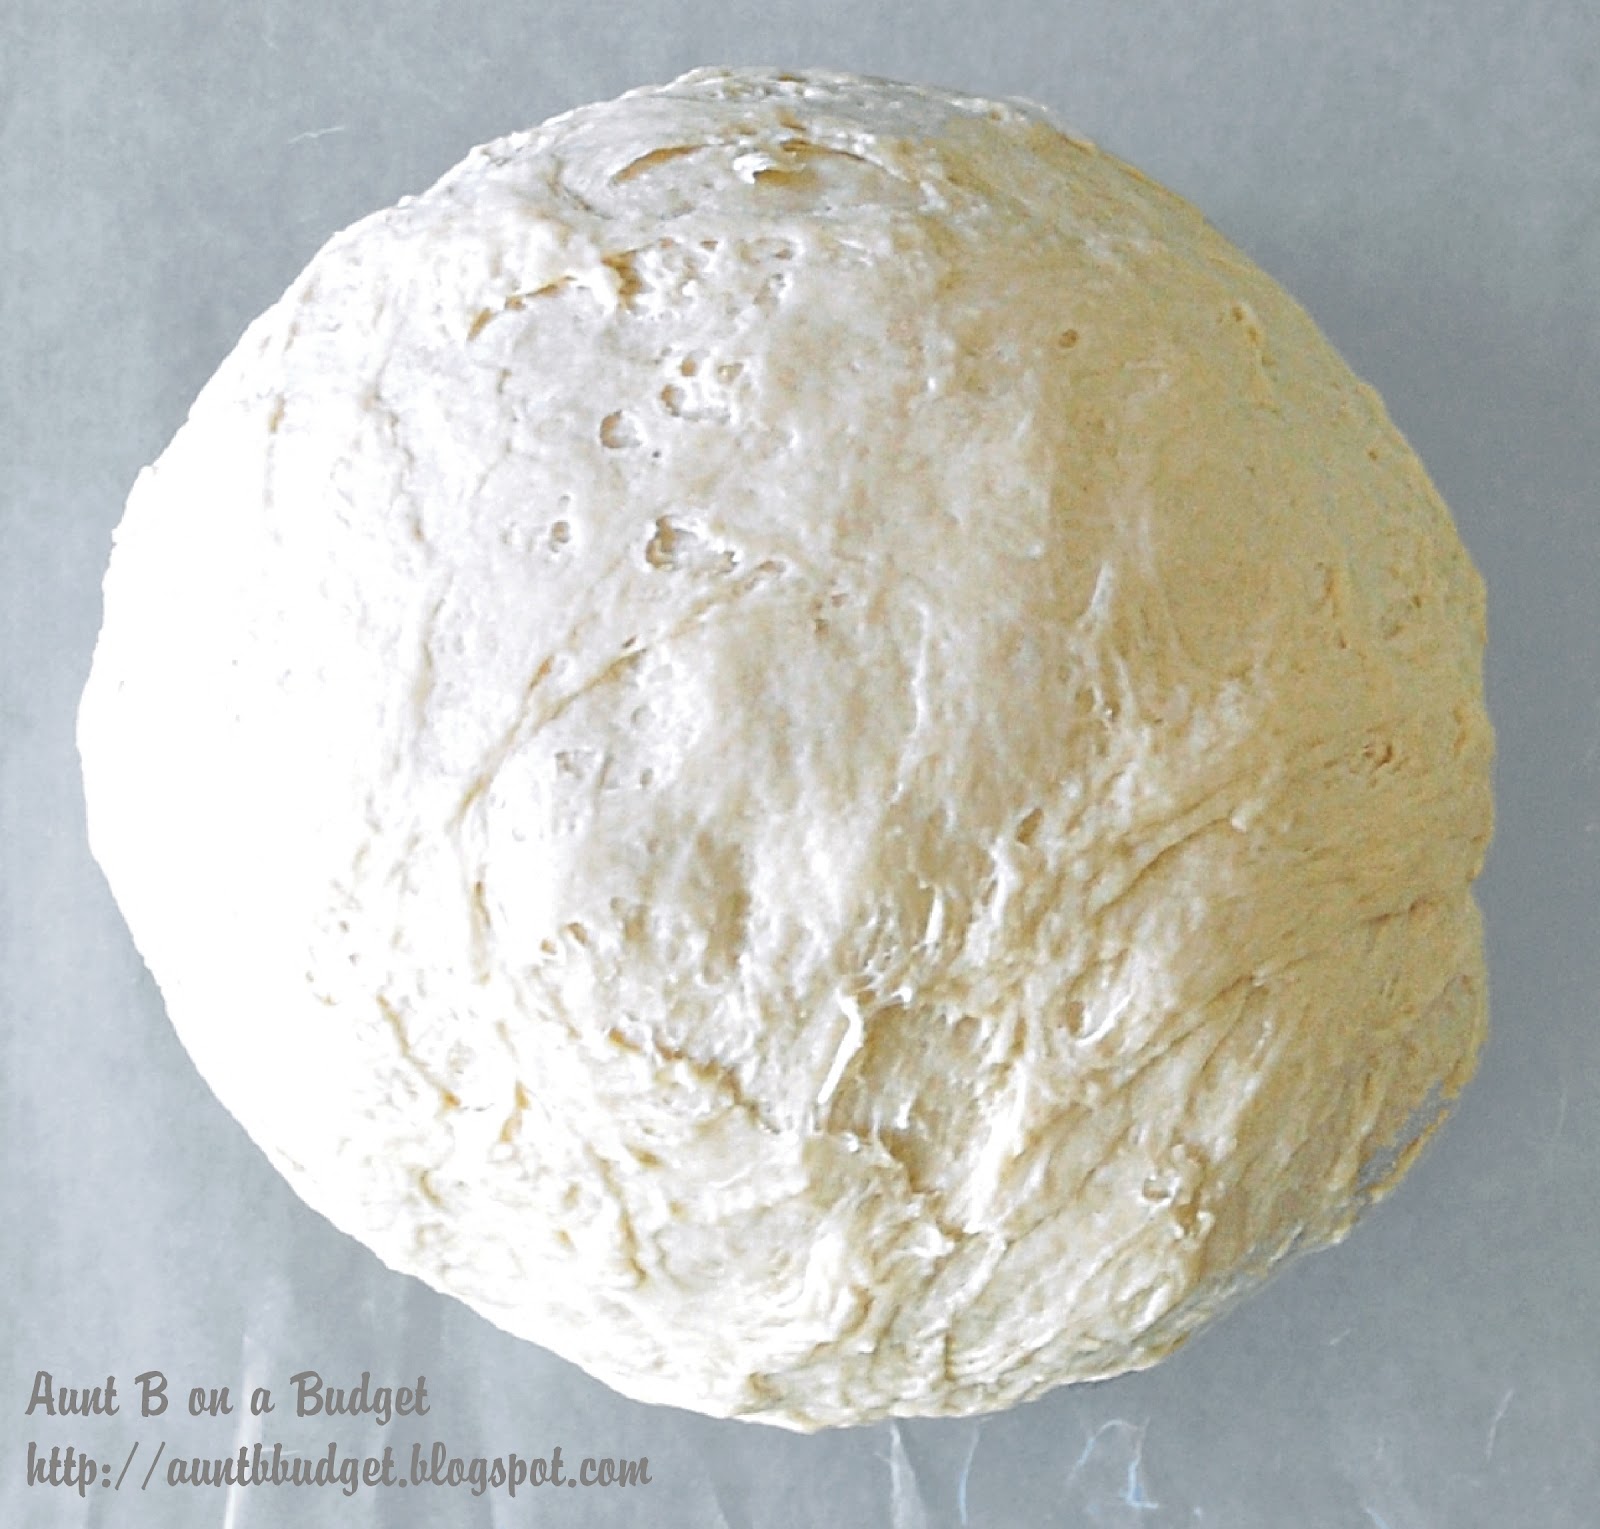
Once the bread dough has risen, punch it to release some of the air.

Knead the dough a few times and then form it into loaves.
This recipe makes a fairly sturdy dough so you can either form the dough into oblongs for loaf pans or form it into rounds and bake it on a cookie sheet.
Oil or butter your loaf pans before you put the bread into them. If you're using a cookie sheet, line the sheet with parchment paper.
This recipe makes a fairly sturdy dough so you can either form the dough into oblongs for loaf pans or form it into rounds and bake it on a cookie sheet.
Oil or butter your loaf pans before you put the bread into them. If you're using a cookie sheet, line the sheet with parchment paper.
Don’t worry if the loaves are not perfect: The bread police will not come to get you, and I'm quite sure that the folks eating it will be so happy to get home baked bread that they won’t care what shape it is.

Let your bread rise a second time. This will happen more quickly than the first rise. My loaves doubled in size in about 45 minutes.

When the loaves have almost doubled in size, preheat your oven to 375F. Most ovens heat to a higher temperature than you set them for, so be sure to wait a for few minutes after your oven preheats before beginning to bake your bread.
Place your loaves on the middle rack of your oven and set your timer for 20 minutes.
When the timer goes off, rotate your bread in the oven, switching the sides of the oven the loaves are on and turning them front to back. Reset the timer for 18 minutes.
In my oven, this bread is usually completely baked by the end of that second baking interval but ovens do vary. To test your bread for done-ness, turn it out of the pan and tap on the bottom of the loaf. It should sound hollow. If not, put it back in the pans and return it to the oven to bake for a little longer.
Turn your baked bread out onto wire racks to cool.
If you like a soft crust on your bread, brush the tops of the loaves with melted butter while they’re still very hot. The butter will soak in, softening the crust and adding great flavour.
If you prefer a crispy crust, just leave the bread as it is.

Once the bread has baked, allow it to cool completely before slicing it. (If you can! My husband always cuts into the bread while it’s still warm because he can’t resist the aroma. It squishes in on itself when you slice it warm, so it’s best to let it reach room temperature before you cut into it.)

Your cooled bread should be stored in a bread box, an airtight wrapper, or – if you’re not going to use it right away – in the freezer.
See? You did it! And it really wasn’t difficult at all!
Now, serve yourself a slice with some butter and jam, and enjoy.
Cook's notes:
This post has been linked to Gallery of Favorites hosted by Premeditated Leftovers and The 21st Century Housewife, the Pity Party hosted by 30 Handmade Days, to Foodie Friday hosted by Rattlebridge Farm, to Foodie Friends Friday hosted by Tracy at Busy Vegetarian Mom, Robyn's View, Marlys at This and That, Lois at Walking on Sunshine, Lindsey at Family Food Finds, Cindy at Cindys Recipes and Writings, Michelle at From Calculus to Cupcakes, Cynthia at Feeding Big, Jodie at Binomial Baker, R Dawn at Spatulas on Parade, Angie at A lil Country Sugar, Erika at Chef Picky Kid, Amber at Mamas Blissful Bites, to Strut Your Stuff Saturday hosted by Six Sisters' Stuff, to Nifty Thrifty Sunday hosted by Nifty Thrifty Things, to Weekend Potluck hosted by Sunflower Supper Club, to Think Pink Sunday hosted by Flamingo Toes, to Scrumptious Sunday hosted by Addicted to Recipes, to Craft-O-Maniac Monday hosted by Craft-O-Maniac, to Busy Monday hosted by A Pinch of Joy, to Manic Monday on Bobbi's Cozy Kitchen, to Mix it Up Monday hosted by Flour Me With Love, to Delicious Dish Tuesday hosted by Mama Chocolate, Full Time Mama, and Coping with Frugality, the Tuesday To Do party hosted by The Blackberry Vine, to Tip Me Tuesday hosted by Tip Junkie, to Whatcha' Whipped Up Wednesday hosted by DJ's Sugar Shack, to Cast Party Wednesday hosted by Lady Behind the Curtain, to Look What I Made hosted by Creations by Kara, to Wonderful Wednesday hosted by Printabelle, to Thursday's Treasures hosted by Recipes for My Boys, to Tastetastic Thursday hosted by A Little Nosh, to Full Plate Thursday hosted by Miz Helen's Country Cottage and to Tutorials, Tips and Tidbits hosted by StoneGable Blog.
Cook's notes:
- You can add about a cup of additional ingredients to your bread dough. Cheese, nuts, seeds, or dried fruit will all work very well in this recipe.
- If you're adding herbs or spices, measure them into the dough along with the salt. Two teaspoons of dried herbs or cracked black pepper are a good place to begin with savoury seasonings. Try about 1-1/2 teaspoons of cinnamon or other spices.
This post has been linked to Gallery of Favorites hosted by Premeditated Leftovers and The 21st Century Housewife, the Pity Party hosted by 30 Handmade Days, to Foodie Friday hosted by Rattlebridge Farm, to Foodie Friends Friday hosted by Tracy at Busy Vegetarian Mom, Robyn's View, Marlys at This and That, Lois at Walking on Sunshine, Lindsey at Family Food Finds, Cindy at Cindys Recipes and Writings, Michelle at From Calculus to Cupcakes, Cynthia at Feeding Big, Jodie at Binomial Baker, R Dawn at Spatulas on Parade, Angie at A lil Country Sugar, Erika at Chef Picky Kid, Amber at Mamas Blissful Bites, to Strut Your Stuff Saturday hosted by Six Sisters' Stuff, to Nifty Thrifty Sunday hosted by Nifty Thrifty Things, to Weekend Potluck hosted by Sunflower Supper Club, to Think Pink Sunday hosted by Flamingo Toes, to Scrumptious Sunday hosted by Addicted to Recipes, to Craft-O-Maniac Monday hosted by Craft-O-Maniac, to Busy Monday hosted by A Pinch of Joy, to Manic Monday on Bobbi's Cozy Kitchen, to Mix it Up Monday hosted by Flour Me With Love, to Delicious Dish Tuesday hosted by Mama Chocolate, Full Time Mama, and Coping with Frugality, the Tuesday To Do party hosted by The Blackberry Vine, to Tip Me Tuesday hosted by Tip Junkie, to Whatcha' Whipped Up Wednesday hosted by DJ's Sugar Shack, to Cast Party Wednesday hosted by Lady Behind the Curtain, to Look What I Made hosted by Creations by Kara, to Wonderful Wednesday hosted by Printabelle, to Thursday's Treasures hosted by Recipes for My Boys, to Tastetastic Thursday hosted by A Little Nosh, to Full Plate Thursday hosted by Miz Helen's Country Cottage and to Tutorials, Tips and Tidbits hosted by StoneGable Blog.


26 comments:
This is a wonderful way to show how to make bread... Even though I have made it myself I will use your technique so it will turn out... I haven't made bread for a long time. Thanks for sharing on Foodie Friends Friday as I am sure it will take the scaryness out of making bread. Remember to come back and vote on Sunday.
WOW! What great instructions! Thanks for sharing on Foodie Friends Friday! Please come back on Sunday to VOTE!
Thank you Marlys. I'm glad you like the post. I appreciate the opportunity to share it.
Thank you. I appreciate the opportunity to share my post. :)
What a thorough tutorial! Your bread is lovely! Thanks for sharing it with the Gallery of Favorites.
Thanks Alea. I appreciate the opportunity to share it, and to check out the many interesting links on the Gallery. There are always lots of good posts there.
what a great tutorial :-) and love the texture of the bread
Thanks Rebecca. I'm glad you like it.
Your bread looks just delicious - I can almost smell it! This is a wonderful tutorial, really easy to understand and with excellent photographs. Thank you so much for sharing it.
Thank you April. I'm glad you like it. Thank you for hosting. I appreciate the opportunity to share it.
What a great tutorial, loved this. I will try and make it when I can fit it in but I want to get the bread flour like you mentioned. I love fresh homemade bread. I'd be like your husband and tuck in while it's hot, slathering it with butter mmm...
Thanks for sharing it on your Facebook page Mr. CBB. I appreciate the link and I'm glad you enjoyed the post.
Your bread looks so delicious!
Thanks for sharing.
I really like the idea to brush the tops of the loaves with melted butter.
Wish you a wonderful week.
Mette
Thank you Mette. :) I'm glad you enjoyed the post.
Wow, that looks amazing! I love bread and would actually like to get a bread maker to make all kinds of doughy creations! =)
Have fun with it Mimi. I love baking bread. :)
This is a great Tutorial! Thank you so much for sharing your awesome recipe with Full Plate Thursday. Hope you have a great weekend and come back soon!
Miz Helen
Thank you Miz Helen. I'm glad you like it. Thanks for hosting. I appreciate the opportunity to share my work.
Congratulations!! You are featured this week on Busy Monday at A Pinch of Joy! I hope you will stop by and grab a Featured Button from the Button Box on the sidebar this afternoon. Pinned. Can’t wait to see what else you’ve been working on!
Thank you Charlene! I'm honoured. I won't be linking this week but I'll be sure to stop by and check out the party. I'll share the party link with my friends too. :)
Thanks for sharing your great tutorial on making bread at Cast Party Wednesday! ~Sheryl @ Lady Behind The Curtain~
Thank you for hosting Sheryl. I found lots of wonderful links at last week's party.
YUM! I love homemade bread but I can't say that I've ever made it myself. I'm afraid of yeast, but I have to get over it... :) Thank you for this! It's pinned!
Missing you on FB but so glad you're still up and running like normal around here! See you at DDT! :)
Thanks Alesha. I'm glad you liked the tutorial. I sometimes miss my FB page too but I'm very grateful to have more time to spend on other things. Thanks for hosting and giving me an opportunity to share this post.
I am in the process of making bread for the first time its on its first rise and am definitly excited. I am going to cook one loaf and freeze the other after the first rise and hope all turns out well. Cross my fingers! Thank you sooo much! My honey will thank you too when he comes home to fresh baked bread!
I'm so glad you gave it a try! I hope it turned out well for you. :)
Post a Comment