Wednesday, 24 July 2013

Swiss Meringue Buttercream Frosting


My FB friend JC Griffiths wrote to me last week requesting a vanilla frosting recipe.  Excellent timing, since I'm working on a cake recipe this week and was in need of some frosting anyway.  :^)

It used to be that when I needed vanilla frosting, I just softened some butter in a bowl and added icing sugar (confectioners sugar) and milk until I got the sweetness and consistency I preferred, then added some vanilla extract for flavouring.  It was quick and easy to make and pretty versatile too.  I still use it if I need something quick.

Some years ago, though, I decided that I wanted to learn some basic cake decorating skills so I bought a book called "Pretty Cakes."  


The book contained a number of different frosting recipes, including one for Swiss Meringue Buttercream which was recommended for filling and frosting cakes, and for piping.  I used it for one of my first cake decorating attempts and liked it so much that I've used it ever since. 

Swiss meringue buttercream has a lot to recommend it: I always have the ingredients on hand. The texture is light and smooth, and the flavour not nearly so sweet as a butter and icing sugar frosting.  It's a neutral base to which a great many different flavours can be added, making it very versatile.  It pipes beautifully.

The recipe I'm sharing here is pretty much the same as in the book.  I've never amended it because it works perfectly just as it is.

To make Swiss Meringue Buttercream Frosting, you'll need:
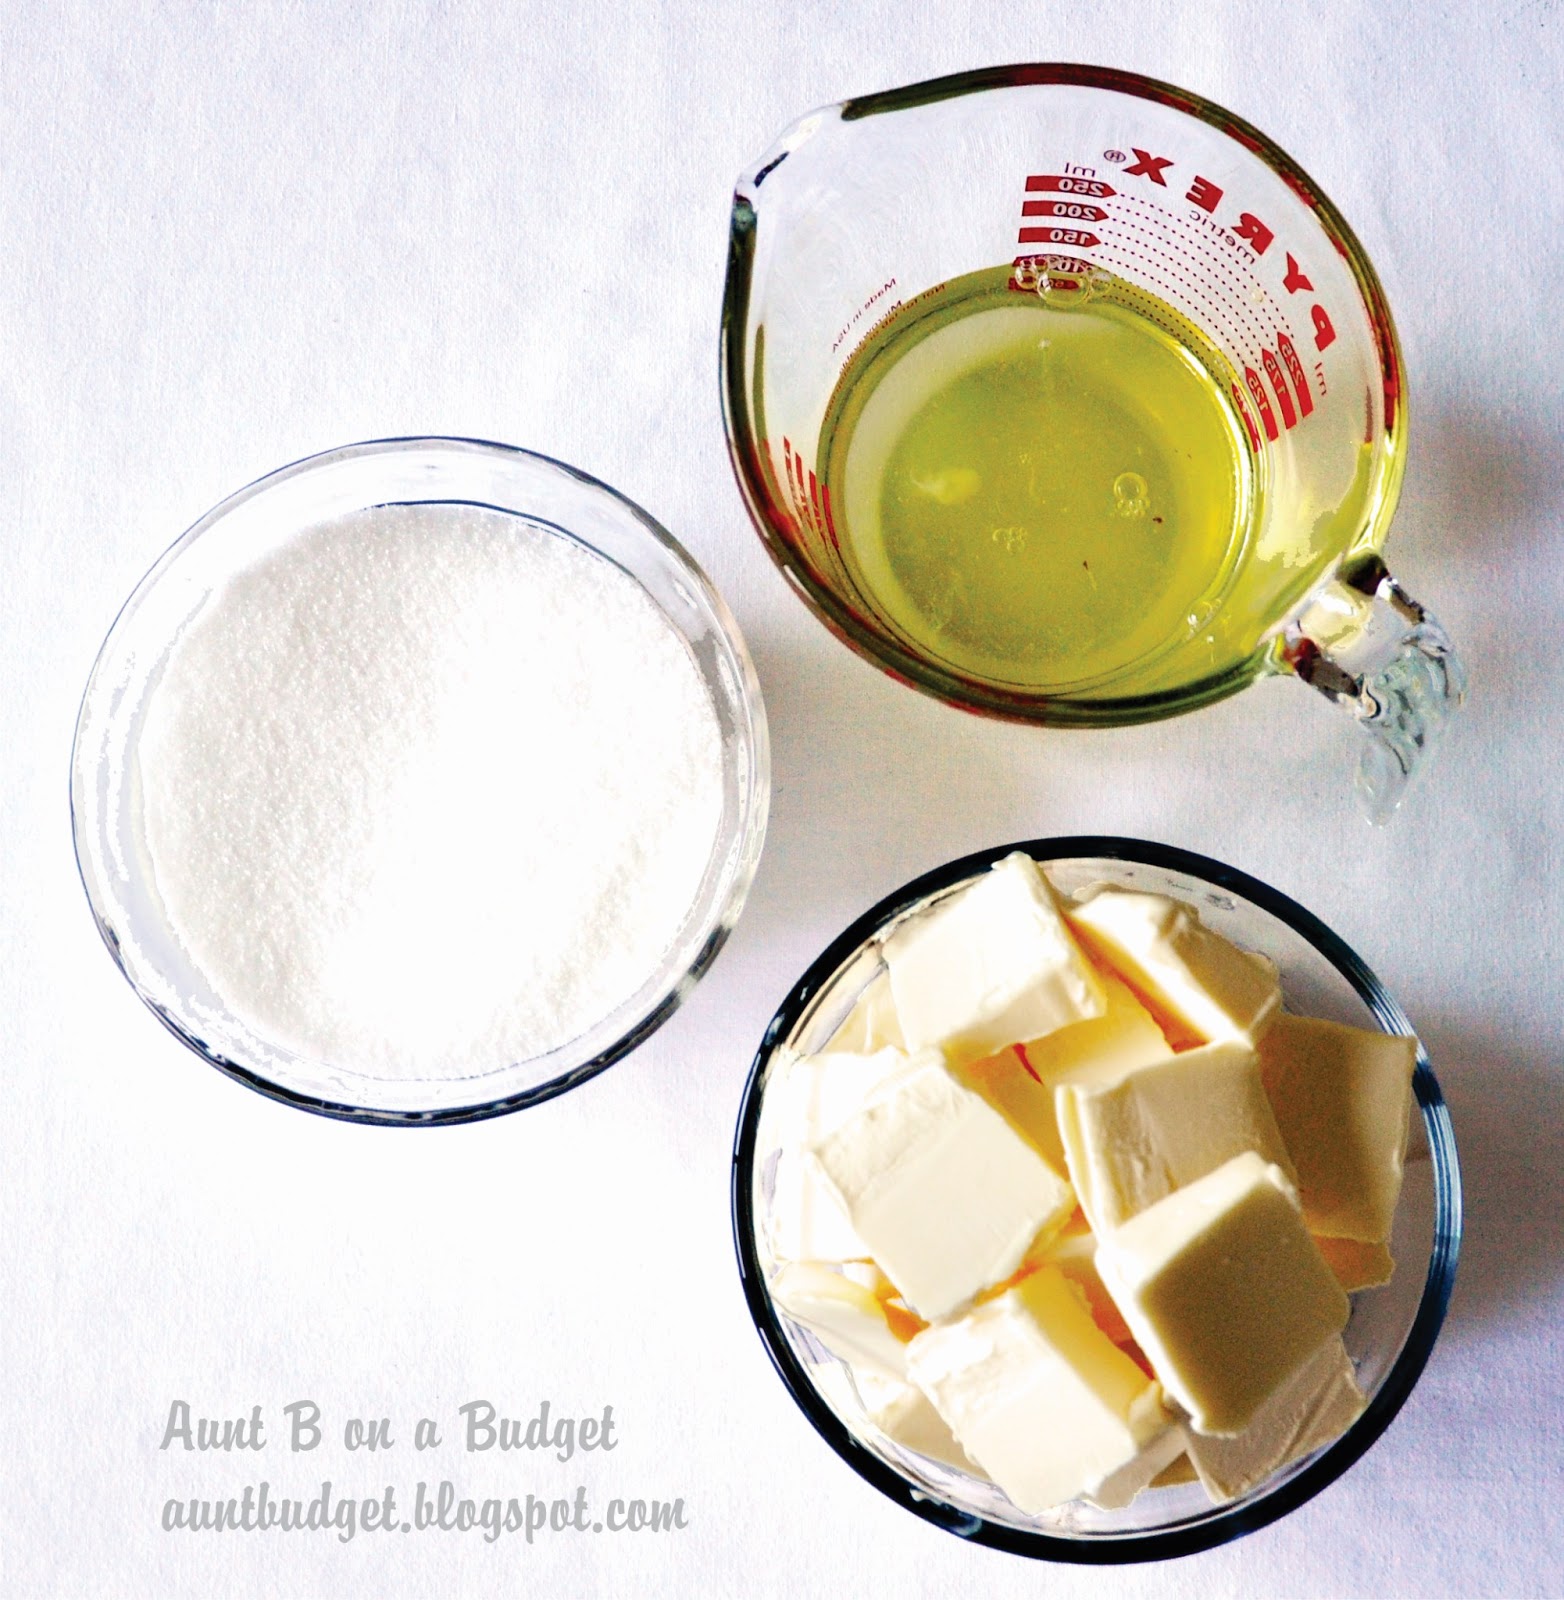


  • 1/2 cup egg whites
  • 1 cup granulated sugar
  • 1-1/4 cups cold (but not hard) butter, cut into small pieces, about 1 Tablespoon each
Although you will be adding butter to your frosting, it begins with a meringue.  In order for the meringue to be at its best you need to work in a very clean bowl, without a trace of oil residue.  It's best to use either a glass or a metal bowl for mixing your frosting, and to give it a good wash and rinse before beginning work.

Combine the egg whites and sugar in your mixing bowl and set the bowl over a pan about 1/3 full of simmering water.  The bowl must not touch the water.  You want to heat the mixture, but not cook it.

Whisk the egg whites and sugar together until the sugar is partially dissolved and the mixture is warm to the touch.  The egg whites will begin to foam up as you do this.


Once the egg white mixture is warmed through, move the bowl to your mixer and whip the meringue at high speed until it forms stiff peaks.


Reduce the mixer speed to medium and continue beating until the meringue cools to room temperature.

Once the meringue has cooled, continue beating at medium heat, adding in the butter a piece at a time.

Stop the machine from time to time and give the sides and bottom of the bowl a good scrape with a rubber spatula. 


The frosting may break when the butter is mixed in.  The texture can range from granular looking to very curdled.  Don't worry. 


The mixture will come together and smooth out.  Just continue beating the frosting at high speed until the buttercream is smooth and light in texture.


Add your flavourings at this point.  Mix in liquids slowly, with the mixer at medium speed.  Dry flavourings should be added all at once. 

After the flavourings have been added, scrape the bottom and sides of the bowl well with a rubber spatula and then beat the frosting briefly at high speed.

Here are some flavouring suggestions:
  • Amaretto - Add 1/4 cup Amaretto liqueur and 1 Tablespoon vanilla extract
  • Cassis - Add 1/2 cup currant jelly and 2 tablespoons Creme de Cassis
  • Chocolate - Add 8 ounces of semisweet chocolate, melted and cooled
  • Coconut - Add 1/4 cup cream of coconut
  • Coffee - Add 3 Tablespoons instant espresso or other coffee, dissolved in 1 Tablespoon hot water and cooled to room temperature
  • Lemon - Add the finely grated juice and zest of three lemons
  • Liquer-flavoured - Add 3 to 4 Tablespoons of spirits such as cognac, rum, kirsh, framboise, or Grand Marnier, to taste
  • Orange - Add the juice of one orange and the finely grated zest of two oranges
  • Praline - Add 3/4 cup ground praline
  • Vanilla - Add 1 Tablespoon of good quality vanilla extract
  • White chocolate - Add 8 ounces of white chocolate, melted and slightly cooled
Recipe source: "Pretty Cakes; the Art of Cake Decorating" but Mary Goodbody with Jane Stacey, Pub. Harper and Row, New York, 1986

Tuesday, 23 July 2013

Necklace Tutorial?

I have a great fondness for necklaces that are long, simple strands of bead or chain.  They can be looped to make multiple strands, long or short, and their very simplicity makes them versatile enough to wear with many different things.


This is just such a necklace.  I made it this weekend because I needed something to wear with one of my favourite summer skirts.   

The necklace is almond coloured glass "pearls" and silver spacers.  It's about 9 feet long so I can loop it into four strands.  I set aside a couple of beads so that I could make matching earrings too.

The set cost me a little less than $14.00 to make.  I couldn't find anything really comparable in the store (not surprising since I tend to go my own way rather than following trends), but four single strand necklaces plus a pair of earrings would cost between $60 and $75 even in WalMart.

Would any of you be interested in a tutorial for a necklace and earring set in this style?  Or is it too simple a project?

Please let me know by leaving a comment on my Facebook page or in my Twitter feed. 

Thanks.

Monday, 22 July 2013

Nature's Pantry; July 21


I headed back to Botanical Beach again yesterday, and foraged along the road as I made the trip there and back.  I gathered a lot of stuff.  It's a great time of year to gather wild foods and medicinal herbs.  There's just so much out there!

Yesterday's haul included huckleberries, fireweed, and pearly everlasting (you can read about them in last week's post), and I added some new finds to the list as well.

It's early in the season for berries, but they are beginning to ripen and I did pick some.  I found:


Thimbleberries:
I grew up calling these berries salmonberries but apparently that's wrong.  Island Nature identifies them as thimbleberries and says that they are drier in texture and have a different shape and colour than salmonberries. 
Whatever they are, they grow in abundance here, and I've been gathering them every summer for as long as I can remember. 
These berries dry very well and were collected by our first nations long before European contact, for use both as a foodstuff and a trade good.
Although they are drier in texture than many other berries with druplets (fleshy fruit wrapped around a seed, like raspberries) the berries I picked yesterday were juicy enough to stain my fingers bright red. 

Brambleberries:
Also known as trailing blackberries, these plants are native to our area.  The fruit are tiny - rarely more than 1/2 inch long - but very flavourful and sweet.  The brambles mostly spread across the ground, often in rocky areas, and because of the reflected heat from the rocks, they tend to ripen before other blackberries in our area. 
Despite their small size, I was able to gather nearly a half gallon of these little fellows yesterday.


Mystery berries:
That's not really their name, I'm sure, but I don't know what these berries are. (Some naturalist I am!  ;^)

I found them growing near the ground like brambleberries, often near the thimbleberry bushes.  They look like boysenberries to me (but smaller) and have similar leaves, but I've never known boysenberries to grow wild in this area.
These ones are resting in my fridge while I test them for safety following the method given here.  If you know what they are, please do drop me a note, as it will save me some time and trouble.  I can tell you, though, that the few I've eaten so far taste very good and I've not experienced any adverse reaction to them.

Author's note:
I've since found out, thanks to the Mill Bay Garden Club, that these are wild black raspberries.  They can be distinguished by their dusty appearance.  Like other raspberries, when picked, the center core of the berry remains on the plant, leaving each picked berry hollow inside. 


Red clover:
Red clover is a really useful plant to know. A member of the pea family, it grows in abundance in fields and uncultivated meadows here.  Bees love it and so do deer, cattle, and horses. 
Red clover is considered a weed by road builders, railway maintenance crews, and landscapers so do exercise caution when gathering it.  Be sure that the plants you forage are not growing in an area where herbicides may be used.
Red clover leaves are edible and are best when gathered in early spring.  The blooms (which I was gathering yesterday) can be used as a tisane (herbal tea).  Traditional medicine recommends the use of this tea for the treatment of sore throats and colds.


Do you forage for wild foods or medicinal herbs?  What are you gathering right now? 

Please stop by my Facebook page or Twitter feed to share your finds. 

Friday, 19 July 2013

Re-Vision: Thrift Store Sweater to Tea Cozy


Okay.  I'll admit it:  There are times when I buy stuff at the thrift shop just because I like the colours.  I have no idea about what I'm going to do with it.  I just have to have it. 

This project comes from one of those purchases:  A Jones of New York ribbed cotton sweater that was too small ever to fit me.  I just couldn't resist the colourful stripes.

I brought the sweater home and looked at it for a while and then decided it needed to be a tea cozy. 

Here's my inspiration piece. 


It's a cotton tea cozy with a removable quilted liner.  I've had it for years.

Here are my raw materials. 


The black stuff is a piece of cotton twill I found in the remnant bin at FabricLand for $3.60.  The silvery stuff is quilt batting with a heat reflective layer fused to one side.  I have an on-going love affair with this batting and buy it in quantity when it's on sale.  I've used it for many projects.

I began by making a pattern by tracing around 1/2 of the cozy's outer cover.  Then I marked two seam allowances: one at 5/8 inch and one at 3/8 inch.  I reasoned I'd need to cut the lining slightly smaller.


I started with the outer cover for the cozy. 

I folded the sweater so that the side seams met at the center of the piece and there was a vertical fold down the middle of both front and back. 

I cut two pattern pieces, laying the pattern against the fold and cutting around the outer edge. 

The second picture below shows what the sweater looked like after I cut the tea cozy pieces and then flattened it out again.


My sewing machine is elderly and cranky. It tends to stretch knits out of shape so I sewed a straight seam then zigzag stitch beside it.  I trimmed the seam down as close as possible to the zigzag edge.


Turned right side out, the tea cozy cover looked like this:


It was kind of wiggly around the edges but I hoped the quilted liner would fill it out enough to solve the problem.

To  make the liner pieces from the black twill, I folded the twill in half lengthwise, then folded it over again, perpendicular to the first fold, making four thicknesses of fabric.  I placed my pattern against the long fold, and cut it out twice using the smaller seam allowance marked on the pattern. 


I folded the quilt batting just once, then cut two pattern pieces from it. 


I ended up with four black twill pieces and two quilt batting pieces.


I pinned two of the black pieces right side to right side, sewed a straight seam, then a zigzag beside it, and trimmed as close as possible to the zigzag.

Next, I laid the next two black twill pieces right side to right side with quilt batting on the outside and sewed them together just as I had the first piece.

With the two pieces of the lining assembled, I turned the first black twill piece right side out and tucked it inside the lining piece with the quilt batting attached. 


I pinned them together at the bottom edge and sewed around it, attaching the two together but leaving a space of about two inches unsewn. 

Pulling the fabric through the unsewn space in the bottom seam, I turned the quilted  tea cozy lining right-side out. 

I pinned the unsewn portion of the seam closed and hand stitched it shut. 


As you can see from the photo above, the bulk of the seam at the bottom of the quilted tea cozy lining caused it to shift.  It wouldn't lie flat. 

I pinned the seam into place all the way around and top stitched all around the bottom edge of the lining, about a quarter inch from the bottom seam.  It worked.  With the top stitching the two pieces no longer shifted.


I tucked the completed tea cozy liner into the outer cozy cover  thinking "job done," but the edges of the cozy looked wobbledy-worbelly (an important technical term ;^). 


I wasn't happy with the way it looked so I decided to strengthen the edges of the cozy cover with some seam binding.

The pins wouldn't easily go through all the layers of fabric and seam binding, so I pinned the binding into place on both sides of the cozy cover and then top stitched near the edge of the seam binding to hold it in place. 


The seam binding did the job.  It's still not perfect but I can live with it.  I actually think it's kind of cute.


Stuff I bought:
  • The sweater was one of eight garments purchased for $5.00 at a thrift shop bag sale.  It cost $0.63
  • The lining was part of a large piece I purchased at $6.00/metre.  I used a little less than 1/2 meter so we'll say the price was $3.00.
  • The black fabric cost $3.60.
  • The seam binding cost $2.80 and I used less than half of it so I'll price that at $1.40
  • The thread was left over from another project.
  • Total cost: $8.63
 
There are still some materials left from this project so I may yet get make another item from the things I have on hand.
 
Stuff I learned:
  • Even working with a straight seam as I was, my machine didn't like that ribbed knit.  Next time I'll choose something a little less stretchy.
  • I don't need a cozy as large as this one.  Next time I'll scale back to about 3/4 the size.
  • The thickness of the quilt batting prevents the liner from flattening out as much as the thinner outer cozy cover.  There's no need to cut the lining smaller.  If you cut them both the same size, you'll end up with a better fit.

Monday, 15 July 2013

Nature's Pantry

I'm kind of amused that foraging has become a "thing."  You know: one of those trends that is discussed by foodies and lauded by fancy-pantsy restaurants.

For most of our history, foraging is just what people have done.  It was how we ate. 

When did we become so distanced from the sources of our food that gathering wild foodstuffs took on the cachet of exoticism?

It's a fairly recent thing, you know. 

During hard years of the 1930's, and during the rationing of the war years, it was rare for a homemaker to leave the house without a sturdy bag or basket.  On walks to and from church, or trips to town, or visits with friends, the family food supply was augmented by whatever could be gathered along the way.  

Food was not the only thing gathered either.  Bits of useful firewood, materials that could be used for basket making, and medicinal herbs were also prized.

In the 1950's convenience and modernity became the watchwords of the day, with home economists singing the virtues of package foods and supermarkets.  Many households moved away from foraging during that decade, and more again during the boom and exuberance of the 1960's. 

Foraging was not lost entirely, even during the 60's and 70's.  The young folk who participated in the "back to the land" movement placed great importance on natural foods. First nations, farmers, and others who lived a more rural lifestyle also continued to eat wild foods as part of their traditional diet.

Perhaps it was during the greedy 1980's that we seemed to lose sight of foraging altogether.  Certainly we lost track of many other traditions as we focussed on unrestrained consumerism.

Whatever the cause or the timing, North Americans have, within just a few decades, fallen out of the habit of gathering natural foods. 

Enter the current foodie culture and the "discovery" that wild foods are much more flavourful than many of the items commonly available on the shelves of big box grocery stores.  Voila! A trend is born. 

I came of age in the late 70's, at the tail end of the hippie era, and was greatly influenced by the "back to the land" philosophy, so I've always gathered wild foods.  They've formed a regular part of my diet for all of my adult life.  I enjoy gathering wild food, love the diverse flavours, appreciate the nutrients it brings to our plate, and am grateful for the way it helps me to stretch our food budget.

It's prime time for foraging in our woods and meadows right now.  There's lots and lots of wild food available in our area.  Here's some of what I gathered this week:


Plums: 

Plums are not, strictly speaking, wild food.  The plums in our area are the result of planned planting.  Many, like the ones pictured above, grow on ornamental trees that are planted for their spring blossoms.  These plums are often very small but they are also quite flavorful. 

Because the trees in our public spaces are prized for their blossoms and not their fruit, the plums usually ripen, fall to the ground, and are left to rot.  I note the location of the trees along my walking route and, when the first plums begin to fall, I gather together some buckets and go picking. 

This weekend, I picked two five-gallon plastic buckets full of cherry sized, dark red plums.  Some I canned whole, in light syrup, some I juiced for jelly, and some I cooked and pureed.  I froze the puree for use in baking and to combine with apples in sauce later in the season.


Huckleberries:

I realize that the term "huckleberry" refers to different plants in different regions, but here on the southwest coast of British Columbia it means these tiny red relatives of the blueberry.  Huckleberries are slightly tart in flavour, with little acidity and almost no natural pectin.  They are rich in nutrients and, for a short time each year, grow abundantly in the dappled shade areas at the edges of our woodlands.

Because they don't have a lot of pectin, huckleberries aren't really practical for jam making nor, by themselves, do they make a good pie.  They pair brilliantly with citrus flavours though, and make a nice addition to baked goods. 

Huckleberries are just beginning to ripen so I'll be picking them for at least a couple of weeks more. 

I wash the picked berries, spread them on cookie sheets and freeze them.  I use the frozen berries in many recipes that call for blueberries, and also incorporate them into some of my winter batch of marmalade.

Fireweed:

Fireweed grows profusely here on vacant lots, the edges of forest land, in well drained meadows, and in recently logged areas.  Besides stabilizing and feeding the soil, fireweed is beautiful, flavourful, and nutritious.  It is an excellent source of Vitamin C.

I cut fireweed when the flowers are at their peak, tie it into bundles, and hang it upside down to dry.  When the plants are dry, I remove and save the blooms, composting the rest of the plant.

Fireweed blossoms make an excellent herbal tea. An infusion of the dried flowers can also be cooked into a flavourful jelly.  The jelly is jewel-like, with a reddish purple hue and a delicate flavour that makes it excellent for gift giving.

The blooming season for fireweed varies, coming earlier in areas near the shore and later in areas higher up the mountains.  By choosing where we gather them, we can harvest fireweed blossoms for a full month or more.

Pearly Everlasting:

Pearly Everlasting is not harvested as food but is, instead, harvested for decorative use.  The flowers retain their shape and pristine white colour when dried, making them very useful for embellishing gift packages or making wreaths.

I try to gather Pearly Everlasting before they are completely opened, and before they look too weathered.  As with fireweed, I tie it in bunches and hang it upside down to dry.


The plants available for foraging in your area will, of course, differ from those mentioned here but, if you're interested in learning about wild foods in your area, many communities have courses available on gathering wild foods.  Courses can often be found through agricultural offices, local colleges, or through community groups focussing on ecological interests.  Wild plant books are usually available at public libraries and there's lots of information available on line too.  Enjoy the quest.

Wednesday, 10 July 2013

Steak and Veggie Hash With Baked Eggs


I married a guy who worked on a ship. 

What that has to do with a recipe for hash and eggs is not immediately apparent but there is, in fact, a straight line connection (or at least as straight a line as any in my life) between the two:

The crew on my husband's ship had a real synergy.  Their work involved search and rescue, and the need to place their very lives in each other's hands created an exceptionally close bond between them.  The "boys" were like a family: A big, often rowdy, frequently drunken, sometimes brawling family, but a family nonetheless.

When we first got together, my husband and I continued to live in the apartment he'd had as a bachelor, and his crew mates continued to view our door as always open. Our apartment was an extension of their shipboard home.

I was a little taken aback at first to realize that my fella's crew mates came and went from our place whenever they felt like it.  The first Sunday morning after I moved in, I got up to find them all sleeping in our living room and spare bedroom.  Every spare inch of carpet, bed, couch, and armchair was covered with sprawling, snoring sailors!

The boys had let themselves in through the spare bedroom window (jokingly known among them as the apartment's back door) and settled in.  They woke to the aroma of fresh brewed coffee and, once awake, asked in chorus "What's for breakfast Mom?"

Those Sunday morning breakfasts became a regular affair at our house and I quickly came to understand that, while they had started because the boys were protective of my guy and wanted to be sure I'd treat him well, they continued because I was approved of and liked...and because I cooked a darn good breakfast!  :^)

A sailor's income doesn't usually extend to lavish entertaining, so I quickly mastered the art of conjuring Sunday morning breakfast from what we had on had.  Hash was a favourite:  I combined potatoes with whatever cooked vegetables we had in the fridge and then, when the hash was cooked, added some eggs.  Sometimes there was meat, and sometimes toast or pancakes, but not always. 

There was never a complaint.  Sixteen rowdy men happily tucked their knees under our table and ate until all the food was gone.

Time passed, the boys grew older, transferred to different ships, married, or moved away, but they all still stay in touch.  When they come to visit us, I still make this dish.  

When the boys aren't around, hash is a popular supper choice at our house; transforming a small bits of leftover this and that into a generous quantity of tasty, filling food.

This recipe for steak and veggie hash with baked eggs serves four.  To make it, you'll need:

  • 3 or 4 large baked potatoes, cooked and cooled
  • 8 ounces of cooked steak
  • 2 Tablespoons bacon fat (If you don't have bacon fat, substitute oil or butter, to your own preference)
  • 1 large onion, finely diced
  • 1 sweet bell pepper (I used yellow), finely diced
  • 1-1/2 cups finely chopped cooked cabbage
  • 1 cup cooked carrots, cut in a small dice
  • 1-1/2 cups black beans or pinto beans
  • smoked paprika to taste
  • salt and pepper to taste
  • 4 eggs

You'll need a large skillet that has a lid to fit and can go in the oven.  

Cut the potatoes and steak into similarly-sized cubes.  I like my finished hash to have some texture so I use about a half inch dice.  


Preheat your oven to 350F.

Melt the bacon fat in the pan, swirl it around to coat the bottom of the pan, then add in the onion and bell pepper.  Cook them, stirring constantly, until the onion is translucent and the texture tender crisp.


Add in the potato, steak, cooked cabbage, cooked carrots, and beans. Allow them to sit in the pan until a little crust forms on the bottom, then give them a gentle stir.

Season the ingredients to taste with paprika, salt, and pepper.  Add the seasoning, then give the hash a stir and a taste.  Repeat until you've arrived at a level of seasoning that pleases you.

Continue allowing a crust to form, then giving the hash a stir until there are some nice crispy brown bits distributed throughout.


Use the back of a large spoon or ladle to make "nests" in the hash.  Crack an egg into each nest.


Put a lid on the pan (this will help the eggs to cook more quickly and evenly) and put the pan on the center rack of your preheated oven.


Cooking time for the eggs will depend on how you like your yolks but I'd start checking them at about 10 minutes.


Cook the eggs until they're almost - but not quite - done.  They'll continue to cook in the residual heat held in the hash.  Plate your portions and serve your meal as quickly as possible after it comes out of the oven. 

Cook's notes:

This dish is pretty nearly infinitely variable.  You can make it with whatever leftover meat or poultry you have on hand, or with no meat at all.  I strongly recommend that you always include onion, potato, cabbage, and beans, but you can add in whatever other vegetables you have on hand too.

If you're cooking this for a big crowd, make a large quantity of hash in advance and divide it between 9 x 13 cake pans.  Make 4 to 6 egg "nests" per pan.  When you're almost ready to serve the meal, add in the eggs, cover the pans with foil, and bake them all at once, rotating their position in the oven about halfway through the cooking time.

Thursday, 4 July 2013

Thrift Shop Haul


We budget $50.00 each month for thrift shop purchases. 

We use our thrifting budget to buy all sorts of things: clothing, linens, dishes, books, and furniture.  Some of these things we use within our own household and others provide material for craft projects that are either given as gifts or sold for a little extra income. 

I hadn't spent any of last month's thrift shop budget so I decided to treat myself to a visit to my favourite store.  

I came home with a skirt, a muumuu (handmade in the 60's, label still attached), a dress, 2 individual sized corning ware ramekins from the 1960's, 2 double bed flat sheets and one matching pillow case, 2 vintage pillow cases, 3 fabric yardages - different colours of the same design - dating from the 1970's (1 x 1.25 yards, 1 x 1.5 yards, 1 x 3 yards), and an assortment of knit and crochet pattern books. 

My haul cost me $29.25.

The skirt needed shortening so I hemmed it.

The mumu needs some alteration.  The armholes are a bit tight.  I want to enlarge them so that I can layer a shirt of some sort underneath.

The dress needed a belt but I have one already that will work.  It's ready for use as an office wear piece for me.

I'll use the ramekins both as every day kitchen wear and as props in future food photos.

The flat sheets and matching pillow case will be used for a variety of things:  I'll make a nightgown, a roman blind (lined with a second sheet I already have on hand), some cloth napkins, and possibly some tea cozy liners or re-useable shopping bag liners.

The vintage pillow cases will be combined with some of the fabric yardage to make another nightgown.

Part of that same fabric yardage will be combined with another pillowcase that I already have on hand, to make an apron.

The largest fabric yardage, combined with a sheet I already have on hand, will make another roman blind.

The last fabric yardage will be set aside and used later, with some other scraps to make a baby quilt.

Not too bad a return for what I spent, right?  :^) 

Are you a thrifter?  What do you buy on your thrift shop or yard sale forays?  Do you upcycle or repurpose any of your finds? 

Join the conversation at my new Facebook forum.  I'm sure we'll learn lots from each other.