Tuesday, 24 June 2014

Why You Need This Stuff In Your Kitchen: Eggs

Some things are such kitchen commonplaces that we give them little thought.  

Eggs are like that.

Unless you're a vegan, it's pretty much a sure thing that you'll have at least an egg or two in your fridge, at least most of the time.  

I'll bet, though, that you don't get very excited about them, at least not most of the time.

Eggs got kind of a rum deal in the nutritional reputation department.  When it was found that there was a link between cholesterol and heart disease, eating eggs (specifically egg yolks) was discouraged. Many folks came to view them as unhealthy, and still do.

That thinking has changed:  Eggs are, in some ways, the perfect food. A 2011 study in the journal Food Chemistry found that regular egg consumption may be associated with a reduced risk of cardiovascular disease and cancer because of their high levels of antioxidants. And several studies, including one in the Journal of Agricultural and Food Chemistry, have found that eggs may help lower blood pressure as well. In addition to their antioxidants, eggs supply a tremendous amount of protein and nutrients in a low-calorie, low-carbohydrate and cheap package. [1] 

Health experts say that you should still be mindful of cholesterol. As with all foods, when eating eggs moderation is key, but their nutritional value makes them a welcome component of a balanced diet.

Here's an egg nutrient chart from nutritiondata.self.com:

Egg, whole, cooked, hard-boiled


Serving size: 
FOOD SUMMARY
Nutritional Target Map Estimated Glycemic Load
2.52.4Fullness FactorND Rating

NutritionData's         Nutrition Data's Opinion
Opinion
Weight loss:
Optimum health:
Weight gain:
The good: This food is a good source of Riboflavin, Vitamin B12 and Phosphorus, and a very good source of Protein and Selenium.

The bad: This food is high in Saturated Fat, and very high in Cholesterol.
Caloric Ratio Pyramid Estimated Glycemic Load
3%62%35%
CarbsFatsProtein

2
Estimated Glycemic Load


NUTRITION INFORMATION
Amounts per 1 cup, chopped (136g)

Calorie Information
Amounts Per Selected Serving
%DV
Calories
211
(883 kJ)
11%
  From Carbohydrate
6.1
(25.5 kJ)
  From Fat
130
(544 kJ)
  From Protein
74.6
(312 kJ)
  From Alcohol
0.0
(0.0 kJ)

Carbohydrates
Amounts Per Selected Serving
%DV
Total Carbohydrate
1.5
g
1%
Dietary Fiber
0.0
g
0%
Starch
0.0
g
Sugars
1.5
g

Fats & Fatty Acids
Amounts Per Selected Serving
%DV
Total Fat
14.4
g
22%
Saturated Fat
4.4
g
22%
Monounsaturated Fat
5.5
g
Polyunsaturated Fat
1.9
g
Total trans fatty acids
~
Total trans-monoenoic fatty acids
~
Total trans-polyenoic fatty acids
~
Total Omega-3 fatty acids
106
mg
Total Omega-6 fatty acids
1616
mg
Protein & Amino Acids
Amounts Per Selected Serving
%DV
Protein
17.1
g
34%

Vitamins
Amounts Per Selected Serving
%DV
Vitamin A
797
IU
16%
Vitamin C
0.0
mg
0%
Vitamin D
~
~
Vitamin E (Alpha Tocopherol)
1.4
mg
7%
Vitamin K
0.4
mcg
1%
Thiamin
0.1
mg
6%
Riboflavin
0.7
mg
41%
Niacin
0.1
mg
0%
Vitamin B6
0.2
mg
8%
Folate
59.8
mcg
15%
Vitamin B12
1.5
mcg
25%
Pantothenic Acid
1.9
mg
19%
Choline
306
mg
Betaine
0.8
mg

Minerals
Amounts Per Selected Serving
%DV
Calcium
68.0
mg
7%
Iron
1.6
mg
9%
Magnesium
13.6
mg
3%
Phosphorus
234
mg
23%
Potassium
171
mg
5%
Sodium
169
mg
7%
Zinc
1.4
mg
10%
Copper
0.0
mg
1%
Manganese
0.0
mg
2%
Selenium
41.9
mcg
60%
Fluoride
6.5
mcg

Sterols
Amounts Per Selected Serving
%DV
Cholesterol
577
mg
192%
Phytosterols
~

Other
Amounts Per Selected Serving
%DV
Alcohol
0.0
g
Water
101
g
Ash
1.5
g
Caffeine
0.0
mg
Theobromine
0.0
mg


Footnotes for Egg, whole, cooked, hard-boiled
Source: Nutrient data for this listing was provided by USDA SR-21. Each "~" indicates a missing or incomplete value.

Percent Daily Values (%DV) are for adults or children aged 4 or older, and are based on a 2,000 calorie reference diet. Your daily values may be higher or lower based on your individual needs.

Nutrition Data's Opinion, Completeness Score™, Fullness Factor™, Rating, Estimated Glycemic Load (eGL), and Better Choices Substitutions™ are editorial opinions of NutritionData.com, given without warranty, and are not intended to replace the advice of a nutritionist or health-care professional. Nutrition Data's opinions and ratings are based on weighted averages of the nutrient densities of those nutrients for which the FDA has established Daily Values, and do not consider other nutrients that may be important to your health or take into account your individual needs. Consequently, Nutrition Data's higher-rated foods may not necessarily be healthier for you than lower-rated ones. All foods, regardless of their rating, have the potential to play an important role in your diet.

The Amino Acid Score has not been corrected for digestibility, which could reduce its value.


Read More http://nutritiondata.self.com/facts/dairy-and-egg-products/117/2#ixzz32dMRsNx1


Eggs also got a rum deal in terms of the glamour factor:  Few people regard an egg as a treat, and yet they are delicious:  rich, and satisfying. Chefs have rediscovered them lately for just these reasons.  They're appearing more often on fine dining menus. It's nice to see this humble food regaining some cachet.

In terms of frugal eating, eggs are hard to beat:  

A dozen good quality, organic, free range eggs costs the same as, or often much less than a pound of meat and feeds more people.  

Eggs are versatile.  They can be served in a great many ways, prepared quickly, and presented beautifully.  

They're the "glue" that binds many dishes together, and in baking they provide not only flavour and nutrition, but act as a leavener too.  They act as an emulsifier in mayonnaise and other sauces.

I simply cannot imagine my kitchen without eggs.  

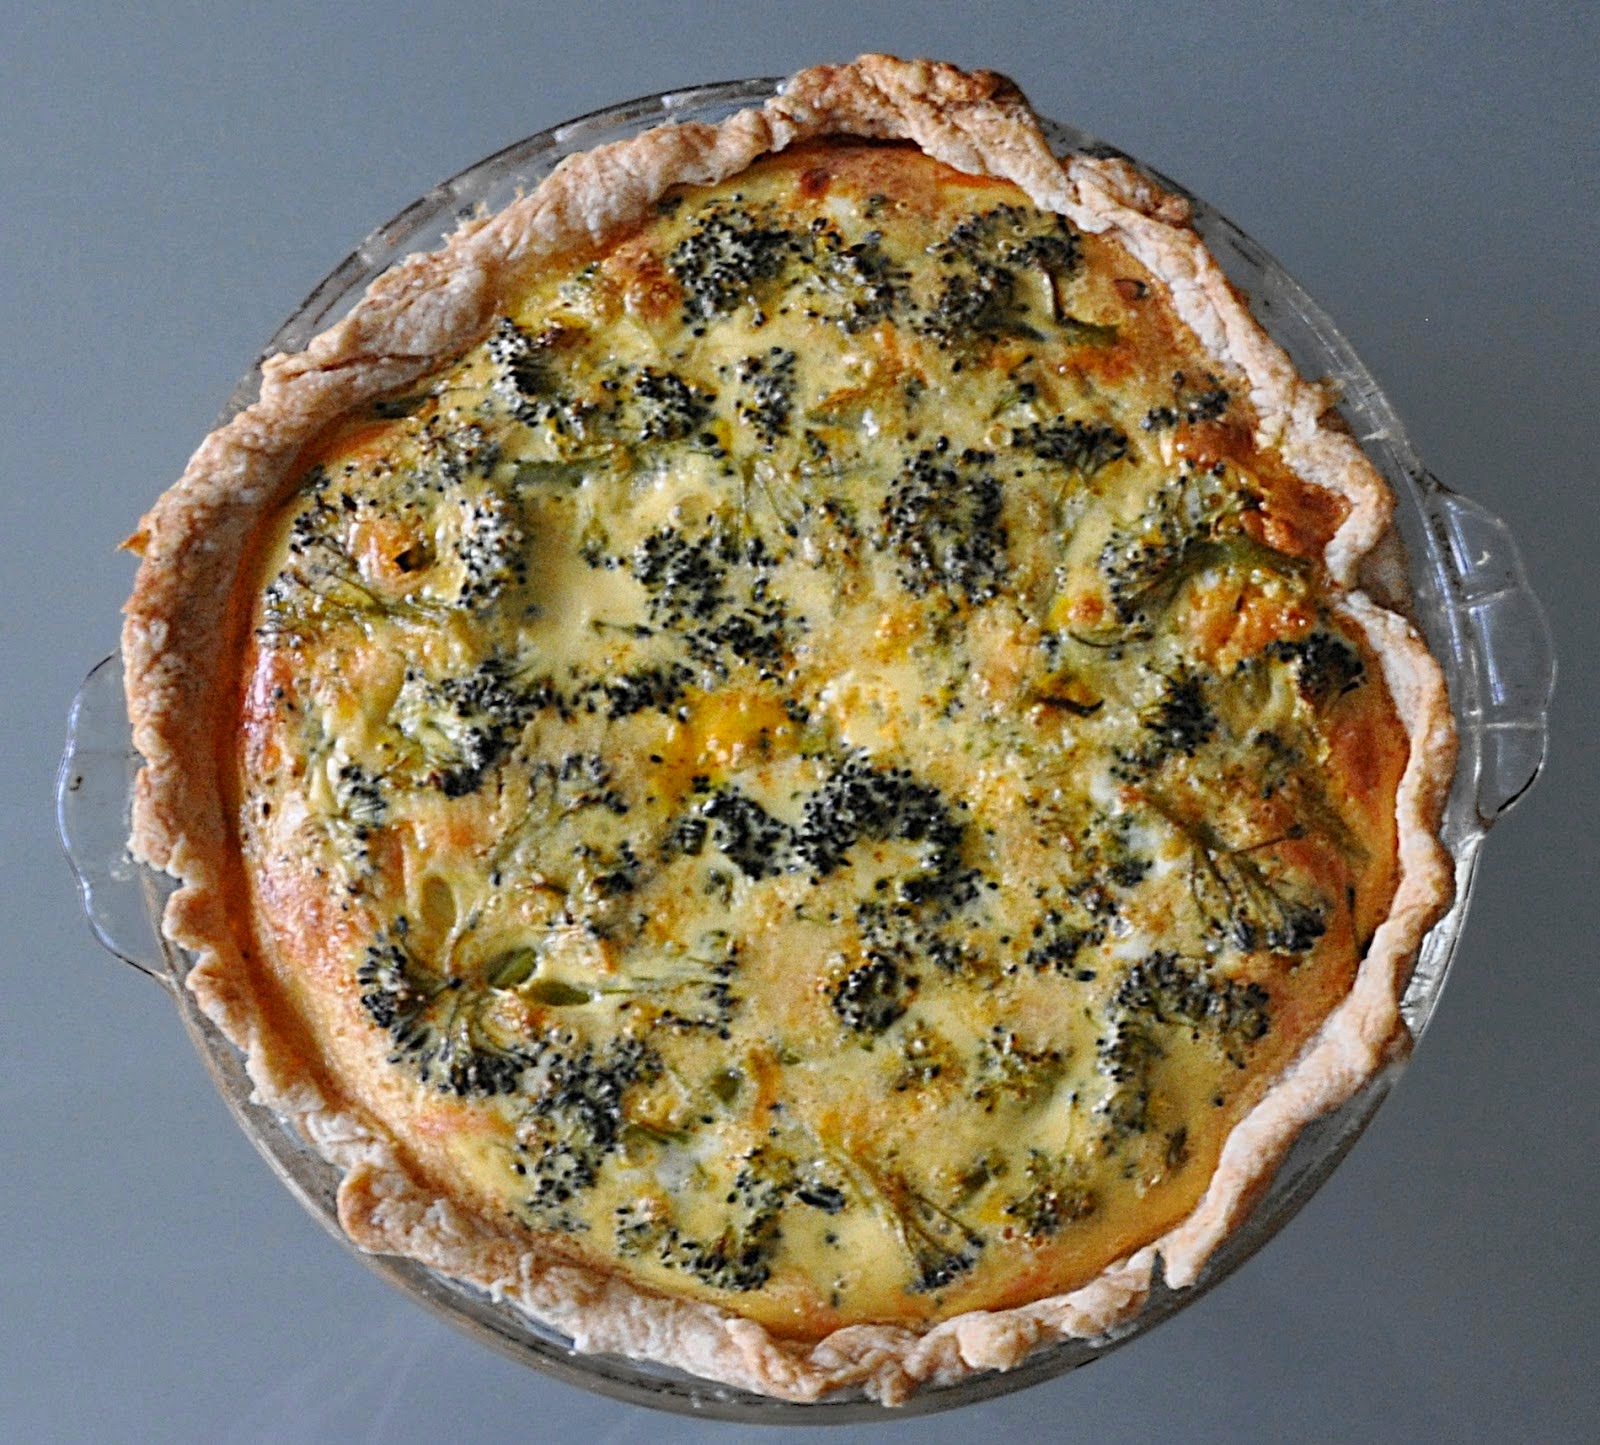
If you're looking for egg inspiration, try these recipes:


Want to read more from this series?  Find the posts here:


___________________________________

[1] http://health.clevelandclinic.org/2012/08/should-i-stop-eating-eggs-to-control-cholesterol-diet-myth-4/

Monday, 23 June 2014

Leaf Print T-Shirt For Canada Day

I'll admit it:  I'm no Wonder Woman.

But I am a Canadian woman, and that's almost the same thing, isn't it?

lol! 

We Canadians are not by nature a flag waving bunch but, every year on Canada Day, we put our reserve aside.  July 1 marks the anniversary of our country's confederation and, in celebration of the many things we love about being Canadian, we break out the flags, don red and white clothing, and proudly display the maple leaf.

Which brings me to the subject of this blog post:  

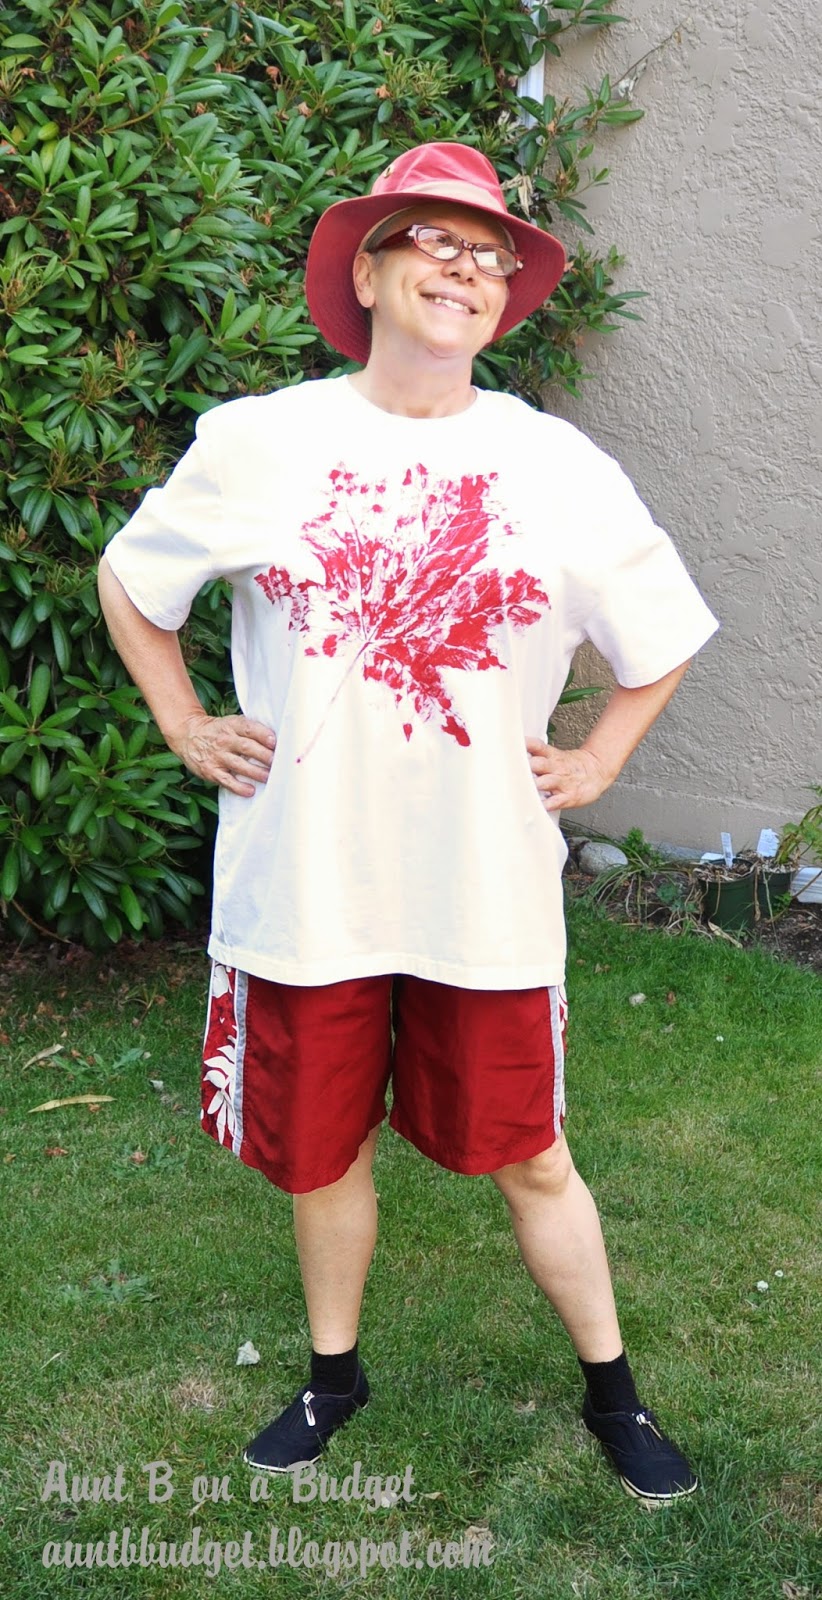
This year, I decided to make our Canada Day T-shirts instead of buying them. Well, not the actual shirts themselves, but I did make the awesome maple leaf prints on the shirts.

The printing process I used is a simple one and, by changing the colour of paint, you can use this technique to make shirts to celebrate Earth Day, Arbour Day, autumn, or Thanksgiving.

I made the prints on our Canada Day T-shirts with a couple of leaves from our Western Big Leaf maple trees.  Here's a photo of one of the leaves I used:  


You can see why they're called big leaf maples. This leaf is a little more than 12 inches across, and they often grow even larger than that! 


The reason I wanted to share this project, though, is because of the paint I used to make the prints. It's the most inexpensive acrylic craft paint I could find.  I bought this bottle at WalMart but you can often find it at dollar stores too.

If you prepare your fabric properly and heat set the image when you're done, a print made with this paint will be every bit as durable as a print made with more expensive specialty fabric paints.

I used pure cotton T-shirts for my project, and began by washing them in hot water and drying them on the warmest dryer setting.  I knew the shirts would shrink, so I bought them a size larger than I wanted the finished shirts to be.

Here's how I made the prints:

I laid down a drop cloth and spread a T-shirt flat on the cloth, with  newspaper tucked inside to keep the paint from bleeding through to the back of the shirt.


I turned a leaf over so its veined underside was facing upwards, and covered that side of the leaf completely with paint.  

At first I tried dipping the brush into the little jar of paint and then brushing the paint onto the leaf, but the paint is quite thick, and it's quick drying.  In this warm weather, the paint began to dry in some places before I'd finished painting the rest.  I got better results by squeezing a generous blob of paint out of the bottle onto the leaf and then spreading it around quickly with the brush.


Once the leaf was covered with paint, I turned it paint-side-down onto the fabric and used my fingers and the palms of my hands to gently press it down.  

It was a messy business.  I ended up with paint all over my hands and, in the course of placing the leaf, got a few smudges outside the printed area.  I'm okay with that.  Perfection is never the goal when making a print from natural materials.


After washing my hands, I peeled the leaf away from the T-shirt. 

The resulting print looked like this:


Remember I mentioned how quickly the paint dried?  You can see that in the parts where the print is very light.  

I decided to retouch those areas. 

I tore away some pieces of the leaf to match the parts that didn't print well the first time, and repainted them.


Once they were painted, I reapplied them like this:


I also painted a stem onto my leaf print, since the real stem hadn't made much of a mark.  

Here's the finished print:


When the paint was dry, it was time to heat set my leaf print.  

I set my iron on the highest setting, covered each print with a piece of cotton cloth (I used a piece of old sheet), and ironed over it several times, applying a firm, even pressure.  

I finished by turning the shirt inside out and putting it in the dryer on regular heat for 20 minutes.

And that's it!  The shirts were printed and ready to wear.

I'll continue to turn these printed shirts inside out when I launder them but, aside from that, no special care is required. The prints will last as long as the fabric itself does.

Have fun with this!  I did.   :)

Thursday, 19 June 2014

Antipasto Salad


Where I live, there's antipasto and antipasto:  The same word can mean two distinctly different things.

Antipasto can refer to a plate of small bites, served at room temperature.  It often includes a variety of meats, cheeses, vegetables, and pickles and is intended to be savoured as the prelude to a meal.  

Antipasto can also mean a relish of vegetables, pickles, olives, and tuna in a sweet, vinegary tomato sauce, often served with crackers.  It's a popular treat here.  

I make my own antipasto relish when I can afford to (a large batch can be quite expensive).  It's a wonderful thing to have on hand. 

If I have no homemade antipasto relish in the fridge, I buy this. It's not quite as good as homemade but it's still mighty tasty. 

I bought a jar of antipasto when I was shopping for our cold plate company lunch, put it in the fridge to chill...and then completely forgot about it.  So I guess this one sort of qualifies as a luncheon leftover, and sort of not. I'm going to count it as one anyway, and share what I made with it.

When dinner rolled around after our company lunch, neither of us was very hungry.  We wanted a little something-something but neither of us cared to eat anything very heavy. 

I opened the fridge seeking inspiration and there it was:  The forgotten jar of antipasto.  

How do you make a jar of relish into a meal?  

Well, you can, of course, simply spoon it onto some crackers and call it good enough 

or 

you can bulk it up with other things and make it into a salad.  

I decided on a salad.  I foraged in the fridge and the pantry and this is what I came up with:


  • 1/2 cup uncooked pasta shells
  • 1/2 cup sliced celery
  • 1/2 cup sliced carrots
  • 1/2 cup sliced cucumber cut into 1/2 inch-ish pieces
  • 1/2 cup diced yellow bell pepper (All these vegetables were also leftover from our company lunch)
  • 1 tin of tuna
  • 1 jar of antipasto
  • romaine lettuce leaves. fresh basil, and fresh parsley for garnish

I began by cooking the pasta shells.  

While the pasta was cooking, I put the vegetables and tuna in a bowl.  

When the pasta was cooked but still a bit al dente, I drained it and rinsed it with cold water until it was completely cooled.  I shook the sieve gently until I was sure I'd shaken off as much excess water as possible.

I added the cooked pasta to the vegetables and tuna.  Because of their shape, the shells wanted to nest one inside the other.  I didn't want pasta clumps, so I used my fingers to gently separate the shells as I dropped them in the bowl.


Once the other ingredients were in the bowl, I stirred in enough antipasto to moisten it all.  I ended up using about 2/3 of the jar of antipasto.


I served our salad on romaine leaves and garnished each plate with a sprinkling of small basil and parsley leaves.  It was quite pretty and tasted good too!


This recipe made enough salad for the two of us to enjoy salad for supper, with enough leftover for a work lunch the following day.

Monday, 16 June 2014

How To Make An Envelope


Last week I shared a post about making a Father's Day card using a page from a battered children's book I found in a thrift shop.  I enjoy making homemade cards like that. For me, they're more personal than a pre-printed greeting card from a store.  

Homemade cards do present a unique challenge though, because they are rarely the same size and shape as envelopes commonly available for purchase.  

There are two ways to meet the challenge of matching envelope and card.  You can either make your card to fit an envelope you already have, or you can make an envelope to fit your finished card.  Since I would rather not limit the size and shape of the cards I make, I most often choose to make an envelope myself.

Making an envelope is very simple, really.  You'll need:

  • Paper.  An 8-1/2 by 11 inch sheet of paper will make an envelope sufficient for any card size up to 5 x 7 inches.  If your card is larger, you'll need a larger piece of paper or you'll need to use more than one piece.  Don't limit yourself to just plain white paper here:  Any paper sturdy enough to hold together in the mail can be used.  Maps, magazine pages, wrapping paper, pages from old books, even cardboard cereal boxes and the like all make good envelopes.
  • A ruler
  • Something to score your paper with.  A bone folder is nice but most anything with a hard narrow edge will do.  I use the tip of a metal knitting needle.
  • Something to cut your paper with.  I use an Xacto knife but scissors will work fine too.
  • Double sided tape or a glue stick.  I prefer double sided tape for sealing the edges and flaps of my envelopes because it's easy to use and holds very well.  A glue stick works too, although it's not the best choice for envelopes that will be going in the mail.  If you use a glue stick, be sure to let the glue dry well, and ensure that your envelope won't be exposed to a lot of moisture.
  • If your paper is heavily patterned, you'll also need some small pieces of blank paper to glue onto the envelope as address labels.


Begin by laying out your envelope's design.  

You'll need to measure your card and make the height and width of your finished envelope both about 1/4 inch greater than the height and width of your card.  My Father's Day card measured 6 inches wide and 4-3/4 inches tall so my finished envelope needed to measure 6-1/4 inches wide by 5 inches tall.

I make the back of my envelopes an inch shorter than the front so that the card sticks up above the edge, making it easier to remove the card from the envelope.  Since the finished envelope would be 6-1/4 inches wide and 5 inches tall, the back of the envelope needed to measure only 4 inches tall.

I make the envelope flap - the piece that folds over and seals the envelope - 1-1/2 inches tall.

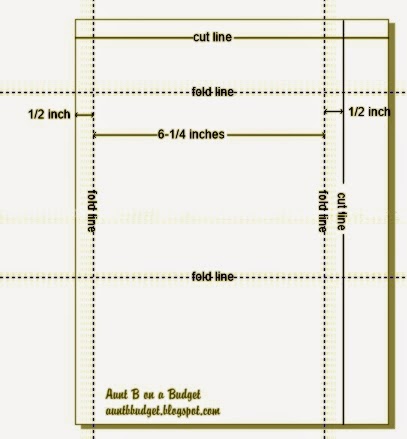
Here's how I laid it out:


First I marked the vertical lines at 1/2 inch (first side flap), 6-3/4 inches (the space that would hold the card), and 7-1/4 inches (the second side flap.

Then I marked the horizontal lines.  The first one needed to be 1 inch shorter than the height of the finished envelope so I marked it at 4 inches.  This piece would become the envelope back.  I marked the second one (the space that would hold the card) at 9 inches and the third horizontal line was marked at 10-1/2 inches.  This would become the flap that closed and sealed the envelope.

I scored where you see the dotted lines.  The solid lines at the top and right-hand side are cutting lines.

Here's how I assembled it:

First I trimmed away the excess paper.


Then I trimmed the envelope flaps.  You only need the side flaps on the center portion of the card so I trimmed away the top and bottom, angling my cuts as shown.


Here's a close up of one of the cuts with the score lines marked in so you can see the approximate angles I used.  You don't have to be all precise about this, just don't cut away so much paper than you won't have enough overlap with the flaps to allow for tape or glue.


Next I applied my double sided tape to both edges of the back-of-the-card portion (the bottom piece) and across the long edge of the envelope closing flap (the very top edge of the unfolded envelope).


Once the tape was applied, I folded the side flaps inward along the scored fold lines.


Then I folded the bottom section along the first horizontal scored line from the bottom edge, to make a crease.  I opened it again, removed the white protective strip from the double sided tape, then folded the bottom section back up, carefully pressing the tape into place against the envelope's side flaps.

With the protective strip still in place on the top flap, I folded along the top-most horizontal scored fold line, to make a crease.


I put the card in the envelope, removed the protective strip from the tape on the envelope flap and sealed the envelope.  All that remained was to address it, put a stamp on it, and drop it in the mail.

If you're using a patterned paper to make your envelopes (like some of those pictured at the top of this post) you'll want to glue some rectangles of white paper onto the envelope front to use as mailing labels.  I use paper cut from used envelopes for making labels.  It's thrifty and I make use of something that would otherwise end up in the recycling bin.

Easy, right?  And handy to know.  I hope you find this post useful.  :)

Meal Plan: June 16 to 20

I often avoid writing a meal plan because I tend to over-estimate how much the two of us will eat and, that results in waste.  Waste is a big no-no in my kitchen!  Lately, though, a change in circumstance is requiring more organization of me so I'm giving meal plans a try once again.

Here's my plan for the work week this week. There are no lunches included because we usually eat lunch separately, availing ourselves of the opportunity to use up left-overs.  


I may well break from this plan along the way if I have food to use up, or if unforeseen scheduling changes arise, but it's a start.

Want to see how I do with sticking to the plan?  I share a "What's for Supper" post on my Facebook page Monday through Friday, usually between two and three, Pacific time.

Want to play along?  Share your menu plan in the comments below this post on Facebook, or join our conversation there on weekday afternoons.

Here's my plan for this week:

Monday, June 16:
 
Breakfast  - Red River cereal, bananas
 
Supper  - Rajma Chawal (one of my favourite Indian bean dishes), brown basmati rice, a salad of romaine, celery, cucumber, and shredded carrot with blushing beet salad dressing.  Orange and banana smoothies for dessert.
 
Here’s the recipe for the Rajma Chawal:
http://www.archanaskitchen.com/recipes/indian/main-course-dal-kadhi-curry-recipe/95-rajma-chawal 
 
and here’s the recipe for the salad dressing: http://auntbbudget.blogspot.ca/2013/03/blushing-beet-salad-dressing.html
 
Tuesday, June 17:
 
Breakfast – Homemade yogurt with stewed rhubarb stirred in, topped with homemade granola
 
Here’s how I make my yogurt:
http://auntbbudget.blogspot.ca/2012/03/making-yogurt-in-thermos.html
 
Supper – Patties made from Sunday’s leftover Rajma Chawal and rice, with sautéed onions and sweet bell pepper mixed in, served in homemade whole wheat pitas, with some of the previous night’s salad and salad dressing tucked in too.  A cold plate of carrots, celery, bell pepper, and pickles.  Home canned peaches for dessert.
 
Wednesday, June 18:
 
Breakfast- Boiled eggs, whole wheat toast, applesauce
 
Here’s my recipe for whole wheat bread: http://auntbbudget.blogspot.ca/2012/01/whole-wheat-bread.html
 
Supper - Homemade gnocchi with herb plantain and sunflower seed pesto.  (Not the banana family plantain but the wild herb I forage while out on my walks.  I’ve pasted an explanatory link below.)  Fresh tomato wedges, a salad of grated carrot, thinly sliced celery, and red onion, with a red wine vinaigrette.  Homemade orange sorbet.
 
Click here to read about herb plantain: http://www.prairielandherbs.com/plantain.htm
 
Thursday, June 19:
 
Breakfast – Oatmeal and applesauce
 
Supper - Hamburger steaks with onion gravy, mashed potatoes, roasted golden beets and carrots, steamed peas.  Grapes.
 
Friday, June 20:
 
Breakfast – Home canned plums,  applesauce bran muffins.
 
Here’s the link for the muffins:
http://auntbbudget.blogspot.ca/2011/12/applesauce-bran-muffins.html
 
Supper - A soup made from the leftover hamburger steak, leftover gravy, homemade vegetable stock, leftover peas and carrots, and barley.  Cheese toast on home made whole wheat bread.  Fresh strawberries macerated in a little sugar and lemon juice, topped with a dollop of whipped cream.
 
Here’s how I make my stock:
http://auntbbudget.blogspot.ca/2012/09/stock-making-basics.html 

Thursday, 12 June 2014

Reuben's Cousin Yonni

Three things:

First, a name:  My fella's name is John, but for all of his growing up years his father, who emigrated here from eastern Europe, called him Yonni.

Second, a food:  My guy's favourite deli sandwich is a well made Reuben.  He orders them whenever we're in a place he feels confident will offer both good bread and good smoked meat.

Third, a recipe, invented by my fella, while thinking of a Reuben, using what we had on hand:  He named it Reuben's Cousin Yonni.  

Works for me!  :)

This is a one-pound link of garlic sausage.  


Quality charcuterie it ain't, but it is widely available here, inexpensive, and has a pleasant, mild flavour.  My fella loves it.

We don't buy garlic sausage often but company affords us a good excuse to put some in the fridge.  

One of our local grocers sells a four-pack of garlic sausage for the same price as two individual links so, when we do buy garlic sausage, we splurge and buy the bulk pack.  

That's what we did when planning a cold plate lunch for company a while back.  We served one link to our company, put one in the fridge for later, and put the remaining two in the freezer.

Half of the "link for later" got fried and served for breakfast the next day, along with eggs.  The day after that, my fella made these sandwiches for supper. 

Here's what he used to make them:

  • 4 slices of pumpernickle bread
  • 1/2 pound of garlic sausage, thinly sliced (He ended up having enough slices left over for another sandwich at lunch the next day so I guess, really, he used about 1/3 pound of sausage for our two sandwich supper)
  • thinly sliced havarti cheese (I'm not sure how much.  Enough to make a generous layer in each sandwich.)
  • 1 cup of sauerkraut, well drained
  • 2 Tablespoons of homemade Thousand Island salad dressing 
  • 4 Tablespoons of butter, at room temperature


Here's how he assembled the sandwiches:


He buttered the outside of one of the slices on each sandwich, 


then placed them, one at a time, butter-side-down in a preheated pan over medium heat.  

Once the sandwiches were in the pan, he buttered the  other slice of bread.


He let each sandwich cook until it was toasted on one side before flipping it and toasting the other.  

Once the sandwiches were toasted on both sides, my fella transferred them to a baking sheet and put them in a 350F oven for a few minutes to finish melting the cheese.


My guy served the sandwiches right away, while the cheese was all nice and hot and melty, with fresh veggies on the side and more Thousand Island dressing for dipping. 

The bread was so dark in colour before it was toasted that it looked almost black when the sandwiches were cooked, but it smelled toasty, and didn't taste burnt at all. 

It was a delicious supper.

Tuesday, 10 June 2014

Spaghetti With Sauteed Zucchini and Grape Tomatoes

These plastic packages of small tomatoes are another food item I don't often buy.  

I usually purchase locally grown tomatoes at the farm market, and usually large tomatoes rather than grape or cherry tomatoes, because they're less expensive. I bought these for a company lunch though, because I didn't have time to go to the market, and because I know they are consistently flavourful and sweet.

Turned out I needn't have bothered.  My wee tomatoes sat on the platter virtually untouched and that, in its turn, turned out to be a good thing.  I found myself in need of a very quick supper later in the week and those grape tomatoes provided the foundation for the meal.  

I made a simple, fresh spaghetti dish. The whole meal was assembled in the time it took to cook the pasta, and it was delicious.

Here's the recipe:


  • 8 ounces spaghetti (I used rice pasta but any spaghetti you like will be fine)
  • 2 Tablespoons extra virgin olive oil
  • 2 cups diced zucchini (1/2-inch dice)
  • 1 pint of grape tomatoes, halved
  • dried oregano to taste (I used about 3/4 teaspoon)
  • salt and pepper to taste


Cook the spaghetti in boiling, liberally salted water, according to package directions.

While the spaghetti is cooking, saute the zucchini in the olive oil.  Cook it until it's tender crisp and has taken on a little colour.


Add in the tomatoes, some dried oregano, and 1/2 cup of pasta cooking water.  Cook the tomatoes until they're heated through and have begun to break down just a little bit.


Drain the spaghetti while it's still quite al dente, with a couple of minutes cooking time left.   Reserve a little more of the pasta cooking water, just in case. 

Stir the drained pasta into the sauteed vegetables.  Continue cooking, adding more pasta cooking water if needed to keep the noodles moist, until the pasta is done.


Season the dish to taste with salt and pepper and serve it right away, while it's still piping hot.